How does a handheld circular saw attachment work?
The device in question is extremely simple and consists of only a few parts: a base for the saw, a guide rail, a thrust block and an eccentric clamp that ensures reliable fixation even on lumber that has been loosened with slight deviations in width.
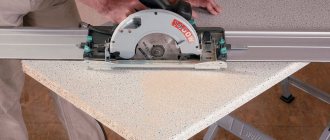
Diagram of a device for a hand-held circular saw.
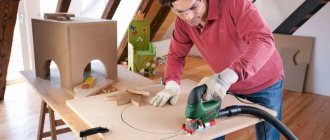
The homemade product is very easy to use. First, markings are made on the board.
Then a homemade device is installed on top, the lower stop of which is pressed against the edge of the workpiece, and the right edge is aligned with the mark.
Photo of a device for a circular saw.
Next, the plywood base is securely secured by turning the lever of the eccentric clamping mechanism.
Photo of the device - view from the bottom.
Now all that remains is to place the circular saw on the base and make the cut, pressing the edge of the sole against the guide side stop.
Cross cutting of boards using a manufactured device.
The result will be a perfectly even cut that exactly follows the markings.
With this device it is convenient to make many cross cuts when you need to frequently move the tool to a new cutting line, for example, when making grooves in beams. It is also useful if it is necessary to reduce the length of the workpiece by several millimeters, and it will cope with this task no worse than a miter saw.
Frame for sawing boards
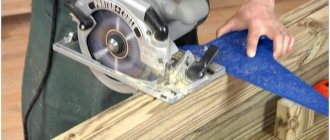
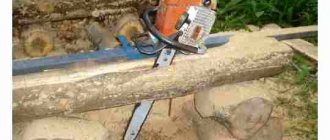
Hi all! Today I’ll tell you about my frame for sawing boards, which is installed on a chainsaw or electric saw. I made this frame myself for my electric saw, and used it to saw boards.
My frame, bottom view. Looks like a UFO! Don’t you think so? I described this in an article earlier, how I sawed boards with an electric saw using a homemade device. Then I needed boards, and I made such a thing, and tested it in practice. I was pleased with this method, and it really works, but of course you will need to customize everything for yourself.
Frame on a saw blade So, my frame is homemade and does not pretend to be ideal in this direction, but everyone has the same principle. Therefore, I will describe how I made it, and anyone interested can familiarize themselves with and improve this design.
Products for inventors Link to the store.
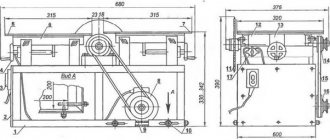
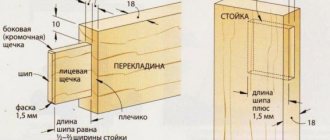
Frame with dimensions in mm The main elements are made of profile pipes 20*40mm and 20*20mm, I used tubes with a diameter of 32mm and 25mm, a strip 40*20*4 for clamping the bar, 2 pieces of rods and a handle with rubber, also bolts with nuts, washers and locknuts . I leveled all the elements and welded them by welding; I took the dimensions arbitrarily at my discretion and adjusted them to fit my saw. Be sure to make a handle to guide sawing and pushing. The handle can be made approximately, I did not indicate the dimensions.
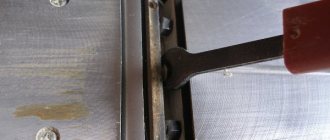
Clamps for shanks All saws are different in power, size and length of the shank, and therefore modifications can be made to the design for your specific saw, which will need to be taken into account.
Clamp dimensions in mm I used parts and blanks that I had on hand, and that’s why it turned out like this.
Clamp for the saw blade I had a problem selecting tubes for tight and free movement of the upper part of the frame to the saw blade, and I will have to look for them. I couldn’t immediately find these tube diameters, maybe it will be easier to find them here.
DIY electronics in a Chinese store.
Source
How to make a device with your own hands
The cutting device is made for a specific model of power tool. On your circular saw, measure the distance from the engine to the bottom plane of the sole and subtract 5 mm. The result obtained is the height of the guide stop.
Removing the required dimensions of the circular saw.
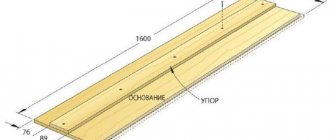
Prepare a plywood base with right angles and wooden slats with parallel edges according to the dimensions.
Blanks for assembling a device for cross-cutting with a circular saw.
Measure the distance from the cutting blade to the edge of the sole.
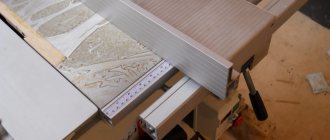
Add an allowance of 6–10 mm and install a guide rail at this distance from the right end of the plywood. Secure the plank with countersunk screws, ensuring its strictly perpendicular position.
Screw the stop block on the back side and fix the device on the workbench.
Cut the plywood to the final width with a circular saw, creating a reference edge for precise positioning of the jig along the markings.
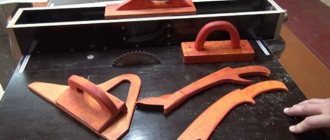
Draw a template for the cam clamp cam on paper.
Drawing of an eccentric clamp.
Mark the piece on 10mm plywood and use an awl to mark the center of the drill hole for the bolt.
Cut the workpiece with a jigsaw.
Make a washer with a diameter of 50 mm from the same plywood using a ballerina extendable wood drill.
Sand the workpieces and select an M6 or M8 furniture bolt with a mustache (or with a square headrest), a handwheel nut, a washer and a bushing. The latter can be made from a tube of suitable diameter. The length of the sleeve is the total thickness of the base, lever and plywood washer.
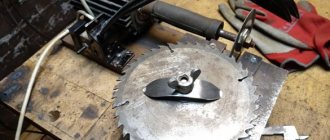
Ready-made plywood eccentric.
Make holes in the base with a drill according to the diameter of the bushing, which serve to rearrange the eccentric clamp according to the width of the board being cut.
Hole drilling diagram.
Assemble the eccentric mechanism: insert a bolt with a sleeve on top, and install a wooden washer, the cam itself and a steel washer from below. Tighten the parts with a nut.
Stick a strip of sandpaper on the inside of the stop to prevent slipping when the eccentric is locked, which can happen when the device is fastened to a smoothly planed workpiece.
The clamping system of this device has a stroke that ensures fastening on boards with a spread of approximately 10 mm in width. If you need to cut or trim pieces of a different size, simply place a wooden block in front of the stop beam.
An example of using a device for cross-cutting a board of smaller width with a hand-held circular saw.
If desired, the potential of the considered device can be expanded by adding a cutting angle of 45°. To do this, you will need to slightly increase the dimensions of the support platform and install a second thrust block at a given angle.
How to evenly saw off a block, a plank, or a board using a “filly”
Of course, if a person has a workshop, then this question will not be relevant. Every workshop has a vice and solving this problem is very simple. But let's simulate the situation that we are at the dacha, and the only tool we have is a hacksaw for wood. We need to cut the block or board very evenly and accurately, cashing, it doesn’t matter.
If we saw on the table, the block will begin to “twitch”. You can't press it with your hand, you can use your foot, but it's not always convenient. The easiest way to attach a block is to make a simple “filly”. Let's take some small scraps.
We fasten it.
Something like this, the “filly” is ready.
For now, let’s put this “helper” aside and make markings on the block. Some people saw the block along one line, we won't do that. 1 - Draw a marking line. (cut line)
2 - We also make a line from the side that will be displayed to us. (control line)
3 - Also, for beginners, you can make a line on the side that is not visible to us. (I’ll tell you why later)
For a rough cut, it is better to use a hacksaw with a “tooth” height of 3.5-4 mm. This information is indicated on the hacksaws. We install the “filly”, one side rests against the edge of the table, the other side will hold the block.
On the other hand, you can place a block to make it level.
On a line that is not visible to us, we make a 1-2 mm cut; it will be a guide for our hacksaw.
We place emphasis and begin sawing with the top of the hacksaw, at approximately an angle of 30 degrees. First we form the cut, we already have a cut, and then we saw off the part of the block we need.
Source