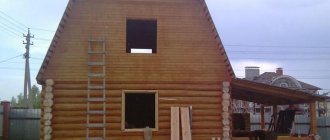
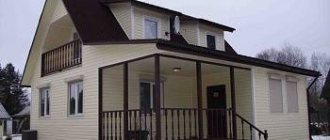
The construction industry is constantly updated with new high-tech materials, ideas and technologies for constructing buildings, but the traditional concept of an eco-house still remains relevant. Such objects attract with fundamentally important advantages, including minimal financial investments and environmental safety. One of the most accessible and widespread construction methods in this direction is the construction of a house made of clay and straw. A photo of a finished structure of this kind is presented below.
Advantages of houses based on clay and straw
In addition to the modest monetary investments in the construction of an eco-house and the naturalness of the materials, we can highlight a number of its technical and operational advantages:
- Thermal insulation. The clay structure has a good insulating function, warming up quickly and retaining thermal energy indoors for a long time.
- Noise insulation. Another benefit is related to the insulating properties of clay.
- Durability. With careful use, such houses can last for about 50 years without losing their basic protective properties.
- Possibility of communication devices. As you build a house from clay and straw, you can make a channel of any configuration with your own hands for the future laying of a cable or pipeline. The flexibility and pliability of the material opens up almost limitless possibilities in the engineering equipment of the structure.
- Fire resistance. This is one of the rare cases when natural building materials without special protection and additives can resist fire.
The technology can also be considered as a worthy alternative to modular construction from the point of view of an optimized approach to the direct construction of the building. Even without the help of specialists and professional equipment, such an object can be implemented in the shortest possible time.
Disadvantages of a house made of clay and straw
Despite their durability, these are not the strongest houses, even compared to the modular frame structures that are popular today. Much depends on the quality of construction, but homemade clay as such cannot compete with either brick or foam block in terms of strength. On the other hand, the lightness of houses made of clay and straw makes them more resistant to dynamic loads, so from the point of view of seismic resistance, this is not the worst housing option. As for the weak points of this type of eco-house, without regular biological treatment there will always remain a risk of the development of fungus, mold and bacteria indoors.
Flaws
None of the available construction technologies is perfect. No matter why we build our houses, they are always in some sense inferior. The technology of clay construction is due to the fact that in order for the walls to have sufficient load-bearing capacity, stability and strength, they must also have the appropriate thickness. Therefore, clay walls, as a rule, should have a thickness of 50-60 cm. Thanks to this thickness, the walls have good thermal and acoustic insulation, but also help reduce the usable area of the house. The problem may arise when we do not have too spacious a plot.
← Previous material
Next material →
Creating a house project
Clay buildings have a fairly simple layout, they have few rooms, and there is no attic or technical rooms. Therefore, the creation of a technical plan can be reduced to a sketch on paper in the form of a drawing. It should outline the geometry of the premises, the lines of walls and partitions, the shape of the facade and the parameters of the corridors. Based on the prepared design of a house made of clay and straw, calculations are made for the volume of building materials. It is important to take into account that the work will require not only clay and straw, but also sand, crushed stone (or gravel), reinforcement elements, lumber and communication consumables.
Main characteristics of adobe
The characteristics of brick blocks made of heavy adobe directly depend on the quantity and quality of additives.
Compressive strength. This indicator varies from 10 to 50 kg/cm2, which almost corresponds to the indicators of gas and foam concrete blocks.
Thermal conductivity. The thermal conductivity coefficient is about 0.1-0.4 W/mC, which is two times lower than that of building bricks, while the thermal conductivity of heavy adobe depends on the amount of straw in it; the more straw there is, the lower the thermal conductivity.
Density. The density of heavy adobe is 1500-1800 kg/m3, which corresponds to the density of building bricks.
Choosing clay for the home
This is a fundamentally important point, since the clay will form the basis of the frame and the entire load will be on it. In some regions, this material can be freely mined directly at the site of the future construction of the house. This is possible if there is sufficient clay content in the soil. The following test will help you find out whether a particular material is suitable for construction:
- Clay samples are taken by removing it from holes located at a distance of 10-15 m from each other. Usually up to 10 samples are taken.
- Approximately 50 g of salt is diluted in 3 liters of water. The finished solution is poured into jars.
- One clay sample is placed in each jar.
- At intervals of 30-40 minutes. You should shake each jar several times.
Next will be the process of separating the ingredients of the composition. Already by its signs, you can determine whether a house made of clay and straw will be durable if you use this particular composition. In the process of softening the samples, three groups of ingredients will be separated - sand, debris in the form of grass and various organics, and clay itself. The sand should settle, but the clay should remain afloat. If ultimately the layer with the sand fraction turns out to be thicker than the clay material, then the specific sample will be suitable for construction.
The nuances of working with adobe
When manufacturing and working with the material, the following recommendations .
- Clay for stone needs medium fat content . If it is greasy, sand is added, and the latter increases the weight of the brick. It is better to prepare the material in the fall.
- The freshest straw is needed . Hay may be used.
- proportions cannot be exact. The builder needs to independently determine the optimal composition.
- prepare raw materials and leave the molds themselves on the ground . The material will collect all debris from the surface.
- dried in the sun for up to 2 days, then they are transferred under a canopy, placed on an edge and dried for another week.
The finished brick does not crumble or split when dropped from a height of 2 m.
Technology for creating a clay-straw mixture
A full-fledged mortar is made from clay, but unlike cement mixtures, it will be used specifically as a raw material for blocks. As already noted, you can use traditional ingredients with gravel or crushed stone, or you can limit yourself to a minimum set of components for building a house from clay and straw. The technology for making the solution involves using 1 part clay, 0.5 parts straw and 2 parts sand. There are no strict standards regarding water, since the volume will depend on the structure of the particular type of clay. That is, you will need to select the ratio by eye so that the mixture is not liquid, but not dry, crumbly. Stir the ingredients with a stirrer after thoroughly softening.
Wall installation methods
Houses made of adobe can be built in two ways - using removable formwork or using pre-fabricated blocks
Adobe houses can be built in two ways:
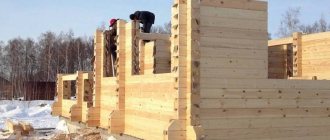
- Using removable formwork. In this case, the finished mixture is compacted into removable formwork up to 20 cm high at a time. To ensure better adhesion of each layer to the previous one, the top of the lower layer is made comb-shaped. The structure can be strengthened with stems of reeds, which are laid between the levels of masonry. Each new layer of adobe is laid on a slightly dried row, but without waiting for a crust to form on its surface.
- Block masonry. In this case, bricks are prepared from the adobe mixture, which are then laid like brickwork with an offset (interlocking). The same sand-clay mixture acts as a solution.
Important: the solution prepared for the production of blocks must be produced in one go. There is no point in leaving it overnight, as it will lose its plastic properties.
Formation of building blocks
Clay blocks are made from the prepared solution. Without special equipment, with the simplest tools they can be made outdoors - of course, it is advisable to do this on warm days under the clear sun. Initially, a lath structure is made from timber and slats with cells 20x40 cm and a height of about 20 cm. A solid sheet of plywood can be used as a backing. At this stage, it is worth answering the question of how to build a house from clay and straw so that it has an even geometry and a minimum of gaps with cold bridges? The quality of the frame largely depends on how correct the shape of the blocks is. If they allow you to build smooth and dense walls, then a sufficient margin of strength and thermal insulation effect will be achieved. Each cell is carefully filled with solution. The time for complete hardening can vary from several days to a month - it depends both on the properties of the solution and on climatic conditions. During periods of rain or wind, the structure is covered with polyethylene or roofing felt.
Manufacturing
The process of making adobe can be divided into several stages:
- preparation of materials;
- preparing the area for mixing the solution;
- making molds;
- mixing the mixture;
- forming bricks or blocks;
- pre-drying;
- final drying;
- storage.
Preparation of raw materials
Preparation consists of the following steps:
- determining the type of clay;
- selection of the optimal mixture composition;
- designations of the volume of materials;
- delivery of materials;
- grinding clay.
Determining the type of clay
Despite the fact that any clay is suitable for making adobe, the method of preparation and the need to add other ingredients to the mixture depend on its properties.
According to the degree of suitability for making blocks, clay can be:
- skinny;
- normal;
- fat.
Skinny clay turns out crumbly after drying, so a wall made from it will be fragile.
Normal clay, after drying, gains maximum strength. Oily, despite its high strength after drying, turns out to be very fragile.
To determine the suitability of the material, carry out a test:
- Take some clay, moisten it with water and knead it with your fingers until it stops sticking to your fingers.
- Roll it into a ball with a diameter of 40–50 mm and dry it in an area protected from the sun for 2–4 days. If the ball becomes covered with deep cracks during this time, then the material is greasy and you need to add a little sand.
- If there are no cracks, then lift the ball above your head and drop it on a hard surface. If it is intact, then the clay is well suited for making blocks, but if it has crumbled, then it is skinny and needs to be increased in fat content.
Add a little sand to the oily clay, then repeat the test. To increase the fat content, the clay must be washed, that is, cleaned of impurities.
Do it like this:
- Grind the material.
- Fill with water.
- Wait until it completely liquefies and you get a solution similar in consistency to liquid kefir.
- Stir the solution vigorously.
- After 2-3 minutes, when sand and other debris settle to the bottom, collect the clay solution and pour it into another container.
- Leave this solution for several hours to allow the clay to settle to the bottom.
- Drain off excess water.
- Use a ladle to remove any water that could not be drained.
- Carry out a test to determine the fat content of the resulting clay.
Selection of the optimal composition
Having selected the optimal clay composition, proceed to choosing the amount of filler, because the more straw, the warmer the adobe, but the lower its load-bearing capacity.
Therefore, blocks of load-bearing walls that do not have a frame or any additional reinforcement rarely contain ≥ 40% straw, while the proportion of straw in insulating bricks can reach 90%.
We recommend adhering to the following proportions of binder and vegetable filler, depending on the purpose of the blocks:
- load-bearing for walls without a frame - 70/30;
- load-bearing frame walls - 50/50;
- interior finishing plaster - 40/60;
- insulating wall - 25/75;
- insulation layer between walls - 15/85;
- insulating layer under the floor or above the ceiling - 5/95.
Remember, the composition of the binder must be selected individually, and for heavily loaded blocks (load-bearing walls) it must include sand and reinforcing components, that is, lime and cement.
Therefore, before starting mass production of blocks, it is necessary to make several pieces with different compositions, and after drying, check their load-bearing capacity in any convenient way , for example, using a press.
After the block is destroyed, all that remains is to divide the press force in kg by the impact area in cm2, after which you will receive the load-bearing capacity in kg/cm2. It is desirable that for load-bearing walls without a frame the strength exceeds 25 kg/cm2, and for walls with a frame - 15–20 kg/cm2.
There are known cases when load-bearing walls were built from blocks with a strength of 10–12 kg/cm2 and they stood without destruction for many decades, but such houses had extremely low ceilings and were afraid of earthquakes even with a force of 3–4 points.
Therefore, do not take risks and do not reduce the strength of the blocks, because heat loss can be reduced by increasing the thickness of the wall or changing its configuration , for example, building 2 (load-bearing and insulating) walls with an air gap between them.
You can even make flooring from adobe - hard, large tiles that can be laid on a layer of sand or a solid wooden sheathing. This tile should have the same compressive strength as that of load-bearing wall blocks, so that even obese people will not press it with their feet.
Adding Additional Ingredients
Additional ingredients are used only in cases where it is not possible to make a mixture with the required properties from standard materials.
Most often this is caused by inexperience and inability to work with clay , but the master, using additional materials, will be able to make a mixture with noticeably better properties.
The only way to learn how to work with materials is through experiments, but to do this they need to start 2-3 years earlier than making the blocks themselves. After all, to determine the quality of the mixture, you need to dry the block for at least 2 weeks.
Here are some tips for using additional ingredients:
- If you need to make a durable block of low density, dissolve bone or casein glue in water; the optimal volume of dry glue is 1–5% by weight of the straw. In this case, reduce the volume of water poured into the clay by the amount of liquid used to dilute the glue.
- Add salt only when you have to work at temperatures around zero; it will protect the water from freezing. However, if it is even slightly frosty outside, stop working, otherwise you will have to spend a lot on heating the place where the blocks are made and dried.
- Add cement only to low-density blocks to make them at least a little stronger. The optimal mass of dry cement is 10–15% of the mass of straw. Along with the cement, add whey to the solution, which will slow down its setting. Determine the amount of whey individually, and add it not to general water, but to cement milk, which is poured into the mixture. Mix the mortar with cement only in the amount that you can turn into blocks in 20–30 minutes.
- Add manure to heavy blocks to make the solution more plastic and slightly reduce thermal conductivity. Dissolve the manure in the total volume of water and fill the clay with this solution. Select the amount of manure individually, focusing on the sufficient mechanical strength of the finished block.
- Add gypsum only if it is difficult for you to work with a thick solution and you want to make it a little more liquid; this is especially true for light adobe. The optimal mass fraction of gypsum is 10–15% of the straw mass. To slow down the setting, add whey or dishwashing liquid, which will also make the mixture a little more flexible.
Mixing the solution
Previously, in villages, to mix the solution, they dug a hole, removing the fertile layer and part of the clay, then filled it with water and poured the required amount of clay into it, after which several people went down there and kneaded the contents with their feet .
When the contents of the pit became limp, straw was poured in and they continued to knead with their feet. If the penetration into the clay layer was sufficient, then water was not lost; otherwise, the walls of the pit were sewn up with a board or film.
You can do the same or prepare any other place for kneading, but remember, kneading clay with rubber boots on your feet is much easier than doing the same with a shovel.
A concrete mixer is not very suitable for mixing adobe due to the nature of its design. It effectively kneads solutions, but the straw disrupts its operation and complete mixing does not occur.
The exception is special clay mixers used in the production of blocks, but due to their high cost and enormous productivity they are not used when making blocks or bricks on their own.
If it is not possible to dig a hole, then you can dilute the mixture in a large bathtub or any other suitable rectangular container of sufficient volume (preferably a thousand liters or more). You can get by with several small containers , soaking the solution in them one at a time and stirring with a puncher with a mixer attachment.
You can also make a container yourself by making it out of boards and covering it with durable waterproof film.
Here is a procedure that will help you make a high-quality mixture:
- Having determined the optimal ratio of clay and water, calculate the volume of liquid required to create a certain number of blocks. If you use exhumed clay, then consider the amount of liquid that comes with it. In addition, consider the volume of the container in which you will prepare the solution.
- Measure out the required amount of all ingredients. It is very important not to make mistakes at this stage, otherwise the mixture will turn out with slightly different properties.
- Grind the clay into pieces a few mm in size.
- Pour the clay into the water and leave for several hours. The process can be speeded up by stirring it with something.
- Prepare rubber boots of sufficient height.
- Get down into the hole and start walking along it, mixing the clay with your feet.
- Ask an assistant or assistants to add the remaining components to the solution in small portions.
- Stir the solution until all components are completely added. The finished solution has a consistency similar to slightly damp cottage cheese.
Choosing a mold size
The size of the blocks must be chosen so that they match the length and thickness of the wall. Once you have decided on the size, buy or make your own molds .
Molds designed for making cinder blocks work well.
If you can get a machine with a vibrating table or a hand press along with them, then you can make stronger bricks or blocks.
Forming blocks
When making it yourself, the mixture is poured into molds by hand, then carefully compacted with your hands, paying special attention to the corners. If even the most primitive vibrating table is available, for example, made by hand, then the quality of bricks and blocks will be much higher .
After compacting the mixture, the mold is removed and the finished block/brick remains on the table or platform, which must lie there without movement for 1–2 days in order to lose enough water and gain at least a little strength. Some molds have to be turned over because they have a non-removable bottom.
Drying
The formed and slightly dried block is placed on an open or closed ventilated area separated from the ground, where it will spend 2–5 weeks until completely dry. At this time, all bricks are laid in one row for better ventilation and faster loss of moisture.
If there is not so much free space, then after 3–5 days the dried blocks can be stacked in packs up to ten products high.
However, each row must be separated from the previous one by wooden spacers to ensure sufficient ventilation. In addition, there should be enough free space (3–5 cm) between adjacent blocks to allow free air movement.
After drying is completed, the blocks are placed on pallets, where they are stored until the construction of the house begins.
Checking readiness
There is no specific method for checking the moisture content of an adobe block, so they rely on drying time. In this case, they proceed from the principle that it is better to overdry than not to dry, because during the rainy season the block will take some of the moisture from the air.
However, some craftsmen offer this method of checking the readiness of a product suitable only for wall blocks - you need to lift the product above your head and throw it onto a hard surface without effort . If the brick survived, it means it has dried enough, but if it is deformed, then it is not dry, but if it scatters, then the mixture for it was chosen incorrectly.
Creating a foundation
To begin with, it is worth deciding on the choice of site for construction, since not every soil, in principle, allows the construction of such buildings. The surface must be reliable, earthquake-resistant and with a low groundwater level.
Directly to the construction of the foundation base can be approached in different ways. A simple technology, which is mainly used in African villages, involves the use of stone blocks as a load-bearing part. But if you have all the necessary components to create a cement mortar, then there is no point in abandoning the strip foundation. In both cases, you will need to construct a trench around the perimeter (the contours of the external walls) with a depth of about 50 cm. If you plan to build a house from clay and straw on a stone base, then the bottom of the trench should be covered with a drainage pad. Sand with gravel and soil are poured there. Only after this are the stones evenly laid out, which, however, would also be useful to fasten with one or another mortar. The grillage in this case is made from large logs or beams. In the case of a strip foundation, you will have to form a reinforcing frame in the trench, then install wooden formwork and fill the form with concrete.
Foundation and mortar for masonry
Large adobe blocks are not particularly fragile. However, the weight of such building material is significant. Therefore, the foundation for such walls must be made strong and as reliable as possible - a wide strip. Before erecting the box, such a base must be thoroughly waterproofed.
Look stylish: how to decorate flower pots in an antique style
The man found out that he was successfully vaccinated against Covid, although he did not participate in the vaccination
A tourist caught an octopus in Bali. It turned out to be one of the most poisonous
When building a house, adobe bricks are laid on clay mortar. When preparing, sand is added to this mixture. Otherwise, the clay in the seams will subsequently crack. Sand is usually added to the mass in a ratio of two parts to one. There should be enough water in the solution so that it has the consistency of country sour cream. They also add a little straw and sometimes cement into the mixture.
Construction of a wall frame
The key difference between the walls of a clay-straw building and a brick house is that instead of a cement mortar binder, a wooden profile is used. At the joints, starting from the grillage level, intermediate strips are installed. The empty space of the frame is just filled with blocks of clay and straw. The house is strengthened by metal rods that stitch the beams of the structure along the entire height and width of the frame. The lower blocks are placed on reinforcement fixed in the foundation at a distance of about 100 cm. At the next levels, additional rods are passed.
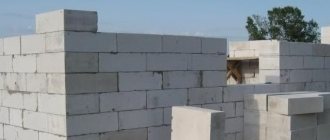
Masonry walls
The thickness of the seams in the finished masonry of adobe bricks should not exceed 1 cm. The masonry is done in the usual way:
- lay out the blocks, placing them with a spoon in two rows parallel to each other;
- the next row is laid out in one line across - pointing towards you;
- repeat the laying order to the very top.
In the corners of the box and at the junction of walls, reinforcing mesh is embedded into the masonry. When assembling the walls of an adobe house, they also take into account how it is supposed to be finished in the future. If the building is coated with clay and whitewashed, the mortar is laid in such a way that there are depressions between the bricks. In the future, this will provide a better connection between the clay “plaster” and the adobe walls. Openings for windows and doors in a frame made of such building material are located at a distance of at least 1.5 m from the corners.
“Manizha associates himself with a Russian woman”: Masha Katz stood up for Manizha
Bright color, cheerful polka dots, ruffles: spring looks to lift your spirits
NASA's Ingenuity helicopter is on Mars and preparing for a test flight
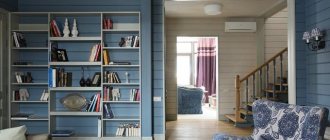
Home decoration
In order to increase thermal insulation and protect block surfaces, it is worth using an external covering made of fiber mats. The same straw can be used for them, but it is better to include more rigid elements such as reeds or chestnut trunks in the layers. A house made of clay and straw with such finishing will receive effective insulation and an attractive appearance. In the manufacture of mats, linen twine or aluminum wire is used. The coating is knitted, which is subsequently fixed to the facade either with the help of plaster or by driving it to the lathing on a block surface.
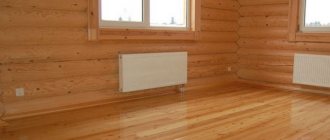
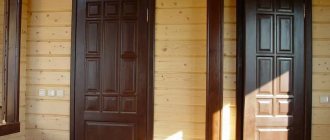
External and internal cladding
It is necessary to finish adobe walls. The material absorbs moisture and will not last long. The traditional option is plaster . Choose vapor-permeable compositions, such as silicate or lime. It’s better not to use cement; it doesn’t stick well to unfired clay.
are also allowed : lining, boards, siding, brick. The latter must be laid with a gap between the adobe and the stone.
For interior decoration, gypsum and clay plaster . Can be tiled. It is better not to use plastic panels, as they do not allow steam to pass through.
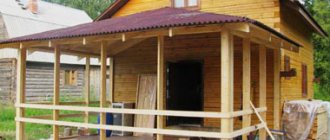
Construction of the roof truss system
The supporting structure for the roof covering is made of straight sanded poles. Full-size boards and bars, which are usually used in the rafters of private wooden houses, are not suitable in this case due to their heavy weight. The geometry of the slopes is designed to maintain angles of about 40-50°. Dowels can be used as a support for the poles, which will be placed in a circle connecting the walls of the house with the rims. Poles 6-7 cm thick are inserted into pre-prepared holes and secured with nails. To insure the structure, you can additionally use support elements made of thin boards. They are usually used for the drying period of a heavy adobe-straw roof, and then removed.
Forming and drying
The construction of an adobe house involves the formation of blocks. You can prepare the solution on the ground by clearing the area and making a hole in the center. For a small volume of building material, a trough with low sides is suitable. You can form a frame from boards and cover it with galvanized sheets. In the container, the solution will not mix with the soil, and in case of rain, everything can be covered with polyethylene.
The mixture is prepared as follows: first, clay is poured, to which water is added. Pour water into it and mix well, leaving for 12 hours. Then straw or other filler is added, everything is kneaded well. To form, use a wide board on which to place the form. The surface is generously moistened with water and sprinkled with sand. The solution must be scooped up with your hands and compacted into the mold, sealing the corners. The open area is covered in straw and sawdust. When drying, there should be free space between the blocks for air circulation.
Roofing installation
Sheaves 50-70 cm long and 10-15 cm thick are knitted from straw. The spikelets must be cut off. Next, each sheaf is kept for several hours in a clay solution with the addition of water. It is necessary to cover the roof frame with ready-made sheaves, completely covering the surfaces of the rafter system. When constructing the roof of a house made of clay and straw with your own hands, it is important to correctly calculate the load. Excessive mortar content in the sheaves will increase the weight of the structure, which is undesirable. In addition, it is necessary to consider elements for reinforcing the covering strapping using reinforcing elements. Fastening to the slopes can be done using the same wire or thin reinforcing bars with grips based on clamps. In this case, linen binding should be abandoned, since in conditions of direct contact with precipitation it does not retain its strength qualities for long.
Checking blocks for suitability for construction
Completely dried blocks are pre-tested. To do this, take a brick and throw it from a height of human height. A self-made block should not crack.
Also, one of the bricks is specially broken in half and the cut is carefully examined. The block material suitable for the construction of walls must be absolutely uniform both in composition and color.
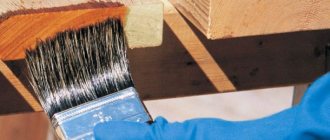
Repairing a house made of clay and straw
From time to time, a clay house will need to update its structure, minor repairs and replacement of individual parts. Serious structural replacements are mainly required in relation to the foundations and are limited to lining with sand-lime bricks, but otherwise the repairs are cosmetic. Most of the exterior clay and straw restoration of a house involves caulking the damaged areas on the surface. To do this, you can use the same clay solutions and special compositions for plaster. Preference should be given to moisture-resistant and mechanically stable primers. It would be useful to combine decorative design in the form of whitewashing or painting with a practical protective function, using products with an antiseptic effect.
Is it possible to build standard thatched houses?
Every year in Russia about 800 million tons of wheat and rye straw are produced, the bulk of which is burned. Half of this straw is enough to build 2.6 million houses with an area of 150 square meters. m (that is, 390 sq. m. of housing per year). Straw belongs to the category of a rapidly renewable natural resource that is obtained almost free of charge. The cost of straw required for the construction of a medium-sized cottage (about 150-200 sq. m.) will be approximately 30 thousand rubles. Considering that straw is a very light material, prices and costs for building a foundation will be insignificant.
At the moment, the cost of constructing a straw house is at the level of wooden cottages, since in our country there is no infrastructure capable of ensuring the continuous production of straw blocks for housing construction. The straw must be thoroughly dried, and in our climate this is very problematic. Despite this, adherents of environmentally friendly construction are confident that the future lies with thatched houses.