The editors of the StroyGuru website did not plan to prepare material about the features of insulating a house made of timber. But while working on the topic of thermal insulation materials, I came across the fact that various construction forums are full of admiring user reviews about the effectiveness of insulating wooden houses with polystyrene foam and extruded polystyrene foam: simple, fast, and most importantly, it became very comfortable inside. Adding “fuel to the fire” was the aggressive advertising of manufacturers of rigid polyurethane foam (PPU), which described in all its glory the advantages of thermal insulation of wood walls with this insulation.
As a result, it was decided to pay close attention to the problem, because home craftsmen, during various experiments on thermal insulation of wooden buildings, do not understand the processes occurring inside the wall. And they are destructive: the tree rots and rots. It is impossible to notice this immediately. And in 20-30 years, the result of an ill-considered decision will definitely have an impact - the heat will begin to disappear rapidly. But this is a small problem. There is a big one - the durability of the house is sharply reduced, to 40-50 years, instead of 100 or more.
Realizing that it is difficult to take many statements on faith, you will have to delve into the theory of the physical processes occurring in the wall after its thermal insulation and only after that consider the types of materials that can be used for insulation and the technology for their installation.
Nuances of insulating wooden walls
When starting to insulate a log house, it is necessary to take into account that wood has features that other types of wall materials do not have.
Hygroscopicity. The ability of wooden structures of buildings and structures to actively absorb moisture from the air is a key point in explaining many of the processes occurring in insulated walls.
After all, we must not forget that in modern houses made of wood, the humidity inside is an order of magnitude higher than in houses of old construction, especially with a Russian stove. Cooking on a gas or electric stove, drying washed clothes, indoor plants, etc. actively saturate the indoor air with moisture, which is readily absorbed by the walls, floor and ceiling.
Changing linear dimensions. Anyone who has encountered lumber in construction knows that when the tree dries, it rapidly decreases in size. This is especially noticeable in thickness and width. By absorbing moisture, it, on the contrary, swells, increasing in length by 0.1-0.3%, in the radial direction by 3-7%, and in the tangential direction - from 6 to 10%.
Knowledge of these basics allows us to draw the first practical conclusions:
- thermal insulation materials cannot be fixed using adhesives: they do not have the elasticity to withstand changes in the linear dimensions of the beam - they will begin to come off;
- insulation made of polyurethane foam and ecowool applied wet are able to stay on the surface of the wood during the swelling process - there is enough adhesion force. But they form cracks on their surface when, due to multidirectional stresses that arise during drying, the timber begins to crack.
Let's summarize briefly: the information provided makes you think, but does not show the full picture of the changes taking place in wooden walls when they are insulated from the outside. So a little more theory.
What to plant in January 2022 for seedlings
bell pepper
Mid-ripening and late-ripening varieties of bell pepper have a growing season of 110-140 days. To grow such varieties, seedlings begin to be sown from mid-January to mid-February.
Pepper requires special conditions regarding heat. Bell pepper is a heat-loving plant that needs 25C, no less. It is necessary to keep the daylight hours to about 12 hours.
Bell pepper seeds for seedlings are first planted in a small container. Plant two seeds at once, in case one does not sprout. If both have sprouted, then one must be removed. When 4 leaves appear, the sprout should be transplanted into a larger container.
Tomatoes
In January, it is important to plant early-ripening and late-ripening tomato varieties. It should be taken into account that tomatoes are transplanted into open ground or a greenhouse no later than 60 days after the sprouts appear, otherwise the seedlings will become overgrown. Therefore, tomatoes are sown as seedlings at the end of January and February.
Like peppers, the seeds are planted in a small glass or other container, 2-3 seeds each. In the end, only one is left. Tomatoes require about 12 hours of daylight. When 4 leaves appear, the tomatoes are transplanted into a large container. After 60 days, transplant into open ground or a greenhouse.
Eggplant
Eggplants are late-ripening, heat-loving and light-loving plants. In fact, eggplants cannot grow under natural conditions in the middle and northern zone. A person helps this cultivated plant to ripen with the help of early seedlings.
The format for sowing eggplants is not much different from previous types of cultivated plants. It is recommended to first plant 2 seeds in a small container, maintain a temperature of 25 degrees and 12 hours of daylight. When 2-4 leaves appear, transplant into a large container.
Celery
The growing season of celery is quite long - 160-200 days. Naturally, it can only be grown in the southern regions in the usual way. For seedling soil, use a mixture of sand and earth. The seedlings are transplanted into a large container 30 days after the sprouts appear.
Physical processes in a wooden wall after insulation
After insulation with vapor-tight insulation, the wall begins to absorb moisture from inside the room. In this case, the process goes in opposite directions: as the humidity in the house increases, the steam is intensively absorbed by the wood, and as the humidity decreases, it returns inside. At the same time, the partial pressure inside the beam (log) increases (you can see what it is here), as a result of which the steam molecules are squeezed out to the periphery.
From the open side they return to the room, and from the outside they accumulate, increasing concentration, in the space between the surface of the facade and the insulation (when insulating polyurethane foam, moisture remains in the wood at the border with the insulation). The process can last for years until the moment of condensation occurs (you can read about the “dew point” that causes condensation here), as a result of which a thin film of water forms on the wood and insulation. Due to “stale” air, moisture can remain on the wood for days and weeks, triggering rot.
Slightly different processes take place under polyurethane foam insulation. Excess moisture in the wood at the border with the insulation and the complete absence of oxygen (there is oxygen between the foam insulation and the wall, although in minimal quantities) lead to the growth of anaerobic fungus in the wood, damaging it. People say about the changes that are taking place: the tree is “decaying.”
Let's summarize briefly: wood must breathe. Therefore, attaching vapor-proof films to the façade directly under the insulation and using vapor-proof insulation materials trigger the process of wall rotting.
Video description
In this video we will take a closer look at insulating a house with polystyrene foam. How safe is polystyrene foam?
Extruded polystyrene foam
It has a special porous structure, tolerates low temperatures well and is unsuitable for microorganisms. The material is durable, easy to install (slabs), and does not absorb water. Disadvantages: Highly flammable and releases harmful toxins.
Polystyrene foam and polystyrene foam are similar in appearance Source lineyka.net
Which timber walls need to be insulated?
Wooden houses have been standing in rural areas for centuries, and no one insulates them. What about walls made of timber?
For the construction of wooden houses, beams of 150x150 mm, 180x180 mm and 200x200 mm are used. Wall thicknesses of 15 and 18 cm are not enough to retain heat in the house. They must be insulated. But with walls 20 cm thick, not everything is so simple.
This size of timber is sufficient for the central part of Russia, where the climate is temperate. For more severe climatic zones, you need to look at the type of timber: profiled or glued. Glued laminated timber has a thermal conductivity coefficient of 0.1 W/(m*K), and profiled timber has a thermal conductivity coefficient of 0.18 W/(m*K). The conclusion suggests itself: a house made of profiled pine 200 mm thick needs to be insulated.
What is the best way to insulate a house made of timber?
If we consider the question of how to insulate a house made of timber purely from a technological point of view, there are no obstacles to the use of known types of thermal insulation materials. You can use:
- polystyrene foam;
- extruded polystyrene foam (represented by the trademarks “Penoplex” and “TechnoNIKOL”);
- sprayed polyurethane foam (PPU);
- PPU slabs;
- ecowool;
- linen mats;
- chipboard (“Izoplat”);
- wood fiber mats (“Wood Fiber”);
- sawdust;
- glassy;
- basalt wool.
But not everything is as simple as it seems.
Styrofoam. Polystyrene foam is one of the cheapest types of insulation with a low thermal conductivity. Easy to install. But the existing disadvantages exclude it from the list of insulation materials for wooden walls:
- high level of flammability;
- lack of vapor permeability due to which, several years after thermal insulation, mold and mildew appear on the walls, triggering the process of rotting.
Extruded polystyrene foam (EPS). EPS is made from the same raw materials as polystyrene foam. But another production technology makes extruded polystyrene foam stronger and more durable. Other advantages include:
- frost resistance;
- good thermal insulation properties;
- environmental cleanliness.
But the almost complete lack of vapor permeability ultimately leads to rotting of the wood on the street side. Additionally, it should be noted the high cost of thermal insulation and the flammability of the material, despite the fact that some manufacturers claim the opposite.
Hard polyurethane foam. Despite the many advantages of insulation with sprayed polyurethane foam, it categorically cannot be used to insulate wooden walls:
- expensive;
- the wood rots (does not rot, but just rots), reducing the durability of the house by 2-3 times.
PPU slabs. Having the lowest thermal conductivity and simple insulation technology, polyurethane foam slabs cannot be used to insulate a house made of timber from the outside due to the main disadvantage:
- the wood rots.
Let's add a few more disadvantages:
- expensive;
- rodents willingly make tunnels, although the material is not part of their food chain.
Ecowool. Ecowool log houses can be insulated using two technologies: dry and wet. In both cases there are critical shortcomings. When filling cellulose fibers between the sheathing and the wall, you need to be prepared to repeat the operation at least twice: the wool settles, being compressed, as a result of which a space unprotected by insulation is formed at the top of the house.
For reference: ecowool manufacturers claim that during the insulation process, special equipment can be used to compact the insulation. No one has yet shown how this works in practice.
The wet method has other problems:
- thermal insulation is 2-3 times more expensive than insulation with mini-slabs;
- in the process of changing the linear dimensions of wood and its cracking, a huge number of microcracks are formed, reducing the effect of thermal insulation by approximately 30-40%.
Linen. Linen mats have good technical and operational characteristics:
- thermal conductivity - 0.03-0.04 W/(m*K);
- density - 15-38 kg/m3;
- noise absorption coefficient - 0.98;
- durability - more than 50 years;
- flammability class - G1;
- vapor permeability - 0.4 mg/(m*h*Pa).
Positive qualities are complemented by simple installation (installed by surprise) and environmental safety of the material.
Among the disadvantages it should be noted:
- high price;
- flammability - even after treatment with fire retardants, the material remains slightly flammable;
- fear of high humidity.
It should be noted that there is one more drawback - rodents like to make nests in mats, which poses a serious problem for wooden houses in rural areas. Detailed information about insulation here.
Conclusion: linen mats, if finances are available, can be used to insulate timber walls.
Chipboard. "Izoplat" is made entirely from natural materials - wood fiber from coniferous trees. Its strengths are:
- durability;
- good thermal insulation properties (thermal conductivity coefficient - 0.045 W/(m*K));
- environmental cleanliness;
- resistance to precipitation;
- excellent sound insulation;
- simple installation - easy to attach, no wind protection required;
- vapor permeability.
Another advantage is that decorative plaster can be applied over the insulation.
Disadvantages - high price of insulation (1 m2 of sheet 25 mm thick costs 50 rubles or more) and flammability (class G2)
Conclusion: particle board can be used to insulate a wooden house.
Wood fiber mats (“Wood Fiber”). For fibreboards:
- thermal conductivity - 0.042-0.046 W/(m×°K);
- specific gravity - 230-240 kg/m3.
The mats are easy to use and do not cause any difficulties during operation. They say about this:
- high level of elasticity - after removing mechanical loads, the original dimensions are quickly restored;
- easy installation.
Among the disadvantages:
- flammability - after purchase, treatment with fire retardants is required;
- wood fibers serve as food for mice and rats;
- very high cost.
Conclusion: there are no technical or technological obstacles to using wood fiber mats as insulation for timber housing. The problem is the high financial costs.
Sawdust. Insulation with sawdust is inexpensive. But the tendency of the insulation to compact negates all the previously done work. Therefore, it is better to refuse this insulation.
Glass wool. Glass wool has many advantages:
- low level of thermal conductivity - 0.035-0.052 W/(m K);
- budget price;
- simple installation;
- light weight;
- fire safety, etc.
But two key drawbacks: short service life (about 20 years) and hygroscopicity force one to be wary of using mineral wool for thermal insulation of timber walls. The only option when glass wool can be considered as a thermal insulation material is insulation under siding (they have similar durability indicators).
Basalt wool. Basalt fiber wool is an ideal insulation material for wooden walls, because... It has:
- excellent thermal insulation properties;
- long service life;
- vapor permeability;
- environmental cleanliness;
- easy installation, etc.
Detailed characteristics of mineral wool insulation made from basalt can be found in the article “Review of stone (basalt) wool insulation.”
Let's summarize: you can insulate the wall of a wooden house:
- flax (fastened by surprise, which is simple but expensive);
- chipboard "Izoplat" - requires significant financial investments;
- wood fiber mats “Wood Fiber” - also expensive for the family budget;
- glassy - conditionally;
- basalt wool.
Types of insulation
The choice of insulation for outdoor work is quite wide and each of them has distinctive features that must be taken into account when choosing:
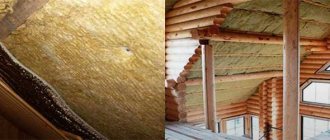
Mineral wool
Available in three varieties - stone (basalt), glass and slag. All have similar properties: fire-resistant, non-flammable, chemical and biological resistance. Other advantages of the material include vapor permeability, environmental friendliness and high sound insulation.
The downside is that cotton wool attracts rodents and does not dry completely when wet.
It all depends on the skills of the builders, but usually insulating the outside of a house with mineral wool is easier to do using mats than rolls - the latter are not always convenient to deploy on vertical walls.
Laying mineral wool slabs in lathing Source remontik.org
Slab styrenes (foam plastic, polyurethane foam)
Polystyrene foam is the cheapest option, lightweight and porous, with low hygroscopicity and excellent thermal insulation. The main disadvantages are considered to be flammability (releases toxins when burned), fragility and instability when exposed to ultraviolet radiation.
Technologies for insulating the facade of a timber house
You can insulate a wooden house using different technologies. The materials on construction sites list three that are considered the main ones:
- ventilated facade;
- under siding;
- by spraying method.
We cannot agree with this approach to insulating timber walls. There are several reasons.
1. The technology for insulating the walls of a ventilated facade and under siding is completely identical. The only difference is that the gable of the roof is covered with siding. Therefore, this is the same method of thermal insulation. In extreme cases, if you really want to, you can talk about a type of technology, but not about an independent type.
2. Using polyurethane foam as insulation is extremely harmful to wood - it rots. Therefore, it is advisable to exclude both the type of insulation and the technology from the list of possible heat insulators for wood.
3. The authors of the materials completely ignore two other insulation technologies that are found in practice:
- "wet method";
- "well".
Let's look at the advantages and disadvantages of each type.
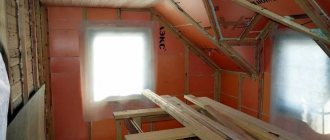
Ventilated facade
Builders sometimes call ventilated facade technology a “coat for the house.” In English-speaking countries the name “curtain walls” has caught on. Sometimes you can come across the definition: false wall. Such expressions reflect the essence of thermal insulation of the facade, which is produced in several stages.
Stage I. The sheathing is attached to the wall.
Stage II. Insulation is placed between the cells of the sheathing.
Insulation scheme for a ventilated facade.
- 1 - siding;
- 2 — counter-lattice;
- 3 - windproof membrane;
- 4 - insulation;
- 5 - wall made of timber.
Stage III. The thermal insulation layer is covered with a windproof membrane (type A or AM).
Stage IV. A counter-lattice is placed on top of the film.
V stage. Finishing work on the façade is underway.
The method has many advantages :
- a comfortable microclimate is created in the premises of the house without forced ventilation and air conditioning;
- condensate evaporates from the surface of the membrane by air currents circulating in the ventilation gaps;
- the cladding together with the insulation perfectly absorbs all types of noise;
- the work can be done with your own hands.
Among the disadvantages : the high cost of construction and repair work.
"Wet method"
The essence of the method is that basalt wool or Izoplat chipboard is firmly attached to the wall with special screws. After this, a reinforcing mesh is glued onto the insulation using a plaster mortar.
Decorative plaster is applied over it. If the finish is to be painted, then the facade is additionally puttied. In order for the resulting wall cake to breathe, the paint must be acrylic based. Before painting, Izoplat insulation is only puttied.
The method has both strengths and weaknesses.
Pros:
- the cost of the work is in the budget segment - affordable for people with incomes below average;
- The dew point moves into the insulation. If the work is done correctly, the wall will always be dry;
- a wide choice of finishing, be it decorative plaster or paint.
Flaws:
- the charm of a wooden house is lost;
- work must be performed in dry, warm weather. Deviation from the specified parameters may affect the quality of the finish.
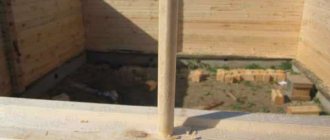
"Well" method
When building private houses, many owners want to get walls made from natural materials on the inside to make living as comfortable as possible, and on the outside - a durable façade that does not require additional finishing.
In this case, they follow this path: they assemble a log house from timber 150x150 or 150x200 mm (150 mm wall thickness), and then line it with brick. There must be insulation between the load-bearing and decorative walls. Otherwise, condensation will constantly form on the wood in winter.
Price
Table 4 Prices for insulation materials
| Name | Average cost, rub | Slab thickness, mm | Dimensions |
| Ecowool | 2035 | 100 | 1000*1000 |
| Stone wool | 600 | 100 | 1000*600 |
| Slag | 134 | 100 | 1000*600 |
| Glass wool | 58 | 50 | 1000*610 |
| Isoplat | 2456 | 25 | 2700*1200 |
| Penofol | 495 | 40 | 1000*1000 |
With standard sizes of insulation, it is much more profitable to buy slag wool or glass wool . Basalt insulator will cost more, but it is stronger than analogues. In all other respects, it is the same natural material.
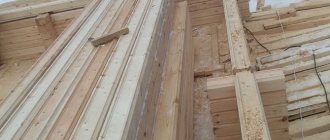
Required materials and tools
To thermally insulate a ventilation façade at a workplace, you must have:
- insulation made from basalt fibers;
- pine or spruce slats 50x50 or 50x100 mm (the specific size is selected according to the thickness of the mat);
- rail 50x30 or 50x40 mm for counter-lattice;
- wood screws with a diameter of 4.8 mm and a length exceeding the height of the plank by 5-10 cm for sheathing;
- wood screws 4.2x75(76) mm for counter-lattice;
- hydro-vapor barrier membrane type A or AM;
- antiseptic (antifungal drug);
- special dowels with a wide head for attaching mats to the wall;
- scotch;
- scaffolding or trestles;
- screwdriver;
- spray;
- wood saw;
- level, preferably laser;
- plumb line;
- construction stapler;
- roulette;
- square;
- knife for cutting insulation.
Ventilated facade
The installation of a ventilated facade consists of 3 stages:
- preparatory;
- the main one, when thermal insulation work is carried out;
- finishing - the building is sheathed with siding, imitation timber, block house, etc.
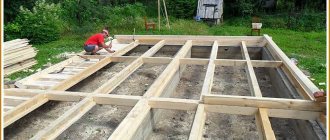
Preparatory work
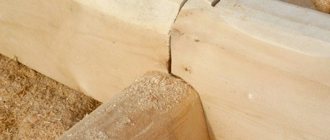
Before starting insulation work, a visual inspection of the facade is carried out, during which damage to the wood due to rot is revealed, which is unlikely, and insects (bark beetles, wood borers, longhorned beetles and woodcutter beetles - the problem occurs), gaps between the crowns, violations in the fastening systems of window and door blocks, unevenness. After identifying all the defects, they begin to eliminate them:
- areas damaged by rot are removed with a plane or an ax;
- Wood infested with pests should ideally be removed. But if such a disaster happened in an already assembled log house, do not despair. After all, these are not termites - they will not be able to completely “devour” the house. In such cases, experts advise drilling holes in the timber at an angle to the horizontal to a depth of ¾ of the timber, in increments of 40-50 mm horizontally and vertically, and then using a syringe to pour insecticides into it. Repeat the operation several times, then tightly seal all inlet and drilled holes with sealant. The larvae will live for some time, but the cycle of their transformation into adult beetles will be disrupted - adult individuals simply will not be able to get out of the wood.
- the cracks in the corners of the building and between the crowns are caulked;
- the fastening of door and window blocks is strengthened;
- protruding places (typical of profiled timber) are removed using a chisel or plane, less often - an ax;
- the outside of the wood is treated with antiseptics, and you don’t just need to spray it for show, but thoroughly treat it 2-3 times;
Attention: impregnations have appeared on sale that also contain fire retardants, which simplifies the wood processing process.
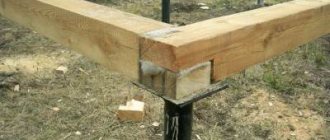
- the sheathing is installed. To do this, the beam is attached to the wall vertically with self-tapping screws. The distance (step) between the slats is equal to the width of the insulation minus 2-3 cm for installing it sideways.
Insulation
Basalt mats are installed between the sheathing strips. Some experts additionally attach them to the wall with special dowels with an umbrella head or a roundel washer in 5 places: in each corner and one in the center. Practice shows that the insulation holds up well even without additional fastening.
The insulating layer is covered with an overlapping windproof membrane (type A or AM). Attached to the sheathing with a stapler. There is no need to be zealous - the final fastening will be done with counter batten slats. The membrane joints are sealed with tape.
Finishing
The counter-lattice strips are screwed onto the lathing slats, on top of the membrane, with self-tapping screws, onto which the finishing trim will be attached.
Wet method
Now let’s look at how to properly insulate a house made of timber under decorative plaster or painting.
The preparatory work is the same as for a ventilated facade, with the exception of the lathing - it is not stuffed. Instead, special metal hangers are screwed (nailed) onto the wall (pictured below).
You can buy them or make them yourself from metal 0.7 mm thick. Dimensions 26x6 cm, where 6 cm is the width, 10 + 10 cm for hanging insulation 10 cm thick and 6 cm for the heel. They are fastened with self-tapping screws 51x4.8 mm in such a way that there are 2 hangers per basalt slab. Testing showed that one holder can withstand a load of 16 kg, which is enough for one mat. The second one is stuffed for insurance.
When all preparatory operations have been completed, insulation begins. To do this, the slabs are pressed against the hangers. In places where it touches the metal, marks remain, which are cut right through with a knife. After this, the insulation is mounted on metal holders, and then finally attached to the wall with special dowels (the fastening diagram is shown below in the photo).
Each subsequent mat sits on hangers with an overlap of 0.5-1.0 cm over the previous one (the slabs will stand apart, tightly blocking the connecting seams). The passage of external corners, window and door openings has its own nuances, which can be seen in the work “Technology for insulating walls with basalt wool.”
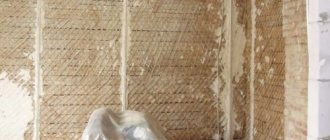
After insulating the entire area of the façade, the thermal insulation layer is reinforced with fiberglass mesh. Glue - “CERESIT CT190” or plaster-adhesive mixture “EK THERMEX - EK Chemical”. The mesh is glued overlapping, overlapping the previous strip by at least 10 cm, and covered with a 3-millimeter layer of diluted glue on top.
Finishing
Before applying decorative plaster, the facade is treated with a primer. Before painting, the walls are primed and then puttied. The paint should allow the wood to breathe. Therefore, only acrylic options are for outdoor use.
"Well" method
How to insulate a house made of timber if the owners decide to line the frame with brick? The step-by-step work algorithm is simple:
- preparatory work is carried out, during which defects in the walls are eliminated (described in detail above);
- roofing material is laid on the foundation, extending 10-15 cm onto the load-bearing wall (the insulation is protected from moisture from below);
- the first row of mats is installed on hangers or dowels;
- a brick wall is laid out at the same height as the mats;
- Along the upper edge of the mats, a metal rod is nailed to the wooden walls, the free end of which extends onto the brickwork. Step 40-60 cm. Thus, the risk of the decorative wall moving inward or outward during operation is eliminated;
- a second row of mats is installed and everything is repeated from the beginning.
Video description
What happens to the wall if the insulation is not properly insulated from the inside - in the video:
Insulation of walls from the outside: advantages and disadvantages of the method
Most often they resort to it, keeping in mind the obvious advantages compared to internal insulation:
- The usable area of the internal space is preserved;
- External work does not change the family's daily routine.
- The facade of the house is reliably protected from sudden temperature changes, which extends the life of the building.
- The correct selection of materials does not disturb the microclimate of the rooms (the house “breathes”).
- You can decorate the facade to your liking or improve the appearance if the wood has darkened over time.
- If the technology is followed, the wood will be additionally protected from damage.
- Ease of monitoring the work of the construction team.
The main disadvantage of external insulation is the need to carry it out in good weather; in cold and damp weather there is no point in doing this.
See also: Catalog of companies that specialize in insulating country houses.