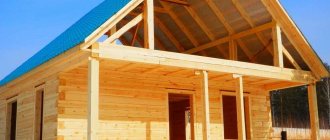
For a long time, the ability to build a house from timber was considered a respected profession among the peoples inhabiting the northeastern part of Europe. Skilled carpenters were valued in Rus' and the Scandinavian countries. The secrets of the profession were passed down from generation to generation. Every man knew how to harvest wood and build a house; boys were taught chopping wood from childhood. The owner who built the house with his own hands received universal recognition. The respectful attitude towards such people has been preserved in our time - a person who built a house from timber with his own hands is respectfully called a master.
The art of wooden architecture is based on a set of rules; this knowledge is still relevant in our time. Laying a log frame with your own hands has its own characteristics. Before you start construction, it is advisable to familiarize yourself with the advice of experienced craftsmen.
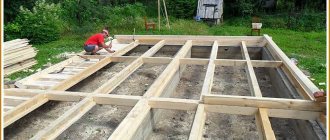
How to organize your workplace?
A workplace for the construction of a log house is organized after the completion of the foundation shrinkage process. The construction site includes: the foundation of the future house, a lumber warehouse and a place where carpentry work will be performed.
The lumber is stacked at a distance of 4-6 meters from the foundation and protected from rain; the stack should not come into contact with the soil and is located on a pallet. Between the foundation and the lumber warehouse, a work area for marking and cutting with a workbench 1.0-1.5 m high is equipped. When using power tools, it is necessary to supply power.
All carpentry work is performed in the work area. The assembly of structures and laying of timber is carried out directly on the walls of the log house. Working on ladders is inconvenient and unsafe; for convenience, industrial scaffolding is used. You can make the scaffolding yourself - place the ceiling on vertical posts and securely fasten the structure with consumable lumber.
The cut parts from the timber are lifted along inclined logs using a rope. All work can be done together.
Builders' mistakes are typical and gross.
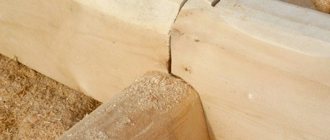
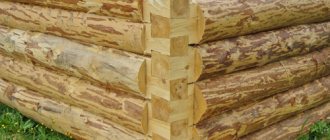
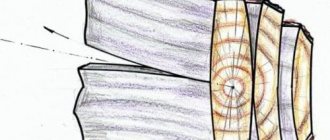
As Alexey Markin notes, the most common mistake when making a log house from chopped logs is the small areas of contact between log and log (small width of the inter-crown groove). The thermal characteristics of such a house will be low. The head of the Domostroy-SK enterprise, Oleg Valuev, adds that in some cases the crowns may not be adjacent to each other at all (photo 1). Huge cracks will have to be caulked regularly, which will require considerable additional costs. However, the appearance and thermal characteristics of the house cannot be radically improved.
Photo No. 2
– The log house cannot sit properly due to incorrectly placed racks.
It happens that builders build a house in such a way that it simply cannot sit down.
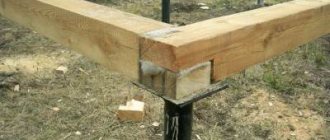
As Oleg Valuev explains, if you plan to make a veranda under the roof, then between the upper end of the post and the upper crown you need to install a special jack for shrinkage (photo 3). This will allow the log to sit evenly. Instead of a jack, you can put several planks that will need to be knocked out periodically. By the way, shrinkage jacks are clearly visible in the first illustration (Fig. 1) to ours.
Photo No. 3
– Jack for shrinkage (photo by Domostroy-SK).
Another mistake that prevents the shrinkage of a log house is an attempt to fasten adjacent crowns with nails. The log lies unevenly on the nail head, and an inter-crown gap appears. Due to a loose fit, the log may begin to “spin” during the drying process.
The problem of poor-quality waterproofing of the lower crown of a log house has somewhat lost its relevance. As a rule, the installation team performs this operation efficiently
However, the customer should pay attention to how the foundation and wooden walls are connected. If the foundation is strip or grillage, then the surface of the strip should be leveled, and between the foundation and the lower crown there should be 2-3 layers of roofing material, or a waterproofing layer of similar effectiveness
However, excess moisture can enter the wood not only through the foundation. If you lay floors and hang ceilings in a house before the frame has settled and dried, this will impede air circulation and lead to “steaming” of the house - mold or mildew may appear on the internal walls.
The head of the Domostroy-SK enterprise, Oleg Valuev, notes that in the washing room there is also no need to make baseboards on the floor. Moisture collects under them and the process of rotting also begins.
Photo No. 4
– Mold on unventilated wooden structures.
How to properly lay the crown molding?
The first and most important operation is laying the first (flashing) crown. The dimensions of the first row of the frame are determined at the design stage; they are commensurate with the length and width of the foundation. Using a building level, a basic horizontal line is applied to the flashing crown to control the current height of the masonry.
The foundation material and wood have different physical properties: the concrete base freezes and forms moisture when it thaws, dew also forms in the summer, concrete has a loose structure and is easily saturated with soil moisture. If waterproofing is insufficient, mold and mildew will appear on the lower beams and under the floor. The trim crown is reliably isolated from the negative effects of moisture.
To waterproof the base of a log house, roofing felt, fiberglass or woven geomaterial with bitumen impregnation are used. To adhere to the foundation, eliminate cracks and air cavities, the waterproofing layer is treated with open fire.
Base insulation
Before laying the first crown, the upper foundation surface is leveled even if there is a centimeter deviation of its level from the horizontal plane. Afterwards, waterproofing material must be laid.
The upper surface of the base must be without slope, drops, and perfectly leveled. They check this with a laser or water level, or a construction level. Leveling is often performed with cement-sand mortar. It can also be used to close a gap if there is one between the lower crown and the foundation surface. Recently, construction foam has been mainly used for these purposes. After hardening, its excess is cut off with a knife. At the end of the work, the sealed area is covered with a decorative strip or ebb.
As a moisture-proofing coating, roofing felt is often used simultaneously with glass insulation. The materials are laid on the base so that they protrude beyond its edges by approximately 0.25 m. It is recommended to make a waterproofing coating of two layers. Boards are placed between them. In the corners, roofing felt or other material used is overlapped.
How to collect crowns correctly?
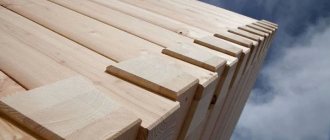
The crown of the house is the main element of the log house; the crown is understood as a closed contour of timber, forming a structure with corners meeting at 90 degrees. The most common standard size for buildings made of solid timber is 250 mm, for buildings made of profiled timber – 150-200 mm. There are the following methods of joining into a crown:
- Cutting into oblo (joining into a bowl);
- Laying in the paw;
- Fastening in a bandage with a main tenon (assembly on a tenon).
Cutting into the claw and laying in the paw are universal joints; this technology can be used in construction from logs and timber. You can do it yourself by attaching it to a headband or a paw. Tenon assembly is used only in timber construction; tenoning is more complex and requires special skills.
Log cutting is the best way to lay a log house for a bathhouse and outbuildings; residential buildings are built in a claw and on a tenon.
Customer errors
A minor mistake made by builders during the construction of a wooden house can dramatically worsen the thermal characteristics of the house or shorten its life. But customers can also make mistakes. Conscientious builders always dissuade private owners from purchasing log buildings that have stood on the production site for a year or more. As a rule, their lower crowns have already begun to rot or are affected by fungus. To give it a marketable appearance, the log house can be bleached, but this will also have a bad effect on the durability of the wood.
Another problem with old log houses is that there is a possibility that the cutters who made the box are already working in another place, and the assembly of the log house will be carried out by other people. The hired team will easily shift the blame for poor quality assembly onto unknown cutters. They say they made an open marriage, and it is impossible to collect it qualitatively. The assembly of the log house should be trusted only to those who manufactured it. Otherwise, there will be no one to ask for quality.
By the way, not only chopped logs, but also other materials deteriorate due to improper storage.
Director Alexey Markin talks about another mistake often made by customers.
Another piece of advice that protects you from mistakes can be considered naive, but in some cases it will come in handy. Builders strongly advise against contacting companies that promise to build a log or timber house in a month. The construction of a building from wood of natural moisture or even dry wood is always carried out in two stages - the construction of a log house with a roof, and after about a year's break, windows, ceilings, and floors are installed to allow the log house to shrink. Only houses made of laminated veneer lumber do not need shrinkage. Previously, the portal Repair.Divandi talked about.
Photo No. 1
– A log house with huge cracks.
How to lay a corner of a house?
After the casing has been laid, you can install the corner of the house. Most often, individual developers ask the question: how to properly lay timber in the corner of a house.
Assembling corners is the most difficult and time-consuming operation; the easiest way is to lay a corner from crowns assembled into a head or paw. The disadvantage is that in both cases significant gaps are formed, depending on the accuracy of cutting out the connecting elements. The corner joints are sealed and insulated.
More practical is a tenon mount, called a “warm corner”; such a connection is more labor-intensive, but has a number of advantages:
- The ends do not protrude beyond the edge of the building, the masonry is called “no residue”;
- The structure has no through gaps, the corner does not require insulation;
- The castle is located inside the structure, the facade takes on an attractive appearance;
- The building can be erected from timber of smaller sizes.
Types of laying load-bearing walls
Laying timber is carried out in two ways:
- "with the remainder";
- "without a trace."
How much it costs to lay timber depends on the amount of waste generated. The more the workpiece is cut, the more waste there is.
In the first case, the workpieces are processed in such a way that grooves are cut out in the upper and lower parts. The depth should be ¼ of the thickness.
A simpler option is to make the groove on only one side. The most complex but reliable is four-sided processing.
Connection "with remainder"
Advantages of styling “with remainder”:
- warmer corner;
- ease of construction;
- sustainability.
Flaws:
- the material is not used rationally, a lot of waste remains;
- The area of the room decreases, and the cost of laying timber increases.
Houses with convex corner joints look very beautiful and antique, but covering them with siding or insulation is almost impossible.
The corner connection of the timber “without remainder” implies that the walls have no protruding parts. All parts are in the same plane, facilitating further finishing of the house.
Advantages:
- modern type of construction;
- a warm corner is ensured through a reliable connection using additional materials;
- the interior space of the house increases.
Minuses:
- If you don’t follow the technology, the house will be drafty.
When installation is done independently, you need to choose the simplest, but at the same time reliable option.
What is a half-tree angle?
Half-wood masonry simplifies the corner connection as much as possible; in this case, the end of the beam is cut in half with a horizontal cut, and one of the parts is removed. The remaining parts are overlapped at an angle of 90 degrees. The reliability of joining the timber in this connection is ensured with the help of dowels.
This construction technique is used for lightweight buildings made of logs and log buildings. Half a tree is used to build country houses, bathhouses, outbuildings and other buildings not intended for permanent residence.
Craftsmen recommend: regardless of the construction method, the crown molding should always be laid in half a tree.
Frame-timber technology
This technology is similar to the method described above for cutting a log frame “into a pillar” (“into a fence”).
The frame is made up of vertical posts with grooves. Bars with ready-made tenons of the desired shape at the ends are stacked on top of each other. The tenons inserted into the grooves make the corners airtight and reliable. Since the joint itself is not visible, the structure has a very neat appearance.
The use of a single template for all tenons provides a significant advantage in the production time of the log house and in the ease of its installation.
How to securely fasten the crowns?
Deciding how to lay and fasten the crowns depends on the type of lumber chosen. The profiled timber is reliably connected by its own tongue-and-groove system; for reinforcement, wooden dowels are used; on one side of the building it is enough to install 6-7 such fastenings. When building from solid timber, dowels are installed every 500 mm.
Simultaneously with the laying and fastening, the inter-crown seams are sealed and insulated. For a log house for shrinkage, this operation is performed after completion of shrinkage.
Foundation
We choose columnar concrete.
| Step, No. | Description |
| We make markings on the ground. In plan, the dimensions of the bathhouse are 3x3 meters, the distance between the columns is 1.5 meters. The partition between the rooms is not load-bearing; there is no need to build a foundation underneath it. Drive pegs around the perimeter and stretch ropes between them. Along the ropes, mark the position of the intermediate posts. | |
| Step 2. | Dig holes 50–60 cm deep, approximately 40 cm wide, and at the bottom make a sand cushion 15–20 cm thick. |
| Step 3. | If the soil is clayey, there is no need to make formwork; pour concrete directly into the holes. Give the concrete time to set approximately two weeks. |
| Step 4. | Mark the location of the stove; according to our project, it will be located between the combined steam room with a washing room and the rest room - this location will allow you to heat two rooms at once. You need to make a deeper foundation for the stove, preferably to the depth of soil freezing. But if the stove is not very complex and massive, then a depth of 1 m is enough, make a sand cushion 25-30 cm thick. If you are still afraid that the foundation may “undermine” in winter, lay foam plastic slabs 2-3 cm thick around the perimeter of the pit. They will absorb the swelling forces, the foundation will remain motionless under any climatic conditions. How to lay a stove is a large and interesting topic; a separate article is needed to consider it. |
| Step 4. | We recommend not pouring them, but walling them with concrete blocks measuring 20x30x60 mm. First, level the concrete a little at the base, use a hydraulic level and cement-sand mortar for this. Next, place the outermost column, use a cement-sand mortar to level it in height and place intermediate columns. At the same time, use blocks to “pull up” the foundation under the stove; it should be higher than the columns by the height of the beams, floor beams and floorboards. |
Columnar foundation (with the first crown)
How to control the assembly of a log house?
During the construction process, a number of parameters are monitored; the following are subject to control:
- Verticality of corners;
- Horizontal masonry;
- Current wall height.
To control verticality, a vertical line is applied to the end of each beam. The line is located at an equal distance from the edge of the corner and is marked using a construction square. When laying the next row, the lines of the bottom and top rows must be aligned. The resulting vertical is controlled using a plumb line; a violation of the integrity of the vertical indicates deformation of the masonry.
When laying the next row, the horizon is set using a building level. The height of the walls is measured from the base horizontal line marked on the rim.
How to use dowels?
The dowels are installed under tension in specially drilled vertical holes and hammered in with a wooden mallet, the upper ends are recessed to a depth of 20-40 mm. Each dowel connects three rows of masonry. For timber up to 200 mm thick, dowels with a diameter of 25 mm are used, for larger thicknesses - 30 mm.
When temperature and humidity change, wooden dowels and wall beams change their dimensions proportionately without loss of adhesion; metal dowels do not have this property.
Preparatory activities
Preparing dowels
Dowels
The connection of the crowns of the timber is made using wooden dowels. I decided to make them from scrap boards left over from other construction projects. In my case it was the installation of roof sheathing.
For dowels, use wood that is as hard as possible. The process of making fasteners is extremely simple. I took some scrap boards and edged them on one side using a matching saw.
Then I set the stop and started sawing to size. In my situation, the size was 12 cm. As a result, I received neat and beautiful blanks.
I sawed the boards using a band saw. At the end of the day I received a whole box of wooden sticks. Next, I sharpened the blanks with an ax on each side and got my dowels.
Moss preparation
Dowels, sphagnum peat moss and boards
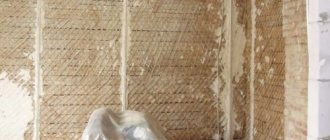
The technology requires that inter-crown insulation be laid between each crown of the timber. Professionals usually insulate with roll materials. Working with them is easy and convenient - just roll out the material on top of the laid crown and you can continue working. However, convenience and ease of processing come at a price.
I decided not to waste money and use moss. Firstly, this material is abundant in nature - go and collect it. Secondly, moss is not only a decent insulator, but also an excellent antiseptic. Additionally, I studied thematic forums: moss is actively used as inter-crown insulation, and there are no negative responses about it.
Red or peat moss is best suited for insulation. The first is characterized by high rigidity. The second one becomes brittle after drying. If possible, it is best to use red moss. It is easy to recognize - it has long stems with leaves that resemble a Christmas tree.
Experts recommend insulating with fresh moss that has lain for no more than 2-3 weeks. I stored the moss in plastic bags, and it was even a little damp. Nothing bad happened to the material.
Making joints
Prepared planks
I make them for each door and window opening. For this I use a flat beam. If possible, there should be no knots at all. For greater convenience, I made a makeshift workbench directly next to my stack of lumber. Made longitudinal cuts. A circular saw helped me with this. Excess material was removed using a chisel.
Not even every professional carpenter can make the right joint. Therefore, I decided to make window jambs using simplified technology. I will install only a pair of vertical jambs in each window opening. The window block itself will be responsible for the horizontal connection.
To install the block you need a “quarter”. However, here too I figured out how to simplify the task. Instead of sampling (it's shaded in the photo), I decided to glue in a strip. To do this, I sharpened the plane in advance. The result was no worse than it would have been in a situation using a quarter.
It is impossible to reduce the number of jambs in the doorway - all four are needed. However, the shape of the products can be significantly simplified.
I chose grooves in the block, which in the future will serve as a threshold, similar to the recesses in the side jambs. This allowed me to slide the bottom timber over the tenons of the opening. However, at this stage, the timber would have to be cut with a chisel across the wood fibers - not the most pleasant or simple task. I found a great way out of this situation! Taking a circular saw, I prepared the cuts by first setting the appropriate blade exit and making a rip fence.
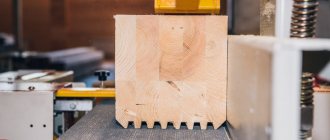
Lumber processing
Then I took a feather drill and made a hole 2.5 cm in diameter, just like for the dowels. Finally, I cut out an even rectangle across the wood grain. A reciprocating saw helped me with this.
Carpenters usually make two rectangular nests in the threshold, and at the bottom of each vertical jamb they create a counter protrusion, cutting down and sawing out excess wood using a chisel. I decided to make holes as for fastening dowels, and hammered in a couple of fasteners. I made similar holes at the bottom of the jambs.
I haven’t touched the upper horizontal beam yet, but I nailed a small board to the threshold - it will take on the functions of a “quarter”. The design of the opening turned out to be extremely simple, but this does not interfere with its ability to cope with its main function. Later I will plan the opening and glue the “quarters”.
Required Tools
To build a house from wooden beams, I used the following tools and devices:
- hammerless electric drill;
- circular saw;
- roulette;
- sledgehammer;
- electric plane;
- square;
- reciprocating saw;
- plumb line;
- hammer;
- water hose;
- axe.
I bought a circular saw to cut wooden beams. I had to cut in two steps. First, I drew a line along the square, after which I cut, turned the beam over and made the cut again. It is best to transfer the line to the second edge of the beam using a square. If you are confident in your “eye”, you can cut “by eye”.
Lumber processing
Using a circular saw, I made tenons and recesses for the corner joints of the beams. When arranging the tenons, I lacked a slight depth of cut, so I had to make a couple of extra movements with a hacksaw.
Lumber processing
For more convenient processing of timber, it is recommended to use a workbench. I didn’t have a workbench, so I improvised - I laid out the lumber in a stack about 85 cm high.
Lumber processing
How to lay the interventional seal?
The slot seal performs the functions of heat and sound insulation and is used in the construction of any wooden structures. The type of sealant and laying technology depend on the size of the lumber. When building from solid timber, a layer of sealant is laid when laying each row. When building from timber with natural moisture, this operation is performed after shrinkage by sealing the cracks. The profiled timber has special grooves for the seal.
The seal for solid timber is produced in the form of a strip of tow, flax, natural moss, for profiled timber - in the form of strips of felt, foamed fine-pored rubber and polyethylene foam. The sealing tape is available in sizes from 100 to 250 mm, the sealing strip is selected according to the standard size.
Mold may appear in a seal that is wet or saturated with atmospheric moisture; it is recommended to recess the seal into the gap to a depth of 20-25 mm, and treat the gap with liquid sealant.
Caulking process
When a log house is built from glued or profiled timber, caulking is not carried out. At the same time, if we are talking about building a house from ordinary timber, you cannot do without it. Caulking is a process of insulating inter-crown joints by compacting various natural insulation materials.
The following materials are used for caulking:
- Natural moss with excellent thermal insulation properties. This material also perfectly resists the formation of fungus and mold. And this increases the service life of the building. In all respects, this material is ideal. Its only drawback is that it is very inconvenient to make caulk with its help;
- Linen tow. This material also has a number of advantages, which are completely negated by the fact that it crumbles after five years. Because of this, you have to re-caulk;
- Hemp hemp is an excellent material. It was widely used by our great-grandfathers. Its structure is very similar to natural wood;
- Jute is an imported natural material that is produced in ribbon format. It is very convenient to use, which is why it is widely used in modern construction of timber buildings;
- Linen batting is a material that is a mixture of flax and batting; its main disadvantage is its strong absorption of moisture.
Main features of the caulk:
- The process starts from the top crown moving downwards;
- First, the crown is caulked from the outside and then from the inside;
- First, rough caulking is carried out to isolate large cracks, and then cosmetic caulking is carried out to give a pleasant appearance to the seams.
How to install internal partitions?
The classic design of a wooden house is “five-walled”. The fifth internal wall is a load-bearing partition and forms a single structure with the external walls. Such a partition is installed on its own part of the foundation and is erected from the same material as the log house. The timber in the partition is interlocked using dowels, the ends are joined to the outer walls in a tongue-and-groove lock.
Lightweight partitions for zoning space, installed after shrinkage. Partitions are made from lightweight lumber of solid or frame construction. Such partitions are attached to load-bearing walls with staples or nails.
Features of laying profiled timber
The technology for laying 150x150 timber assumes that the workpiece is completely ready for use. Its side can be flat or convex - you can choose either one, both for the outer and inner sides. Each subsequent crown is laid on a layer of jute insulation, tightly interlocking with each other using a tongue-and-groove system.
Manufacturers usually produce blanks 6 m long, but the wall can be much longer. In order to lay the beams efficiently, it is necessary to splice them together. It is important to prevent cold penetration.
To do this you should do:
- at the junction of two wooden blanks, a cut is made along the beam;
- the clutch is carried out “in a dressing” - on one side there is a long tenon, and on the other there is a groove, with jute between them;
- hammering the dowels at the joints provides additional strength;
- in each subsequent row, the joint location shifts slightly - this is necessary for the reliability of the structure.
The price of construction in this case increases due to the large amount of waste after cutting the workpieces. If the house design assumes a size of 6x6 m, then the cost will be significantly lower.