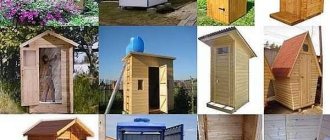
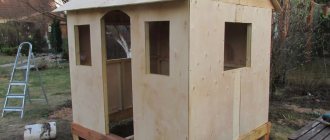
A barn is a building without architectural delights. Most often it is a frame structure with a pitched roof, sheathed on the outside with sheet or panel materials such as OSB, plywood or moisture-resistant chipboard. Often lining, tongue-and-groove boards, corrugated sheets or sheet iron are used for cladding. The most difficult part of building a barn is building the frame. It is necessary to understand that this design consists of several elements that are connected into one whole. At the same time, the frame of a barn with a pitched roof is a reliable structure.
Frame of a shed with a pitched roof Source yandex.ru
Tools you will need to build a shed:
- Shovels. This tool will be needed at the stage when you need to prepare the foundation. You will also need a shovel to level the area for the shed.
- Roulette. This is an indispensable tool for any construction process; it will help you accurately measure the required size.
- A cord or strong rope will be needed when marking.
- A pencil that will also help with marking.
- Level. It will help to measure the evenness of the site and the building.
- Plumb. Needed for vertical measurement of the evenness of the building.
- Ruler.
- If the shed will be insulated, you will need a knife and a stapler.
- Chisel. An indispensable tool when working with wood.
- An electric drill will simplify the work. Can be hammered in manually.
- Saw. You can take a regular hand pipe or an electric saw. You will need it when cutting wooden boards.
- Screwdriver. You will need it when decorating the ceiling and floor in the barn.
- Plane.
- Hammer.
- Nails. You will need several types of nails.
These are the basic materials that are needed when building a shed, but this list can be supplemented depending on the need.
Types of buildings
If we consider timber as the main material for building a shed, then 2 types of buildings can be built from it:
- frame;
- massive.
They differ only in the covering. In the first case, the timber is used only for mounting the frame and skeleton of the roof; the walls are made of boards and other materials. In the second case, the barn is built entirely from timber. That is, each rounded log overlaps one another in the same way as log houses are built.
These are the main differences between outbuildings made of timber. Otherwise, outbuildings may differ in the type of foundation, roof shape, cladding, insulation, size and other minor details.
If a barn is being built for raising livestock or poultry, then it is important to think about the internal climate, insulation and dampness prevention.
Peculiarities
Today, in many local areas you can find outbuildings built from such environmentally friendly material as wood. You can make a variety of buildings from it: from chicken coops to spacious outbuildings for storing agricultural machinery and equipment. Homeowners are attracted to wood not only by its spectacular appearance, but also by its ease of operation. Most wooden buildings can be built with your own hands.
First, let's look at the advantages of wooden sheds and outbuildings.
Such structures are quite easy to build. The fact is that wood is a malleable material that is easy to work with. Even an inexperienced craftsman who has never encountered such tasks before can build a good wooden shed.
Wood is an environmentally friendly, safe material. It does not emit strong chemical odors and cannot negatively affect human health. Plantings located in close proximity to such buildings will also not be affected in any way.
A well-made wooden shed may well become not only functional, but also a decorative addition to the local area
High-quality buildings, the design of which the master paid due attention to, will be a real decoration of the site.
The construction of such buildings can be relatively inexpensive, especially when comparing wooden structures with metal ones.
Wooden house buildings can perform a variety of functions. Such structures can be additionally insulated or left without insulation, and the buildings can also be made suitable for tools, garden equipment or livestock - there are a lot of options
Farmers and summer residents can build neat agricultural blocks from wood to solve a huge number of problems.
Properly made and high-quality wooden sheds have many advantages. However, these structures are not without some disadvantages. Let's look at the most serious of them.
- The main disadvantage noticed with wooden outbuildings is that they require regular maintenance. Wood is a material that can quickly dry out, begin to rot under the influence of moisture, and be destroyed by wood parasites. Such problems can be prevented through timely antiseptic treatments. They must be carried out regularly, which worries many homeowners. In addition, additional money is spent on special protective equipment.
- No matter how carefully you care for the wood from which the shed is built, it will still begin to deteriorate over time. Such buildings are not designed for record service life. No matter what the owners do, the adjacent buildings will still have to be repaired and restored sooner or later.
- Wood is a fire hazardous material. If you make a shed or outbuilding out of it, it will turn out to be unreliable from a fire safety point of view.
Suitable types of material
For the construction of a commercial building, absolutely any type of timber is suitable, including material that has previously been used 2 or 3 times.
If there are no severe chips or cracks on it, and it is not damaged by insects, then it will hold on just as tightly as new.
The owner can choose the sizes at his own discretion . In thickness they should be from the thickest to the thinnest in the following order:
- Bottom and top straps.
- Load-bearing pillars, jibs, rafters.
- Lags.
- Sheathing.
- Lathing.
As for the type of wood, it is more advisable to choose one that has lower thermal conductivity , which will affect the retention of heat in the room, especially if livestock live in it.
It makes sense to pay attention to the degree of drying of the timber. The undried type is the cheapest. But its disadvantage is that within 2 years after the structure is assembled it will shrink, forming cracks. The second option is dried, in the middle price category. It can be used immediately, pre-treated with insect repellents and fire-fighting mixtures. And the best timber, laminated veneer lumber, has maximum strength, but is the most expensive.
Their preparation
First you need to choose the right tree , which will serve as the main material. If you focus on the species, then the best species in terms of thermal conductivity are cedar, spruce, larch and pine, in that order.
Table of required materials:
| Foundation | Frame, walls | Floor | Roof | |
| Columnar | Tape |
|
|
|
|
| |||
Attention ! Before purchasing timber, you should make sure that the wood is dried and heat-treated, that is, it has no more than 18% moisture content. A frame made of undried timber cannot be sheathed or insulated for another 2 years.
Material requirements
To build a shed, you need to choose materials manufactured at the factory. Since the production process is simple, they are often stamped in artisanal conditions.
You should not use such material, as it will allow moisture to pass through, will not be able to retain heat inside, and will quickly crack. As a result, the building will collapse in 2-3 years.
It is recommended to build the barn from D600 foam blocks. They have optimal strength class B2.5, which corresponds to the M-35 concrete grade.
The building will not freeze or collapse in the cold season, thanks to the following properties:
- The thermal conductivity of the blocks is low (the coefficient is 0.13-0.14).
- Frost resistance is moderate (coefficient F15-F35).
The blocks are not very heavy, so you can cope with the task on your own, or hire a small team.
How to determine the difference in wall height?
Rafters are the basis for any roof, and they are made from pine and spruce without knots.
Before. How to use beams: They are well treated with antiseptics against various insects, as well as special impregnations that give the wood greater strength, fire and moisture resistance.
The rafter system for a shed roof is called a sloping system, and the first thing you need to do during construction is to calculate the level of difference in the walls of the building that will be needed for the slope.
To do this, let's use a function from trigonometry and open a simple school textbook:
So, the magnitude of the difference of all walls is equal to the width of the garage multiplied by the tangent of the angle of inclination of the barn roof.
Let your garage be 5 meters wide, and the slope you need is 25 degrees. So, we determine the difference in walls = 5, multiply by tangent 25, we get 2.33 m, which means that the front wall of the barn should be exactly 2.33 meters higher than the back wall.
Selecting a site for building a shed
To choose a place for a future shed, you must first decide where it is more convenient for you. Someone wants to do it not far from the site, so that they always have garden supplies at hand.
But for others it is more comfortable when the shed is located near the house. If you can’t decide on your own, look at photos of DIY sheds or consult with a specialist.
The second point to consider is the location for planting crops. There is not a lot of space on a small plot, so it is best to decide initially where and what will be planted so that the shed can be built in the free space. Otherwise, it will greatly interfere and may take up the land necessary for planting.
Be sure to consider the possibility of constructing other outbuildings. Once a suitable location has been selected, proceed to the next step.
Layout
The design of an outbuilding must take into account the location and natural environmental conditions.
It is better to place it closer to the house or to the place where the main part of the country work takes place, so that the tools are always at hand.
According to the planning rules, the barn must be at least 2 m from the neighboring plot.
You can choose any size of the building, for example, 2x2 m or 6x4 . It is better to make a single-slope roof for a small barn, and a gable roof for a large one. It will require more material, but it better distributes the pressure from the fallen snow onto the beams. It is also worth choosing a construction method, whether it will be a frame barn or a massive log-type barn.
How to build a shed from corrugated sheets: structural features
The construction of a shed from corrugated sheets is carried out quite quickly and at the same time allows you to get a reliable utility unit.
Construction work is carried out as follows:
- Determining the optimal size of the shed, preparing the site for it.
- Digging a pit 5 cm larger on each side than the size of the shed. Digging holes in the corners of the pit with a depth of 70 cm.
- Filling with sand, crushed stone, installing metal racks or square pipes. Filling the corner parts with concrete (ratio of sand and cement 3 to 1).
- Pouring the foundation (the remaining unfilled area, which will be both the foundation and the floor).
- Installation of a frame under a pitched roof: appropriate cutting at an angle of a pair of racks, welding them with auxiliary profiles.
- Fastening corrugated sheets to the frame as walls and ceilings + separate production of a wall with a doorway and installation of a gate made of corrugated sheets and a profile frame.
Tools
Dowels or self-tapping screws are best suited as fastening tools. If possible, it is better to exclude nails, since they can form cracks in the timber. To attach the boards you will need:
- reinforced steel corners;
- wooden dowels;
- self-tapping screws
And for the construction itself you will need a screwdriver, drill, tape measure, saw and other personal tools. To process wood, you need to stock up on fire-fighting mixtures and an antiseptic for treating timber and boards against insects.
To calculate the amount of cement for the foundation, you need to subtract the dimensions of the pit. So for 1 cubic meter you need about 330 kg of cement. You need to purchase 1 ton of sand for 1 cubic meter. Crushed stone will take 1 ton, 80 kg.
What types and purposes of sheds exist?
For many, a workshop in the garage, as well as storing garden tools there, is far from the most convenient option. Firstly, the area for the vehicle to pass is limited, and secondly, you need to make sure that any tool does not fall and scratch the car’s polish. Therefore, it is better to build a shed on a suburban plot for a well-equipped workshop. Sometimes a container or even a metal kiosk brought from the city is used as such, but this is also not the best solution.
Therefore, let's focus on this type of construction, such as a utility block - this is a fairly broad concept and can include various structures. The most common option is a small room without windows under a pitched roof with a single door and no window openings. You can store both gardening tools and simply unnecessary things in it. After harvesting, vegetables can be left here until sorted.
With proper insulation, it will do just fine as a shed for rabbits, although in this case it would be useful to make a small window and ventilation. A similar building will also be suitable for wintering chickens, and if there is a large enough window, you can make a workshop in it, either ordinary or for taking photographs. However, the utility unit can also be multifunctional. First of all, it is easy to combine several rooms with separate entrances under one roof.
In this case, one part of the structure can be built insulated and with windows, the other can also be built with thermal insulation, but without windows. In any case, you shouldn’t skimp on insulation, since if it is present under the wall cladding, the range of uses for the shed becomes wider. In such a building it is easy to equip not only a workshop, but also a shower room, a toilet, it can be a shed for firewood and coal. Such premises can even be used as a garden house while the construction of a large cottage is underway.
https://youtube.com/watch?v=jDDdLnG-eas
Possible mistakes
The main reason why a barn may lean is insufficient waterproofing of the foundation .
If old brick was used, it may peel off after just a year. In this case, you will have to raise the building from the problematic side, change the brick, and insulate it.
In a strip foundation, gravel or crushed stone plays the role of waterproofing. The problematic material can be lubricated with mastic next year .
The second mistake is saving on iron materials. They must be galvanized. After winter, all nails, screws and other parts leave unpleasant rusty stains in visible places. To eliminate this problem, the caps need to be coated with paint, varnish or other protective material.
Frame shed on a summer cottage
A frame shed is an inexpensive solution that is probably the easiest to do yourself. The frame is built on the basis of a wooden beam or a lightweight steel system, inside of which insulation is laid, and sheathed on the outside and inside with rough finishing materials, which also helps to increase the rigidity of the structure.
For the walls of a frame shed, wooden boards, plywood and OSB are used, and polystyrene foam, EPS, mineral wool, and ecowool are used as insulation.
Roof - any format, but taking into account the features of this technology. The ceiling and roofing material cannot be heavy, since the barn itself is installed on piles with a preliminary calculation of the weight of the entire structure.
Also, a frame shed can be mounted on beams, blocks, columnar foundations, tires, and even on a wheelbase for transportation. In this case, it is recommended to read about the regulations governing the possibility of using such a design as a trailer on the road. It will be necessary to strictly comply with the permissible sizes.
For cladding frame structures, they use corrugated sheeting, more classical methods of finishing the outside and inside, for example, an unedged board with a strip, and others.
Barn frame made of timber
Most often, the frame of a barn is made of timber. To construct the structure, you will need dry material that is free from defects, mold and mildew. The recommended timber size is 100x100 mm. Before erecting the structure, it is recommended to treat the material with an antiseptic agent to protect it from the harmful effects of an aggressive biological environment, as well as a fire retardant, which will prevent the structure from catching fire.
Timber frame shed.
To build a barn frame from timber, professionals advise taking material whose length corresponds to the size of the large wall of the structure. This will allow you to make the strapping from one piece of material, rather than assembling it from parts.
Construction of the walls of a frame barn
Using a plumb line, we place vertical posts at the corners of the future utility block; for them we use 10x10 timber. So that they stand straight and do not tilt, we secure them with braces, and then fix them with corners to the frame. We immediately make the strapping at the top, but more about that a little later. We install the racks along the perimeter of the base, while the exact step may not be observed, since for a doorway the distance between the vertical elements of the frame must be wider than for installing wall cladding.
Front pillars should be higher than the rear pillars. We definitely take into account how the internal and external upholstery materials will be oriented: if vertical, then we definitely need to make more crossbars in the frame structure. As for the sheathing itself, it can be made either in one layer, that is, only the outer one (in this case, insulation is not provided), or in two layers, with inner upholstery. The first option is a deliberately cold shed, and in a rainy climate, dampness easily penetrates into such a room through a thin wall with invisible cracks.
Therefore, at the very least, the outer cladding needs to be done overlapping, that is, the boards should be nailed horizontally overlapping, and it is advisable to lay membrane waterproofing underneath them. Or, as an option, a profiled board is used. The internal lining can be made of either fiberboard panels over insulation and, of course, waterproofing, or moisture-resistant chipboard. By the way, it is quite possible to make flooring from the latter; it is much cheaper than deck boards.
Also, the walls in the utility room are often covered with clapboard, especially if the room will be used as a workshop, photo development studio, summer kitchen or even a garden house. Either polystyrene foam or mineral wool is used as insulation between the vertical posts; also today, thermal insulation made from flax fiber is becoming increasingly popular.
We install the outer and inner cladding using self-tapping screws made of stainless metal. We measure the outer upholstery boards so that they are joined at the corners so that the front ones overlap the ends of the side ones; in any case, a special corner of vertical planks will be stuffed on top. We fasten the internal panels first in the corners, and then further along the perimeter; they must be joined strictly on vertical posts (or crossbars, if oriented horizontally). Try to fit everything tightly, without gaps. When installing side panels, they should be cut at the top, taking into account the slope of the roof.
Wooden barn frame
The frame of the barn is erected with your own hands without the use of special equipment. It is easy to assemble using construction tools.
To build a shed frame from a board, you will need material whose size is 100x50 mm. Construction begins only after the foundation has completely hardened, if the structure is placed on a support. The first thing they do is assemble the bottom frame of the barn from 100x100 mm timber. with your own hands. Next, the boards are used to make floor logs. The pitch between the material should be 500-600 mm. Then the vertical posts are fixed.
On a note
The boards are fixed around the entire perimeter at a distance of 500-600 mm. between themselves. To strengthen the structure, jibs are attached to the corners. After this, the top trim of the barn is performed.
How to choose a foundation?
For a shed or outbuilding on the site, you need to build a high-quality and reliable foundation. There are several different types of these foundations. Let's look at how to choose the best option.
Tape
To build a utility block or shed made of wood, many homeowners choose this type of foundation. The result is buildings that are optimal in terms of quality and ease of construction. A strip foundation is installed around the perimeter of the walls of the future building. True, the manufacture of this base takes quite a lot of time and materials. The main advantage of a strip foundation is that it can easily withstand even very heavy loads.
This foundation is done like this:
- dig a trench with a depth of 50 and a width of 40 cm;
- fill the sand and crushed stone bed;
- lay out the formwork;
- lay a layer of waterproofing;
- install the reinforcement frame;
- fill the blanks with concrete.
Columnar
A very popular and widespread option. Considered relatively inexpensive to construct. Single supports of this foundation are placed along the perimeter of the future structure. We are also talking about the corners at the points where the partitions adjoin, if such are provided for in the project. To make a high-quality columnar foundation, pits of suitable depth are first dug for the columns. The pillars themselves are often made from bricks or cinder blocks.
The type of foundation under consideration is considered budget-friendly and is built quite simply, which is why it has become very popular. Sometimes a columnar foundation is constructed from pipes. To do this, boreholes are made with a drill, a sand cushion is poured into them, and a layer of waterproofing is laid. Asbestos-cement pipes are installed, having fixed the correct location, reinforcement bars are installed inside, and then everything is filled with concrete. The pit is backfilled after all necessary components have hardened.
Pile
A pile-type foundation, like a columnar foundation, provides for the installation of single supports along the perimeter of a future building on the site. In most cases, installation of piles is carried out by special organizations. Screw structures made of practical metal are mainly used. They are screwed in using special mechanized equipment or a manual lever device.
After the installation of the piles for the foundation is completed, the upper part of the supports is cut off in accordance with the horizontal level. Concrete solution is poured into the pile cavity with layer-by-layer compaction using a special vibrating machine. The fresh solution must be covered with a film and left to harden for about 5-7 days.
Option without foundation
If a wooden outbuilding or shed is temporary, then there is no need to make a foundation for it. It is allowed to use boards and timber at the base. However, the area of the shed should not be more than 20 square meters. m, and its height is limited to 2.5 m. A structure that is too high and spacious will be sailing and may move (or even capsize) due to gusts of wind.
The base of the type under consideration is equipped as follows:
- level, compact the area, add toppings of fine gravel and sand;
- deepen the corner posts into the ground by 60-70 cm;
- construct a frame base from 50x100 mm timber.
Site preparation
The first thing to do after choosing a location is to mark the site. It is usually marked with pegs placed in the corners of the future structure. A string is pulled over the pegs - this will make it easier to control the level of the foundation being built.
Marking and tracing the site for the future barn
The foundation for a shed can be made in different ways, and the choice will depend on what material the structure will be built from. Most often, a barn is built using a frame type, but some owners prefer to build such an outbuilding from brick.
A frame structure is much lighter than a brick one, so you can choose a monolithic, columnar or strip foundation for it, or you can install it on relatively large concrete blocks.
For a brick building, a strip and monolithic version of the foundation is well suited. You can, of course, adapt a columnar one to it by making jumpers between the pillars, but this is quite troublesome. To choose a suitable foundation for your planned structure, you need to know what they are.
Monolithic foundation
Although a monolithic foundation is the most expensive and labor-intensive to install, it has several advantages over other types of foundations.
Monolithic foundation
- It is durable and strong, so even when a wooden structure becomes unusable, a new one can be built on the old foundation.
- Having arranged such a foundation, the owner receives not only the foundation for the walls, but also the finished floor of the barn.
- If the concrete is strengthened with a topping, the floor will not require additional flooring. But if desired, you can put linoleum or tiles on it, i.e. the concrete base gives you complete freedom to choose its decoration.
The construction of such a foundation occurs as follows:
- A not too deep pit is dug on the marked area, since the barn is a light non-residential building that does not require insulation of the base. Therefore, its total thickness can be 300 ÷ 350 mm, i.e. its underground part will be 200 ÷-250 mm, and the above-ground part 100 ÷ 150. Even if the walls are built of brick, half a brick thick (and more is usually not required for a barn), this height of the base will be quite enough for it.
- In the prepared area, you need to loosen and remove the soil to a depth of 400 ÷ 550 mm.
- Then at the bottom of the pit you need to place a 100 mm sand cushion, which will waterproof the foundation from below. The sand must be thoroughly compacted by pouring water.
- Crushed stone is laid on the sand in the same layer. It is also compacted to the maximum. Crushed stone will make the base more durable and will not allow it to sag.
- Formwork is installed around the pit, 100 ÷ 150 mm high above the soil level.
- Next, a coarse concrete solution is mixed, which is laid on the crushed stone in a layer 7-10 cm thick and evenly distributed throughout the pit - this will be a rough screed.
- Then a reinforcing grid with cells 60 ÷ 100 mm is immediately laid. It can be fixed with wire staples by inserting them in several places into the rough screed.
- If the shed floor area is large enough, then after the rough screed has set, you need to install beacons flush with the height of the formwork. They will be necessary for the convenience of leveling the surface.
- Next, a thinner cement-sand mortar, made in proportions 1:3, is poured and leveled according to the rule along the guides of the beacons.
- The structure should be given several hours to set, and then covered on top with plastic film to ensure even hardening.
- If it is planned to strengthen the surface with topping, then this process is carried out on a newly set, but still wet surface.
Strip foundation
A strip foundation will require less expense, but having installed it, you will also have to make a floor from boards, plywood, or also pour a screed, but a thinner one, since this type of foundation is intended only for the base of wall structures. It can be made both under brick walls and under wooden frames.
Ready strip foundation
- For a strip foundation, a trench is dug along the perimeter of the marked area, approximately 100 ÷ 120 mm wide than the thickness of the future walls. The depth of the trench, just like that of a monolithic foundation, should be 400 ÷ 550 mm.
- Laying the sand cushion and strengthening it with crushed stone is also done in the same way as when installing a monolith.
- Next, the trench is fenced from the outside and inside with formwork, which should be 200 ÷ 350 mm high.
- A welded structure made of reinforcement is installed on the crushed stone layer; it is desirable that it be 50 ÷ 70 mm high below the top edge of the formwork.
- Next, the concrete mixture is poured into the formwork and tapped with a bayonet shovel to remove air, which can form cavities inside the concrete, which will weaken the structure.
- The top of the poured foundation is leveled along the top edge of the formwork, and the structure is left to harden.
- When the concrete hardens, the formwork is removed from the base.
- Inside the foundation, it is best to fill in fine expanded clay; it will insulate and waterproof the floor, and will also prevent rodents from getting in, since they simply do not live in it.
Columnar foundation
The supports of a columnar foundation can be made of brick or cast from concrete.
A columnar foundation is used to construct a frame structure. Install it as follows:
- The area allocated for the barn is marked specifically for a columnar foundation, since the supports must stand at a certain distance from each other, usually from one to one and a half meters.
- According to the markings, the required number of holes are dug, 350 ÷ 450 mm deep, approximately 400 × 400 mm wide at the top.
- A layer of 100 mm of sand and the same amount of crushed stone is poured onto the bottom of the dug holes. Each layer is well compacted.
- The next step is to lay waterproofing made of polyethylene film; it should line the hole and extend to the surface, to the height of the future columns, plus 70 ÷ 100 mm.
Formwork for pouring the support of a columnar foundation
- Formwork is installed in each hole - a box without a bottom. The waterproofing film is spread out inside it and secured with staples along its top. The shed structure will be raised from the ground to the height of the box.
- A welded or wire-bound reinforcement structure is installed in each formwork box.
- After this, the concrete solution is poured. From above, along the formwork, it is leveled and left to harden.
- While the columns are hardening, if desired, you can carry out the following work, which will reduce the entry of moisture into the barn room. To do this, 50–70 mm of the fertile layer is removed throughout the entire site, around the columns, and in its place sand is poured and compacted, and fine crushed stone is poured on top of it.
- After the concrete has hardened, the formwork is removed from the posts, and then it would be advisable to cover them with a waterproofing material, for example, bitumen mastic or liquid rubber.
Prices for bitumen mastic
Bitumen mastic
Video: barn on a columnar foundation
Concrete block foundation
This type of foundation is suitable only for a frame structure, and its installation is the simplest of all those described above.
- First, the marked area is cleared, and the fertile soil layer is removed from it by 50 ÷ 70 mm.
- Instead of the extracted soil, a layer of sand is poured, watered and compacted.
- A layer of fine crushed stone is placed on top of it, which also needs to be compacted.
- Next, concrete blocks of the required height are laid on the prepared site along the perimeter. The distance between them should be no more than one and a half meters. The blocks must be leveled using a level.
After any type of foundation is ready, waterproofing made of roofing felt in 2-3 layers must be laid on its surface.
Video: building a shed on a base of concrete blocks
Choosing a barn project
As a rule, sheds are purely above-ground premises, which is why compacted platforms, a screw or columnar foundation can be used as a foundation for them. Examples of such projects are presented below.
Shed made of profiled pipe (assembled on gussets and corners) with cladding and roofing made of corrugated sheets, without insulation, on a concrete site
Wooden barn with a gable roof (on one side the overhang is increased) and a vestibule-porch
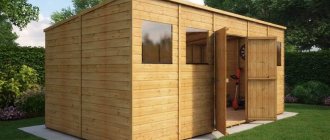
Shed on a wooden frame with a pitched roof, windows on a columnar foundation
However, often in addition to a room for storing various things above ground level, an underground room is also required. In this case, the construction of a shed becomes more complicated, since it is necessary to dig a foundation pit for the basement (cellar) and thoroughly protect the walls located below ground level from ground moisture.
Barn with basement
The building itself can be either wooden or frame, or capital - made of foam or gas blocks. The walls of above-ground sheds are also made of blocks; in this case, a strip foundation is required.
The choice of a specific project depends on the needs and capabilities of the future owners.
Projects and drawings
Drawings of a barn with a frame made of wooden beams measuring 100x100 mm, suitable for making a room with your own hands, are posted by the authors on thematic websites. The choice of barn design remains with the owner of a residential or country house, who can make adjustments to the layout of the building.
The developer can develop individual drawing documentation for a barn with a timber frame, based on several ready-made projects and taking into account his own wishes for the layout of the room.
Construction for the roof of a country shed
At the same time, a base for the ceiling is installed, and in this case, which is more advantageous, a flat sloping roof. What does that require?
- Along the long side of the barn, its front part, strictly along the top trim, an additional beam is laid, due to which a slope is formed;
- Logs are attached sequentially, in increments of 50 cm, to the front trim beam and the rear beam, which by default are obtained at a given slope. An additional requirement for the logs is overhangs of 40 cm in front and behind (if you need to make a small canopy in front of the barn, you can increase the size to 80-100 cm), and 20 cm on the sides;
- An OSB board with a thickness of 16 mm or more is laid along the installed joists, on which the roofing material will be spread!
Roofing and wall cladding
The roof of the barn is pitched
Attach the top portion of the shed frame to the exposed vertical support posts. Pre-prepare cuts in the timber according to the size of the posts. Fix the connections with corners and self-tapping screws.
Traditionally, barns are equipped with single-pitched roof structures. In this case, the length of the wooden posts on one side should exceed the length of the opposite supports.
Lathing for laying soft roofing on the roof
This placement will further contribute to the effective removal of sedimentary moisture from the roof surface.
Arrange the rafters of the roof structure from boards 4-5 cm thick. The length of the rafters should be approximately 50 cm longer than the length of the frame.
In the places where the rafters meet the beams, make cuts first. Lay the rafters on the frame and secure with self-tapping screws. The installation pitch of the rafters is 40-50 cm.
Treat the frame with an antiseptic. Attach batten boards to the frame. Boards measuring 2.5x15 cm are optimal.
Shed roof
A plank roof requires a mandatory waterproofing layer. Traditionally, roofing felt is used for moisture insulation. If you plan to install a more beautiful finishing coating, use polyethylene film for waterproofing.
Choose the finishing coating at your discretion. You can lay metal tiles, corrugated sheets, euro slate, etc.
Construction of a pitched roof
Lining is suitable for covering the walls of a building; chipboard, boards and other similar materials can also be fixed. First, sheathe the front side of the shed, and then line the side and rear walls. Attach the boards without gaps.
Pitched roof design option
If necessary, sand the outside of the boards with an electric planer. Typically, such treatment is only needed when covering walls with boards. Thanks to this, the material will become more attractive in appearance, and rain will linger much less on a smooth surface.
If you wish, you can paint the walls of the shed. Oil and water-based compositions are best suited for painting such buildings.
Painting the barn
Carry out the interior arrangement of the finished shed at your own discretion. If the building is intended to store various kinds of tools and accessories, install convenient racks and shelves around the perimeter. Shelving allows you to make the most of the available space and easily access the things you need.
You can buy racks and shelves ready-made or make them yourself, for example, from boards, fiberboard, leftover furniture, etc.
At this point the barn is ready. All you have to do is connect the electrical wiring to it, if necessary, and install the required devices.
Finished barn
Good luck!
Foundation for a barn
Construction on the ground is only acceptable for temporary shelters, since the lower parts of the fence quickly begin to rot from contact with wet soil. Such buildings are suitable only for rocky and sandy soils with very low groundwater levels. For all other cases, it is better to use a columnar type foundation (monolith, blocks, ridges dug into the ground with suitable waterproofing). For particularly wet areas with a high groundwater level, you can build a foundation of screw piles.
Block foundation - four blocks of aerated concrete or cinder block for each column
Screw piles as a quick foundation
The advantage of a pile-screw foundation is the high speed of its construction - there is no need to wait for the mortar holding the blocks to “set” or for the concrete of the monolithic supports to gain the design strength. In addition, it is easier to adjust the level to the desired height of the support platforms.
A block or monolithic columnar foundation is significantly cheaper and does not require special equipment for construction. Remains of building materials that are not useful for other structures can be used.
As a last resort, if it is necessary to build a building as quickly as possible and at minimal cost, it is permissible to fill the site for building a shed with secondary crushed stone - that is, relatively small pieces of building materials. The cost of such crushed stone is 250...350 rubles per ton, this weight gives about 0.7...0.8 cubic meters. That is, it will take
4x6x0.2=4.8 cubic meters
Or about 6 tons of crushed stone, which will be 1200...1500 rubles. For comparison: the cost of arrangement is 5...7 thousand rubles, and the cost of a pile-screw arrangement is 9 thousand rubles without installation (piles with caps) and 15 thousand with installation.
Selection of roofing materials
A reliable roof today can be made using readily available materials. Today, roofing materials on the market are presented in a huge range, and finding the right option for yourself in terms of price and quality is not a difficult task. Among them, slate sheets are considered traditional.
Main characteristics:
- Acceptable price. Even people with low incomes can afford to buy slate;
- Excellent technology. Slate is easy to cut. For this purpose, use any tools: saw, hacksaw, grinder;
- Frost resistance.
Don't worry if the thermometer shows -40 degrees. Option for insulating a frame shed This roofing material is not exposed to low temperatures; - Easy installation. The material fits perfectly with your own hands. Even if a person has never done roofing work, he will perform high-quality installation on his own. To do this, just study the instructions;
- Long service life. Slate, a material that can last for decades.
Modern industry produces several types of slate, both standard and non-standard. The most common brands of roofing material:
- UV (unified profile);
- VO (regular profile);
- VU (wavy profile).
Modern manufacturers add various coloring pigments during production. Slate sheets turn out bright. The paint on the surface of the products does not fade over time.
Differences between slate and ondulin
Ondulin is a roofing material that is harmless to health. In terms of service life, it is practically no worse than slate sheets. It is also available in a wide range of colors.
However, slate has a number of advantages compared to ondulin:
- Slate sheet is harder, so it can withstand heavy loads;
- Slate has excellent corrosion resistance;
- This roofing material practically does not heat up even in the midday heat. Its heat transfer coefficient is very low;
- Remarkable maintainability. Damage to slate sheets is easy to repair.
Photo of a do-it-yourself shed
Door and window installation
We purchased a window frame with glass 0.8 m x 0.8 m on the market. We measure 0.9 m in the opening left from the edge (10 cm more, so that adjustments can be made) and fasten a vertical block, insert the window frame, fasten it and foam it with polyurethane foam.
After this, we sew up the remaining holes with boards. Using the same scheme we make a door. We nail the horizontal beam at the required height, thereby obtaining a door frame, and attach the door to the hinges to the corner beam. Then we sew up the remaining holes.
Basic construction requirements
Since various things (equipment, tools, supplies) can be stored in sheds, the operating mode may also differ:
- “cold” construction without waterproofing. This is the simplest structure, for which insulation and protection from moisture are not provided. Usually built from scrap materials, sometimes directly on the ground;
- “cold” shed with protection from atmospheric moisture. It is impossible to completely eliminate dampness in such rooms, since condensation inside is inevitable during the cold season. However, they try to make the walls without cracks and gaps, the roof without leaks;
- a “warm” barn that can also be used as a workshop or storage room. In such cases, insulation of structures, high-quality waterproofing, and sometimes heating (usually temporary, while people are inside) are provided.
As a rule, agricultural implements that are not prone to corrosion and mold are stored in “cold” buildings, poorly protected from dampness. But it is better to store power tools and expensive equipment in not only a waterproofed, but also a relatively warm room.
Frame covering
We take boards for lining our barn and mark each one 2.2 m, i.e. We cut one board 6 m long into 2 boards for cladding and 1.6 m remains (all the trimmings will come in handy later). We nail the board vertically to the upper and lower chords, 2 nails in the lower chord and in the upper one in each corner.
Close to the nailed board, we nail the next one, and so on until the opening that was left for the window. We measure the height from the top belt to the beginning of the window opening and from the bottom belt to the window sill.
We mark the board to the resulting length, saw it off and sheathe the top part first, then the bottom. Using the same scheme, we finish the front part and both side walls, leaving only the last fourth opening unfinished, since there will be an entrance to the barn.
I propose to cover the back wall of the barn not with vertical boards, but with horizontal ones, since there are no openings there, and this will significantly speed up and simplify the sheathing.
Thus, saw off the extra meter from the boards and nail them horizontally, driving a nail into each vertical beam.
Choosing a location for a shed
When choosing a location for your shed, use personal preference. Some owners prefer it when the barn is located in some nook of the site. For others, it is more convenient when the barn is located next to the house.
It is most rational to build a shed on an area that is least suitable for growing garden and various types of agricultural crops. You can find a similar place in almost any area.
At the stage of choosing a place for arranging a shed, take into account the location of other zones of the land plot, take into account the dimensions of the building being erected and its external data. Try to ensure that the shed fits well into its surroundings and blends harmoniously with nearby buildings
We build a barn with our own hands
Set for work
- Wood processing machine. You can do without a machine, but with it the work will be faster and easier.
- Electric jigsaw.
- Hand-held circular saw.
- Electric planer.
- Screwdriver.
- Electric drill.
- Chain Saw.
- Boards.
- Logs.
- Fiberboard.
- Ruberoid.
- Fastening elements.
- Switches.
- PVA glue.
- Sockets.
- Oilcloth.
First stage of work
Before you start figuring out how to build a frame shed, there are a few more steps to take. Construction must begin by determining the location of the outbuilding on the site plan. It is better not to focus attention on the barn and hide it behind the country house. The approach to the barn should be free: it should not be cluttered or planted with plants. It is recommended to think about making a path to it from a residential building with your own hands.
Then, even in bad weather, it will be convenient to approach the shed to take the necessary tools. A drawing and project of an outbuilding is an important document that records all the main points of future construction. It can be standard or custom. The project is ordered from construction organizations or drawn by yourself.
Project of a frame shed with a woodshed
Consider a few tips for choosing a suitable location for your shed:
- It is better to build a building on a hill. Then the building will not be threatened by melt water in the spring, or water will not stand in it after heavy rain. The building will serve the owners longer.
- When making a project, you can designate the width of the front door depending on the size of the wheelbarrow you use for gardening work.
- If you are a beginner and have not done construction work before, then entrust the project to professionals in this industry. The price of such a service is much lower than the costs that are inevitable if the plan is drawn incorrectly and the building soon collapses.
- Almost any materials can be used for the construction of an auxiliary structure: boards, timber, OSB boards. The base can be a strip foundation, prefabricated, columnar or monolithic, to choose from.
Covering the walls of a frame shed with OSB boards
The project reflects the best option based on the characteristics of a particular site. - The form of the outbuilding varies. Sheds can be square or rectangular. The structure can have either a pitched roof or a ridge type. Choose any roofing materials, focusing on your own preferences and financial capabilities. Corrugated sheets, slate, and tiles are suitable for roofing. Budget options include roofing felt or polycarbonate. The price of the latest materials is available to everyone who wants to start individual construction on a summer cottage.
The project will allow you to determine not only the appearance and interior design of the premises, but also the cost of the building as a whole.
Which roof is better
When installing the rafter system, the same materials are used as for the frame. After manufacturing the rafter system, it is strengthened with the help of lathing, which is made with an inch board. You should not use wane, as such boards quickly become unusable.
To make a roof in a barn, you can install:
- A pitched roof, when the roof rests on opposite walls, and the heights of the sides have different heights. A pitched roof is considered optimal if the span does not exceed 6 meters.
- Gable roofing, when the roof rests on opposite walls at the same height, while the roof slopes are connected at the highest point, called the ridge. It is used for span widths greater than 6 meters.
The angle of inclination of the roof slopes depends on factors such as the intensity of wind and snow loads.
For example:
- The more intense the wind loads, the smaller the slope of the slopes.
- The heavier the snow load, the greater the slope should be so that the snow that accumulates on the roof melts off faster.
In addition, it is necessary to take into account the recommendations of the roofing material manufacturer.
Shed with pitched roof
Since large barns are not built, you can use a pitched roof, but it is necessary to ensure a minimum angle of inclination for a particular type of roofing material.
For example:
- Slate will require at least 20 degrees.
- For a soft roof, you can get by with 5 degrees.
- For corrugated sheeting, this parameter is 8 degrees.
- For tiles this is at least 25 degrees.
If a barn is being built from concrete blocks, then a support beam-mauerlat should be installed and secured on opposite walls. As for frame structures, the role of support beams is performed by the upper strapping beam.
Rafter boards are installed starting from opposite walls. The pitch of laying the rafters depends on the size of the beams, so for greater reliability, all elements are connected in pairs. Fastening to the support beam is carried out using a tie-in, as well as using metal plates.
The final stage is installation of roofing material:
- Slate is fastened with nails to the upper wave, metal tiles - with roofing screws to the lower one.
- The sheets are laid with longitudinal and transverse fly patterns.
- For better sealing of joints, EPDM rubber gaskets are used.
- The minimum weight of the roof is 50 mm for slate, 100 mm for thin sheet materials.
Barn with gable roof
The technology of assembling a rafter system of 2 slopes is no different. The only differences are that the ridge knot is formed:
- With an overlay at the top of the corner.
- With additional spacer bolt.
- With fastening of rafters at the point of the ridge run.
- Attached to the top of the ridge beam.
Although a gable roof is more complex, it is more resistant to wind loads. In addition, there is enough space under the roof to be used for various purposes.
Assembly diagram of a gable roof of a barn, dimensions 3.5x3.65 m
about the village - MULTIFUNCTIONAL BARN / HOW TO MAKE IT WITH YOUR OWN HANDS EASILY / agricultural vlog / EVERYTHING IN YOUR MIND
Watch this video on YouTube
Do-it-yourself utility block 5x3
Watch this video on YouTube
▲Frame house $500\Do it yourself frame house for 30 thousand rubles
Watch this video on YouTube
Roof options and materials
The purpose of the roof is to protect the interior from atmospheric influences. The roof should not let water in and ensure its outflow. The roof of a wooden shed is not as important a part as the roof of a house, nevertheless it must fulfill its function.
The roof of a small building can be single-pitch or gable. The first option has the advantage of being easy to manufacture, but it is only applicable for small-width sheds. Creating a gable roof will require more material and time, but it drains water better, which will affect the durability of the structure as a whole.
Roofing felt and other rolled materials can be used as roofing material for a small shed. You can create a full-fledged roof using classic slate or modern sheet materials.