It just so happens that in our country wood is perhaps the most affordable material. The price is reasonable, plus any home craftsman can work with wood. Next, we will look at how to make steps for a wooden porch with your own hands, starting with the calculation of the porch and ending with finishing.
How to make steps to a house made of wood - tips for an amateur
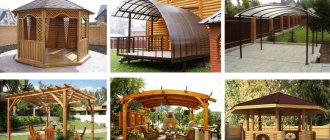
Projects
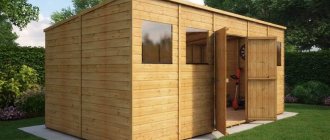
Metal porch designs are very diverse.
It’s one thing to design a project for a country house, another thing for a representative country private house, where a street staircase can lead straight to the second floor level. When drawing up drawings of a future structure, it is important to comply with all the parameters necessary to make it convenient and safe to use. So, you need to take into account that the depth of the platform should be one and a half times the width of the door at the entrance
The width of flights of stairs is usually 110 cm.
The depth of the step should be about 30 cm in size. For a summer house or emergency entrance, steps that are slightly narrower are suitable.
When drawing up a project, you need to take into account not only the porch itself, but also the railings, as well as the canopy over the door
It is important to correctly calculate the required number of steps, determine their size and the height of the stairs
It should be taken into account that making a forged structure with a canopy is quite difficult, unless the owner of the house is a master of artistic forging himself. You can go the route of purchasing finished products, including those made from special designs.
Not only a special pattern on the railing, but also an unusual canopy will help emphasize the individuality of the porch. Its structure can be with a single-pitched surface or a gable one. The canopy can be made in the form of a smooth bend, as well as in the shape of a tent. If it has forged elements, it is complemented by metal supports, which can have an intricate appearance and work on the overall style of the house.
A glazed terrace also goes well with metal. This version of the porch is also very practical, since it is comfortable to relax on it in any weather until late autumn.
And it is also quite justified to complement the porch with a wrought-iron lantern, which, in addition to its decorative function, can perform a direct function - to illuminate the porch and the front door.
To make the porch unusual, you can complement it with an openwork metal arch, which will create the impression of the house as a fairy-tale castle.
Requests for porch design can be very bold and are limited only by the size of the customer’s wallet.
How the idea came
In summer there are mosquitoes, in winter it is cold. And if you have to go several times, and even go to the toilet at night, then the problem becomes insoluble.
In order not to experience the inconvenience of going into “outer space,” it was necessary to build a staircase inside the house. The problem is that it takes up a lot of space.
And I came up with an idea: to make the stairs steeper, and underneath it to arrange a toilet room, install a toilet, a sink and a sink.
As you can see in the photo, there is quite enough space, thanks to the steep stairs.
It turned out pretty good!
If you like such a table for a circular table, then you can make it from the drawings and materials below.
Simple do-it-yourself entrance staircase made of timber
It's so easy to make an entrance staircase! It’s not easy to do, but very simple!
A couple of photos of how it was done.
It turned out pretty good!
A simple and reliable ladder!
See also:
- A simple staircase on a metal frame to the basement with your own hands
- Wooden staircase on a metal frame from Mikhail Alexandrovich
- Multifunctional homemade bed for son
- Carved front pillar in the shape of a cat for the larch staircase
- Homemade staircase to the garage
EuroSamodelki.ru is a huge number of homemade products, which are accompanied by detailed illustrated instructions for self-production. There are already more than 4,500 homemade products in our catalog. Join us, join our social groups VKontakte and Odnoklassniki. We are waiting for you! Do something useful for yourself, for your home, for your loved ones.
Make homemade things with your own hands like us, do better than us!
Before starting assembly, you need to make a preliminary calculation and make at least an approximate drawing, indicating on it all the dimensions of the stairs.
Basics of designing a wooden veranda
How to make a project and build a wooden porch with your own hands
A porch is a platform of different sizes with steps located near the entrance to the house. The design of the extension depends on the architectural design of the house, the height of the foundation, landscape features, and design vision. This may be one or several platforms, with one entrance, or stairs on two sides.
Porch structure: dimensions, height
The porch consists of a horizontal platform, to which inclined marches (steps) lead. The optimal march width is 1200*1450 mm. It consists of bowstrings (bars located at an angle), steps and railings. The width of the string corresponds to the width of the steps, and its thickness is 60-70mm.
The steps consist of a tread (horizontal board 270-320mm wide) and a riser (vertical board 150-180mm high). The optimal width of the porch is 1.5 times the width of the front door, the height of the railing is 900 mm;
Please note: the most comfortable stairs are those with wide treads and low risers.
All components of wooden stairs are attached using screws, nails, staples, and the handrails to the balusters are additionally fixed with waterproof glue.
Scheme of the structure of a wooden staircase
The porch stairs must have internal and external supports. A wooden console, which is fixed to the crown of the log house, can act as an internal support. For the exterior, you can expand the foundation of the house (fill in a monolith, or drive in wooden pillars). The site itself is made with a slight slope towards the street (this way precipitation will not accumulate on the extension).
When forming the flooring of the site, you should not fit the boards tightly together; rainwater will flow through the gaps between them.
If the staircase leading to the house is small (2 steps), you don’t need to build a fence, but if it is larger, you need railings. They must stylistically match the structure of the house and encircle the steps and the entire landing.
To protect the veranda from precipitation, it is necessary to build a canopy over it. It can be attached to one of the roof slopes and covered with the same material as the roof of the house.
The site can occupy part of the house, be located on one or more of its sides, and even extend beyond its perimeter.
Remember: in order not to interfere with the opening of the front door, the dimensions of the area on the front side should be within 120-180 cm.
A large wooden porch can already be called a terrace
Form
There are no restrictions in choosing the shape of the veranda. The main thing is that it harmonizes with the overall style of the house and fulfills its main functions.
Option for connecting a porch to a wooden house
The extension can also be angular, semicircular, or placed parallel to the wall of the house. The entrance can be direct or located on the side.
Mini veranda located in a semicircle
Installing wooden steps on a metal staircase
Holes are drilled in the metal frame of the stairs every 15 centimeters. Make an indent of 2 centimeters from the edge. Wooden steps made of oak or other wood will be attached to these holes. During the welding process of metal elements of a flight of stairs, some inaccuracies may occur, resulting in height differences. Such defects can be easily corrected by gluing the backing onto the frame, which can be plywood.
To securely fix the substrate, use self-tapping screws. To brighten up the cold metal, wooden steps are made with a protrusion.
Stages of staircase installation
How to make a porch from blocks with your own hands
Stairs to the porch made of wood
Installation of stairs for the porch of a wooden house is carried out in the following sequence:
- The foundation is being poured;
- Stringers are installed and fastened;
- Steps are installed;
- Fencing of the flight of stairs is constructed, if necessary.
Pouring the foundation
In order for wooden porch stairs to be reliable and durable, a foundation is needed.
He can be:
Columnar. In this case:
- Pits are dug, the depth of which is 800 mm;
- A layer of sand is poured;
- A layer of crushed stone on top;
- The racks are inserted strictly at an angle of 90° to the bottom step;
- The pit is filled with concrete mortar.
- A hole is dug 500 mm deep;
- A layer of sand is poured;
- Crushed stone is laid;
- To increase the strength of the foundation, it should be reinforced;
- Concrete is poured.
Wooden stairs to the porch are most often built on a columnar foundation. It is easier to fit it into the design of the site, and the structural safety margin will be sufficient. Slab has great strength, it is better to use it for very powerful and fairly heavy structures.
Installation of stringers
If a wooden staircase is being installed, a porch to the house already exists, and stringers can be installed without any problems.
The lower part of the element is installed on a previously prepared foundation, and the top is attached to the porch or to the foundation of the house. Stringers or bowstrings are attached with self-tapping screws to the supporting platform; nails are rarely used.
Installation of steps to the bowstring
There are several ways to attach steps to strings:
- The simplest, but not very elegant and rather rough option is to attach the steps to support bars or corners. First, holes are drilled on these parts, through which they are attached to the bowstring itself with screws or nails. Then steps are laid on them, which are screwed on top with the same screws or nailed;
- Fastening the step into the groove with the remainder. In this case, two counter grooves and a ridge are made in the step and in the bowstring. The step is then inserted into the string. The disadvantage of this fastening is that if the structure is frequently loaded from the side of the groove, over time the wood fibers may peel off, which can lead to breakage of the step;
- The most reliable and beautiful type of connection is the middle knitting, which has several subtypes:
- connecting steps with dowels is one of the simplest methods of fastening, but in this case the strength of the entire structure will depend directly on the reliability of the dowels themselves. To increase their strength, it is better to fasten each side of the steps to three elements, and choose their diameter 10 mm;
- connecting the parts into a wide groove on the bowstring, into which the step is driven at the end. This is one of the most reliable and popular methods for installing steps on strings.
Options for attaching steps to strings
Attaching steps to the stringer
When installing a riser to a stringer, the fasteners should not only secure the steps from displacement, but also play a decorative role, masking the fastening itself.
- The easiest way is to drill holes in the risers at the places where they are attached to the stringer and secure them with powerful self-tapping screws. To hide traces of fastening, the self-tapping screws should be screwed into a countersunk position, and for a better effect, it is better to drill a shallow hole with a large diameter and then install a polymer plug.
- Stair steps can be installed on dowels. In this case, holes are drilled in the stringer and the step to match the diameter of the dowels, after which the steps are glued. A serious drawback of this method is that due to the heavy load on the stairs or if the steps are too wide, the fastening will not be very durable.
- On the stringers you can attach pre-prepared fillies to which you can attach the steps.
Fastening the railings
Installation of railings
Railings make any staircase more attractive and give it a finished look. To avoid injuries to your hands, the handrails must have a smooth surface and be comfortable to slide. The main elements of the railing: posts and handrails.
The distance between the posts should not exceed 100 mm. The upper part of the racks is connected to the handrails. For this, a tongue-and-groove type connection is used.
The rounded parts of the handrail of the structure are tightened with countersunk screws. At the bottom, the racks are attached to the ladder or inserted into special sockets.
How wooden stairs and a porch are made and installed, all the details and nuances of the processes, are shown in detail in the video in this article.
After you have installed your own wooden staircase for the porch, you must not forget to properly care for it and periodically treat all elements with protective agents.
Conclusion
Now you know how to make wooden steps for a porch in two simple ways, plus you can design a porch yourself from any other material. In the video in this article you will find valuable advice from recognized masters. If you have anything to add or have any questions, welcome to the comments.
Wooden porch steps photo of original models.
Porch project
How to make a concrete porch with your own hands, photo instructions
Facade design includes the design of the entrance to the building. The porch is a functional and decorative element. It is the design of the wooden porch of the house that gives the first impression of the home and its owner.
The area in front of the house can be of any size, open, fenced, or lightly glazed. The main thing is that in style it forms a single ensemble with the house.
The type of porch depends on its purpose:
- Protection of the entrance from precipitation;
- Organizing an outdoor recreation area;
- Additional indoor space for a hallway or winter garden.
Ways to design the area in front of the entrance
| View | Description |
| Small porch with fencing | A small porch to the house is made of wood, does not require a deep foundation, and may be without a fence. |
| Terrace | An open extension without windows or walls. The fence is light, lattice. Usually has a roof. |
| Patio | Large recreation area near the house. There is no foundation being made for it. Can be without a roof, with a roof or a sun grill. |
| Veranda | Summer extension on foundations, sides open or glazed. Not heated. A closed veranda acts as a vestibule, preventing cold air from entering the house when the door is opened. |
Calculation of the porch area
Making a wooden porch begins with determining the area it occupies. It will consist of the dimensions of the area in front of the door and the flight of stairs itself. The determining quantities in the calculation are the width of the door and the height of the base.
- The standard width of the entrance door is 90 cm. According to building codes, the platform should be one and a half times wider than the door (90 x 1.5 = 135 cm). We get a minimum platform width of 135 cm.
- The length of the area along the house depends on the availability of space in front of the entrance and the architectural design of the facade. It can be like a staircase, or located along the entire wall. There are corner terraces (along two walls or along the perimeter of the entire house).
- The horizontal plane of the step is called the tread, the vertical plane is called the riser. Let's say the design of a wooden porch of a house provides for a plinth height of 65 cm. Let's make a calculation for this value. It is recommended to make the platform 5 cm below the level of the finished floor (for free movement of the door).
- We need to climb 60 cm. According to the standards, for the convenience and safety of climbing, the step should be 15 x 30 cm (shown in the photo). The flight of stairs will consist of 4 steps (60: 15 = 4 risers).
- The first step will be the platform in front of the door. Three treads will be 90 cm long (30 x 3 = 90 cm). 2 people must pass on the stairs, so its width must be at least 90 cm. The minimum area of a flight of stairs of 4 steps will be 90 x 90 cm.
Typical step sizes
Dimensions and drawings for folding stepladder
A do-it-yourself wooden stepladder should be made safe and convenient for ascent and descent.
Optimal criteria for placing crossbars:
How to choose the right steps for a shelving stepladder
Stepladder height according to drawings and in reality
How to make a stepladder at the correct and safe height? Basically, the height of the ladder ladder is 200 - 210 cm at the top, where the supports are connected to the strings. The height of the last crossbar should be approximately 30-40 cm lower so that the ladder remains stable. The functional height of a stepladder made by yourself will be approximately 150 - 170 cm. Higher is risky, you can lose stability. You can reach the ceiling, a lamp, or hang a picture in any case.
It is worth noting that structures with dowels last longer and are more integral. Wooden nails also have disadvantages:
Wooden porch
Wooden porch
Wooden porch construction diagram
Building the foundation
Foundation for the porch
A pile foundation is the best solution for a wooden house porch. Such a foundation is simple and quick to install, but at the same time very reliable.
We dig holes at the points where the pile is installed - in the corners of the future porch and along the length of its edges in increments of 80-100 cm. The depth of such holes is from 80 cm. Optimally, below the freezing point of the soil.
We treat the support beam with an antiseptic, wrap its lower part with roofing felt, and then insert it into the holes. Fill the vertically aligned timber in the pits with concrete.
Let the concrete harden and proceed to further activities.
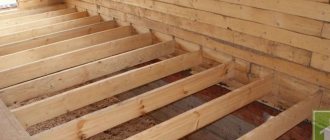
We install logs
If necessary, we cut off the tops of the timber so that all the piles are at the same level. We calculate the height of the supports so that after laying the platform between it and the front door there remains approximately a 5-centimeter difference in height.
We attach the logs to the supports and the wall of the house in a suitable way (with self-tapping screws, dowels, etc., depending on the wall material).
Making a kosour (string)
Making a bowstring (stringer)
Installation of wooden porch stringers
We begin to manufacture the load-bearing part of the stairs. We will attach steps to it. That is, the string is the side edge of the steps.
To make a bowstring, we use wooden boards with a thickness of 5 cm. We take the board and draw steps on it. We cut out the blanks with a jigsaw or saw.
We fasten the string with the lags using a tongue-and-groove connection.
We design the platform and steps
Drawing of the lower steps of a wooden porch
We screw or nail the deck sheathing boards to the joists. If desired, we lay some kind of finishing coating on top of the boards - we focus on our preferences.
We attach risers and treads to the string. We start working from the bottom step. The procedure is simple: fix the riser, attach the tread to it, and so on until the end. For fixation we use self-tapping screws or a tongue-and-groove connection.
Manufacturing of the platform and steps
Washed down the stringer of a wooden porch
Fastening steps and risers
Arrange the railings and canopy at your discretion. Installation instructions for these elements have been provided previously. The sequence remains the same, you just need to replace the supporting elements and cladding parts with similar products made of wood or other preferred material.
Wooden porch
Good luck!
Installation Rules
In order for the assembly of a wooden structure to be correct, the craftsman will need to not only install the dowels correctly, but also prepare the necessary tools, in particular, a drill. The step-by-step instructions for the procedure are as follows.
If a crack develops in the dowel during installation of the beam, the product is drilled out and the operation is repeated again.
In order to qualitatively assemble a structure from timber using dowels, you should adhere to certain rules. Expert recommendations for correct and reliable fixation of wood fasteners:
Sometimes purchased dowels may not be enough to build a structure made of timber . In this case, the devices can be made with your own hands by turning them on a machine from high-quality wood. The material should be chosen that has no knots or defects. It is strictly not recommended to make dowels from hygroscopic material.
During work , you should ensure that the diameter of the rod exceeds 2.5 cm. The length of the dowel can be selected according to your own preferences, usually it is 150-200 cm. It is important for the master to choose the right shape and size of the fastener. In the case of high-quality assembly of a timber structure and the use of high-quality dowels, the consumer can count on a long service life of the structure.
Technology for constructing a wooden porch
The construction of a veranda is the final stage in the construction of a house. How to make a wooden porch yourself? This is quite possible. We offer you instructions on how to build a wooden porch with your own hands step by step.
Sequence of work:
- calculations and planning;
- preparation of drawings, selection of materials;
- frame formation;
- construction of the site.
Drafting
How to build a terrace correctly? To do this, you first need to draw up a project for the porch of a wooden house.
Advice: the site should fit into the general design of the house and have the same foundation.
If the terrace is being built as an extension, then it is necessary to calculate the size of its base in order to lay the foundation of the required depth. You should also calculate the dimensions of the stairs and the approach. The average length of a step is 1200-1500 mm, height - 150 mm, width - no more than 300 mm. The distance from the stairs to the canopy should exceed the entrance door by 200-300 mm.
Example drawing
Selection of materials
In order to build a wooden porch with your own hands you will need the following materials:
- beams for the construction of beams and rafters measuring 100*200 mm;
- boards for the platform, steps, railings and canopy (section 50*150-200 mm);
- cement, sand;
- tools (saw, hammer, nails, tape measure, level, shovel, solution container).
For the construction of a veranda, larch and spruce wood is suitable.
Foundation construction
The basis of any building is the foundation. The best option for a wooden platform is a foundation on piles. It is of simple design and low cost. You can build such a foundation for the porch of a wooden house with your own hands in a short time.
Remember: the durability of a wooden building depends on the correct processing and preparation of the wood. It must be well dried before being treated with a special compound to protect it from insects and moisture.
Along the perimeter of the future extension, holes are dug for piles at least 80 cm deep. Then piles are installed in them, the holes are covered with earth and compacted well.
Installation of piles - do-it-yourself wooden porch, photo
To make the base stronger, the supports can be filled with concrete. All subsequent work is carried out after it has completely hardened.
Diagram of how to make a supporting wooden frame
Caution: an insufficiently deep foundation without waterproofing can cause wood to swell and rot from groundwater.
Next, the supports are leveled in height and the preparation of cuts begins. To do this, nests are hollowed out in the logs, in which the foundation piping will be fixed with the help of spikes. For reliability, the structure is also attached to the wall of the house.
A reliable connection between the foundation of the veranda and the wooden house minimizes the expansion joint between them
Making stairs
Next, they begin to form the bowstring. The string can be of several types: with cut-out ledges (simple to make), with inserted or embedded steps.
Types of bowstring
To form identical recesses, a pattern is made. One side corresponds to the size of the tread, and the other is the riser. Then markings are made on the board.
Preparing to install steps
For reliability, wooden bowstrings are connected to the base logs. This is done using the “tenon and groove” method: tenons are cut out of the bowstrings and inserted into logs with grooves.
Tip: this structure can be made of metal, and also additionally reinforced with metal brackets.
Various options for how to attach a wooden ladder
Site installation
This is the simplest stage of constructing a wooden porch. Floor boards are mounted on the finished base.
Laying the floor of the site
Installation of steps
Fastening risers and treads can be done using self-tapping screws, or using the tongue-and-groove method. This is how all the parts of the staircase are connected together.
Formation of steps
The video will clearly demonstrate how to build a wooden porch with your own hands:
Decor
After the wooden porch is almost ready, you should take care of its design. Railings and a canopy can serve as decorative elements for finishing the porch of a wooden house. They will not only decorate the house, but also make the structure safer and protect it from bad weather.
The design of the porch of a wooden house may include carved railings and carved platbands. You can also experiment with balusters and add forging elements.
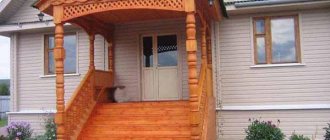
Exquisite carved wooden porch
Materials and tools
To build the simplest staircase, a saw, hammer and fasteners will be enough. But if you want to get a more reliable and aesthetically attractive wooden structure, the list of what you need will have to be expanded. You will need:
- not too heavy hammer, weighing up to 250 g;
- a saw straightened and comfortable - there is a lot of work to do for it;
- an ax or chisel, necessary in a number of operations;
- brush and composition for processing wood material;
- nails 80-90 mm long. You can use screws, but practice shows that using nails the product is no less durable, but it is still easier to fasten with them;
- sandpaper or sanding machine;
- tape measure with marker or pencil;
- studs and wrench for fitting tie rods on a wooden ladder.
In order to make a simple version of the design, nothing else is needed. If you decide to go further, figure out for yourself what tools you are missing.
To strengthen the structure, it is also recommended to install stringers in the cuts of the load-bearing floor beam.
Design and arrangement of the foundation
Before building a porch for a wooden house, you need to take care of the underground foundation for it. Ideally, the foundation for the porch of a house is integral with the foundation for the wooden house itself. If you install a porch without a foundation, the structure will “walk” under the influence of seasonal soil movements, which reduces the strength and durability of the wooden structure.
A staircase to a wooden porch can be mounted on the following types of foundations:
- columnar - the number of supporting elements made of monolithic concrete, brick, asbestos-cement concreted pipes and other materials is selected depending on the dimensions of the structure;
- slab - a monolithic slab made of reinforced concrete does not need to be tied to the foundation of the house and is suitable for the construction of heavy structures;
- tape - economical compared to slab, can withstand high loads, needs to be tied to the foundation of the house in order to avoid destruction of the porch due to uneven loads during soil movements.
The binding of the strip foundation is carried out in several stages:
- a pit is being prepared for a strip foundation adjacent to the foundation of the house, and the depth of the foundation should be the same;
- in the foundation of the house at the place where the porch is installed, holes are drilled in increments of about 50 cm, into which expansion anchors on studs are inserted;
- the formwork and reinforcement frame of the porch strip base are installed in such a way that the ends of the reinforcing bars fit the expansion anchors, and the formwork wall stands 20-30 cm from the foundation of the house;
- the strip foundation is poured and left under load for a year (or winter);
- the protruding reinforcement is attached with an expansion anchor using welding or twisting, then the gap between the foundations is filled with concrete mixture.
If the structure of the porch of a wooden house is relatively light and the steps of the stairs rest on stringers or bowstrings, it is enough to install. In this case, reinforced concrete pads are mounted under the supporting elements. It is the easiest and fastest way to build such a foundation for a porch with your own hands.
Calculation of stair steps
The flight of stairs is calculated based on the average step length of a person. There are certain formulas for carrying out calculations that can be used to calculate the height and depth of a march element. But there is one rule - when walking, a person must place 1/3 of his foot on the tread of the march. The generally accepted depth should be 20-30 centimeters. A smaller size will make going down the stairs much more difficult.
In their home, when building stairs, they resort to the following trick - they take the shoes of all household members, calculate the average length and, by adding 2 centimeters, get the depth of the tread. If the calculation led to a small depth (in the case of a steep staircase), then it is possible to provide an overlap on the steps, which will prevent the foot from sliding and prevent a person from falling on the stairs.
This is interesting: the optimal height of steps.
Wooden porch for home
At first glance, the porch looks like a complex and figured engineering structure, but in practice, building it with your own hands is quite simple. As in any business, the construction of a wooden porch has its own rules and regulations.
As a rule, few people have any idea what a porch should be like, even in general terms. Therefore, the owner needs to at least make a sketch, linking it to the actual building. But it is best to make a full-fledged drawing - with dimensions, in the correct scale, indicating materials, etc.
The main operational characteristic of a porch is not beauty, but reliability. After all, people of different weights, ages will walk on this structure, and most importantly, children will run. The porch is the most loaded element of the entire house; every day it is exposed to the most diverse loads, impacts, and atmospheric influences.
Treatment of steps with protective agents
Steps made of larch or oak are quite resistant to external influences. But there are several techniques that can further improve the protective properties of the material. Oak steps can be varnished. This adds shine and prevents minor scratches on the surface. Temperature changes and humidity have a negative impact on wooden steps; they can become deformed. Varnishing the surface eliminates such a nuisance.
It is better to use polyurethane mixtures as varnish, which can withstand significant damage. The varnish is applied in three layers, but first a primer is applied.
The next operation to extend the life of the product is wood impregnation. At the stage of selling wooden products, no one can say for sure in what conditions they will be used: in dry places with high loads or wet conditions.
Positive effects of impregnation:
- creates a surface wear-resistant layer and improves the performance of wood (not so important for steps made of larch and oak);
- reduces the sensitivity of the material to ultraviolet radiation - paints and varnishes last a long time and do not fade;
- improves the moisture resistance of wood.
Advice! A board treated with paint and varnish coatings and various impregnations does not allow air to pass through it well, so unpleasant odors will accumulate in the room more quickly. This drawback can be eliminated by good ventilation of the room.
Kinds
Metal porches can be divided into many types depending on the shape of the stairs and canopy, as well as the size of the platform. Such diversity opens up great opportunities for numerous design and functional solutions for this component of the entrance group.
The upper landing of a street staircase can be:
- terrace, that is, a large open area fenced with railings;
- veranda - closed terrace;
- patio - an area most often without fencing, but with a canopy.
Unlike facade metal staircases that stretch all the way to the roof, and also have a purely technical purpose and a corresponding “industrial” design, even if they are spiral, such structures for the porch can approach the site in different ways and look much more elegant.
This is a perpendicular location with respect to the entrance, and a location on the side or on both sides at once. And also the staircase can have several flights and encircle the central platform. Typically, these types of designs are part of luxury, expensive homes.
Types of stairs to the second floor in a private house
If we talk about the structure, there are three types of interfloor stairs:
The most compact interfloor stairs
Yandex.RTB RA-1479455-2
- Screw or spiral. They take up the least space, look good, but are not very convenient to use. Most often used as additional ones.
- On pain. The steps are attached to special metal bolts - bolts. There are no heavy fastening elements in the design, which is why the structure visually looks light. Stairs on rails - they look very interesting
- Marching. The most common type. May consist of one, two or more marches (elements). If there are several flights between them, platforms are made - rotating or not - depends on the choice of the owners, but is mainly determined by the dimensions of the room and the allocated area.
There are two types of marching ones - on stringers and bowstrings
Yandex.RTB RA-1479455-7
All these structures can be made of metal, wood, concrete, glass, marble and other decorative stones, and often use combinations of these materials. But most often, the staircase to the second floor is made from wood, a little less often - from metal or combinations of metal and wood.
In addition, there are two types of degrees - open and closed. In open stairs there is only a horizontal part - the step itself, in closed ones - there is also a vertical part - the riser.
Steps can be open or closed
Yandex.RTB RA-1479455-3
Building elements
When making a wooden staircase with your own hands, beginners need to know what parts are included in the staircase; experienced craftsmen need to update their knowledge:
- Turning area - an area that divides the marching spans;
- Marching span - the steps of the structure run in a straight line;
- Steps – horizontal elements of a staircase;
- Riser – vertical elements;
- Baluster - supporting bars of the railing;
- Frieze steps - the first and last steps of each floor;
- Winder steps - allow you to turn the stairs;
- Bowstring - a thick side beam that connects the steps;
- A stringer is a beam that secures steps, usually either wood or metal.
Do-it-yourself wooden staircase: understanding typical designs
Very often, country houses are built on two floors or even more. And in summer cottages, where there is often an urgent need to save space for planting, a swimming pool or a recreation area, two-story buildings are also no longer a rarity. But any building above one floor already requires the installation of a staircase.
DIY wooden staircase
A wooden staircase can be made with your own hands after choosing one of the existing structures, carefully calculating all the parameters, and, of course, if the owner of the house has high, stable skills in working with carpentry and plumbing tools.
If this element is installed not in a small country house, but in a large country mansion, you need to immediately select and install a reliable and durable structure with high quality. It must easily withstand the lifting of massive and very large furniture. In addition, the staircase should be convenient for ascending and descending, especially if there are small children or people with disabilities in the house. Therefore, it is recommended to make it as flat as possible, of course, if the area of the room where it will be installed allows. In addition, for safety reasons, the stairs must be equipped with a guardrail.
To make the right choice of staircase, you need to take into account not only its design and the area of the room where it is planned to be installed. It is imperative to understand standard designs, the names and purposes of all the main parts and assemblies.
Staircase design elements
A staircase consists of one or more flights or flights. A march is the section of a staircase between two landings.
Basic elements of assembled wooden stairs
Any flight of stairs (flight) consists of a number of basic elements, each of which has its own name and functional purpose.
| Miniature | Item name | Functional purpose of the element |
| Kosour | This is a load-bearing beam with a comb cut out on top, onto which steps and risers are attached. This element must have special strength, since it bears heavy loads. | |
| Bowstring | Instead of a stringer, a bowstring is sometimes used, which also performs a load-bearing function. If a bowstring is chosen to secure the steps, then it is carefully marked so that the steps are installed perfectly horizontally. Spacer bushings or cross bars serve as a stand for them. Most often, this support is used if one of the sides of the staircase is adjacent to the wall. | |
| stage | Any staircase cannot do without steps, which are attached to one of the selected load-bearing beams (stringer or bowstring). | |
| Radius stage | This type of step has not a straight, but a curved leading edge. The parts can be semicircular, have rounded corners, or be sawn in a “wave”. | |
| Winder stage | This type of step has a non-standard shape and is installed at the beginning of a flight of stairs. | |
| Riser | This element is optional, but you need to take into account that it gives the staircase increased strength, since it is a part that supports the middle of the step. They cover the space under the step. The riser is secured to the spacer bushing. | |
| Radius riser | The radial type of riser is installed under steps that have a semicircular shape. | |
| Radius curved riser | A curved riser is installed under the platform between flights or under steps that have the appropriate shape. | |
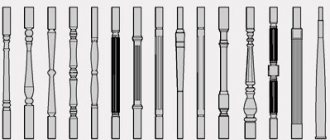
| Baluster | Balusters are posts supporting handrails, which create a side railing for the flights of stairs. They can have different shapes, depending on the style of the staircase. | |
| support pillar | Support pillars are installed at the beginning and end of the stairs, as well as along the edges of the platforms between flights. They are the outermost supports for the handrails and give strength to the entire fence. | |
| Ball | The balls are installed on top of the support pillars. They are decorative elements. In addition, they cover the sharp edges of the bar from which the post is made. | |
| Handrail | It is impossible to do without this element when constructing a staircase, especially if the structure has several flights. The supports for the railings are support posts and balusters. This part must have a perfectly smooth surface so that when holding it, you do not injure or splinter your palm | |
| Spacer sleeve, block | Stands-bars are necessary in the design of any staircase that has two or more flights. Even if stringers are used to install steps, support bushings are needed when installing platforms between flights. |
Prices for staircase elements
Elements of stairs
Main types of staircase designs
Always the first thing to consider when choosing a staircase design is the size of the area allocated for it. And the second criterion can be called the convenience of the design, the comfort of ascending and descending along it, especially if the staircase will be used in everyday life not just once, but constantly. The third thing that should influence the choice is the aesthetic appearance of this interior element, since it should fit perfectly into the design style of the room.
Stairs made of wood are divided into two main groups - marching and spiral. To understand what they look like and what they are, you need to briefly consider each of the options.
Spiral staircases
Spiral staircases have a rather complex design, but their main advantage is that they take up a minimum of usable space in the room.
Spiral staircases take up minimal space, but are not always convenient to use
It must be said that they are not installed often enough compared to marching ones. This is explained simply - because they are much more difficult to assemble, and it is not very comfortable to climb up and down them, and even more so to lift large-sized pieces of furniture or household appliances to the upper floor.
At the same time, they also have a lot of adherents - screw structures can become a real decoration of the interior, because they have very elegant compact shapes.
To reliably construct a spiral staircase structure, you need to make a lot of complex, precise calculations, otherwise you can get serious injuries during its operation.
The article is largely devoted to staircases. And yet, for those who love DIY at home, here is a detailed video instruction on assembling a spiral staircase. By the way, the author shares his first experience in this area - there is an opportunity to discuss with him.
Video: first independent experience in making a spiral staircase
Marching stairs
The main design is more reliable than the screw design. Despite the fact that any of the flight stairs occupies a much larger area, they are built much more often.
From the point of view of convenience, of course, flight stairs win
Such staircases can have several flights, however, in small private houses, one- and two-flight options are most often installed. These interior elements also feature a wide variety of designs.
So that the staircase occupies as little usable space as possible, rotating double-flight structures are often chosen. The turns of the stairs can be arranged at an angle ranging from 90 degrees to 180.
If the layout of the room allows (and sometimes even “requires”), then the staircase can have a curved design. When planning the location of the stairs, the main thing is to create comfortable conditions for the residents of the house to enter it.
A smooth turn in the design of a curved staircase is ensured by installing turning steps.
Such steps are also sometimes installed in double-flight staircases instead of platforms between them.
To imagine what such stairs and their elements look like, you need to consider the most popular types in the interior.
Ordinary one-flight staircase
A single-flight staircase is the simplest option, as it has a fairly simple design. The flight of stairs can be located against the wall or in the middle of the room.
Very nice, simple one-flight staircase
As a rule, the area located by a flight of stairs is also used functionally. For example, if the staircase is fixed to the wall, then by covering the area under it with a partition and installing a door, it is quite possible to get a small utility room for storing old things or tools.
It should be noted that this type of staircase to the second floor is the most durable, as it has reliable support in the form of walls.
Single-flight curved design
This type of staircase is mainly used in rooms with a large area, as it should even emphasize the spaciousness of the hall. This design is not suitable for small country houses, as it takes up quite a lot of space and is unlikely to fit into the interior.
Single-flight curved staircase
The staircase turns out to be large due to a smooth turn and steps widened on its outer side (it even looks like a spiral one), but it is these features that give it respectability, so this element of the interior will decorate the spacious hall of a large mansion.
Single-flight curved staircase in a rectangular opening
If, when planning the construction of a house, the location of the stairs is taken into account, then for climbing to the second floor the best option would be a single-flight curved structure that fits well into a rectangular opening. It is quite compact and aesthetic, and also quite comfortable for ascent and descent. In addition, a small storage room can also be installed on one of its sides on the ground floor.
One flight of stairs in a narrow opening manages to bend almost 180 degrees
Single-flight with lower turning steps
A single-flight staircase with rotating lower steps is sometimes necessary in a room due to the specific layout of the room, or to maintain the chosen architectural style. For example, if there is a window on the wall designated for the installation of a staircase landing, which you do not want to cover with a two-flight structure.
Here the required direction is set by the lower turning steps
Due to the smooth rotation of the lower steps, and the railings and handrails repeating this direction, the staircase becomes a real decorative adornment of the created interior, without losing any functionality.
Two-flight simple design.
A staircase that has two flights with a turning platform between them is convenient in that it can be installed above the front door, thereby saving space and limiting the hallway area.
Compact two-flight staircase - convenient when there is a lack of space
In addition, it is quite compact, and the space under it can also be used to arrange a small closet.
This design is quite reliable, simple and suitable for almost any interior, if you choose the right color and shape of the fence balusters for it.
L-shaped double-flight design
This staircase also has two flights, but its location perfectly saves space in the room, since the entire structure is compactly located in a rectangular opening, along two walls perpendicular to each other. The space under it can be used to install one of the pieces of furniture or to install an entrance door.
Two flights along the walls, located at right angles to each other
The staircase is easy to use, compact, and fits perfectly into the interior design of the room.
U-shaped two-flight staircase with turning steps and an upper platform.
This design is installed in luxurious country mansions with a very large hall area. As can be seen from the massiveness of the structure, it is not suitable for country houses, and its installation in them will simply look ridiculous.
This is more likely from the interior of some palaces
Three-flight staircase with two landings
A three-flight staircase structure is often installed precisely in order to save space in the halls, but in order for its elevation angle to be convenient, a high ceiling height is required.
Sometimes the optimal solution is to install a three-flight staircase
If at the place where it is installed there is no overlap between floors, then the area of the second floor will be greatly reduced.
This staircase option is also more suitable for a mansion with spacious rooms.
Staircase calculations
If the location for installing the staircase structure has been determined, then before starting to manufacture parts for the selected option, it is necessary to make accurate calculations, make a drawing and put all the resulting parameters on it. If you are not sure that everything will work out perfectly, then you can entrust this work to specialists in the design and manufacture of wooden stairs, working in specialized companies.
Stair height
To determine this value, it is necessary to measure the distance between the floor levels of the first and second floors. Let's say the ceiling height on the first floor is 2700 mm, and the thickness of the ceiling between floors is 300 mm. This means that the total height of the stairs will be:
H = 2700 + 300 = 3000 mm.
Riser height
Experts have calculated the approximate standard height of the riser, which is based on the size of a person’s step, which is most convenient from an anatomical point of view. This height can vary between 150 and 200 mm. It is considered optimal because if the step is made lower, then when climbing the stairs the step will be lost, and you can simply stumble and fall. With a higher riser height, it will be much more difficult to climb up the stairs and uncomfortable to go down.
The table shows the calculation data - if you wish, you can simply use them:
Riser height depending on the total height of the staircase and the planned number of steps
| Floor height in mm | Number of steps (pieces) | |||||||||||||||
| 11 | 12 | 13 | 14 | 15 | 16 | 17 | 18 | 19 | 20 | 21 | 22 | 23 | 24 | 25 | 26 | |
| 2100 | 191 | 175 | 162 | 150 | 140 | 131 | 124 | |||||||||
| 2400 | 200 | 185 | 171 | 160 | 150 | 141 | 133 | 126 | 120 | |||||||
| 2700 | 193 | 180 | 169 | 159 | 150 | 142 | 135 | 129 | 123 | |||||||
| 3000 | 200 | 188 | 177 | 167 | 158 | 150 | 143 | 137 | 130 | 125 | 120 | |||||
| 3300 | 194 | 183 | 174 | 165 | 157 | 150 | 144 | 138 | 132 | 127 | ||||||
To correctly calculate the number of steps, the average riser height is usually taken based on the standard, which is approximately 175 mm.
Number of steps
Knowing the height of the stairs and risers, you can calculate how many steps there will be along the entire height of a single-flight staircase. To do this, the height of the stairs must be divided by the height of the riser, the result will be the number of steps.
For example, in this case: 3000 : 175 = 17,1
Next, the data is rounded to the nearest round number. In this case, there are 17 steps.
Step width
In order to avoid accidental injuries on the stairs due to poorly chosen width of the steps, it is necessary to carefully calculate it. Many years of practice have proven that this important element of the staircase should not be narrower than 220 ÷ 230 mm and wider than 400 mm.
And yet – what width should you choose? There is a certain proportion that is most optimal. So, in order to calculate the exact size of the step width, you can use the following safety formula, taking as a basis the average width of a person’s step, which is equal to k = 600-640 mm.
A visual representation of the so-called “safety formula”
The formula looks like this:
b = k – 2a
a is the height of the riser;
b is the calculated step width.
k – as already mentioned, the average step length.
Since two values from the formula are known, you can easily calculate the third value by substituting numbers instead of symbols.
b = 640 – 2 × 175 = 290 mm
A step width of 290 mm will be most comfortable for going up and down the stairs.
Stair width
The width of the staircase, in principle, depends on the area allocated for this architectural structure and on the preferences of the owner of the house, so we can say that it is allowed to any. However, there is an important caveat: safety rules require that in order not to impede the evacuation of people in emergency situations, the span width should not be less than 800 mm. And for comfortable passage of residents and carrying pieces of furniture, the most optimal width for the stairs of a residential building is considered to be from 1000 to 1500 mm.
To make it easier to maintain proportions and to maintain structural rigidity, experts advise starting from the multiple of the width of the march to the width of the step.
Plan length of the staircase
To calculate the length of the stairs, you need to use two already known values - the number and width of the steps. To do this, the width of the steps is multiplied by their number.
In the example we are considering this will be:
F = 290 × 17 = 4930 mm
It turned out to be almost five meters - this is a fairly long staircase, and if you arrange it in one flight, then you need a room of at least six meters.
Not every house can have such open spaces, therefore, with such parameters, it will have to be done in two flights with a 90-degree turn. Between the marches it will be necessary to arrange a platform, which, however, can be replaced with turning steps.
The slope of the stairs and the size of the ceiling opening
When building a staircase, you must not forget about calculating the ceiling opening, since if you do not take care of this in advance, you will have to bend over when climbing to the second floor. And this is always a fairly high risk of getting a head injury, especially for people who are not familiar with this feature of a particular staircase.
The comfort of using the stairs largely depends on the angle of inclination.
This parameter will largely depend on the slope of the stairs. The slope will largely influence the comfort of ascent and descent.
The optimal slope for walking is considered to be between 23 and 36 degrees. However, quite often it is simply not possible to arrange the staircase at a convenient angle due to the small area of the room - the steeper the slope of the staircase, the less area it occupies.
Comparative diagram of slopes of different types of stairs
For example, if a ladder can only be installed at an angle of more than 45 degrees, then it will not take up much space, but will be considered an extension. In this case, in order to save room space, a folding staircase is often made.
If the stairs are used infrequently, then perhaps a folding model will be the best choice
If it is possible to allocate at least 1.5 square meters for installing stairs on the floor of the first floor. m, then a spiral staircase is suitable, which will not take up much space (this has already been mentioned above).
If there is a clear lack of space, you will have to build a screw or one similar in design
The size of the opening in the ceiling will depend on the angle at which the flight of stairs is installed. For example, an extension or folding ladder requires a very small opening for a hatch. For a gentle, most comfortable slope, the opening will have to be made large enough, since the distance at any point throughout the entire ascent between the ceiling and the surface of the stairs must be at least 1.95 ÷ 2 meters.
The opening in the ceiling should be at such a height as to prevent head impacts
This is necessary so that a tall person can move freely along flights of stairs without the risk of hitting his head.
To do this, when marking the location of a single-flight staircase that will be installed against the wall, the following measurements are taken:
- The angle at which the staircase will be installed is determined on the wall.
- Having established the lower point near the floor and the upper one near the ceiling, connect them with a solid line - along this line the supporting elements for the steps will subsequently be attached.
- Next, on the drawn line, the place where the distance between it and the ceiling will be the required two meters is determined.
- From this point, exactly level, a line is drawn to the joint between the wall and the ceiling - it will determine one of the boundaries of the opening being made in the ceiling.
- Then, exactly at right angles to the mark at the junction, a line is drawn on the ceiling, the length of which will be equal to the width of the stairs. The second side of the rectangle of the opening in the ceiling is marked in the same way.
- On the floor, exactly under the ceiling rectangle, you need to draw exactly the same one, and then, using a plumb line, check the correctness of their relative position.
- Thus, the size of the opening in the ceiling will be determined, which will allow you to safely climb the stairs, without any risk of accidental head injury.
- Next, you need to cut the intended opening in the ceiling before installing the stairs.
Stringer length
Calculating the length of the stringer
To calculate the length of the stringer, you need to use the familiar formula of the Pythagorean theorem from school, which accurately determines the relationship of the sides of a right triangle:
L² = F² + H² , therefore L = √ ( F² + H²)
L – determined stringer length;
F – length of the staircase in plan (defined above);
H – height of the stairs (also already found earlier)
By using previously defined parameters and substituting them instead of symbols in the formula, you can set the desired length.
L = √ (4930² + 3000²) = 5771
As a result, it turns out that the length of the stringer will be 5771 mm or 5.77 m
Materials for wooden stairs
Once the calculations have been completed and a drawing of the future building has been drawn up, you can proceed to the purchase of materials.
To work you will need:
- Boards of different thicknesses and lengths:
- for the manufacture of stringers or bowstrings - approximately 250 mm wide, 50 mm thick, and the required length is determined by the above formula;
- for steps - at least 20 ÷ 25 mm thick;
- for risers you will need material with a thickness of 30 ÷ 40 mm.
- Balusters and handrails can be purchased ready-made or. make it yourself. However, for this you will need to have special equipment (lathe, planer, milling machine) and timber 150 × 150 and 100 × 100 mm. It should be noted that the manufacture of these elements is a rather complex task, and in the absence of experience it is better not to undertake such work, since you can only unsuccessfully transfer the material to sawdust.
- In addition to lumber, you will need nails and screws. It is quite possible that for the installation of some elements you will also need reinforcing metal corners.
Prices for various types of construction boards
Construction boards
Manufacturing of parts and installation of stairs
Using a prepared and carefully calculated drawing, the staircase elements are manufactured one by one according to the dimensions indicated in it and immediately installed.
Bowstring or stringers
- On the boards prepared for making stringers, the required length is marked and the excess is sawed off.
- The next step is marking the “comb” according to the calculated dimensions. For this purpose you will need a square and a long ruler. The remaining untouched strip of the board – the one below the “comb” – should never be less than half the total width of the board.
Marking the stringer for cutting out the “comb”
Stringers should be marked taking into account the angle at which the staircase will be mounted. Therefore, the base for the first step and the lower cut for installation on the floor must be compared with the slope line marked on the wall. It is important that the steps are placed in horizontal planes, without “blockages” in or out.
It is best to use a prepared template for marking
Then, focusing on these parameters, the entire comb is marked and cut out - for this, using the first step, you can make a template that will simplify the work.
- The next step is to attach a limiting stop beam to the floor along the line where the staircase will begin.
In order to install stringers to a beam, you can use two methods - by making cuts in the form of grooves in the beam itself, or vice versa - on the stringer.
Methods for attaching stringers to cross beams
- Next, the stringer is installed on a support beam on the floor, pressed tightly and secured to the side wall, as well as in the ceiling opening.
- Then a second hanging string is attached to the block on the floor and in the opening along the width of the staircase and secured.
It should be noted that sometimes for the rigidity of the structure, not two, but three or even four stringers are required - their number will depend on the selected width of the staircase.
- In the ceiling opening, stringers must also be connected with a reliable block.
The bars on which the base of the staircase will rest and rest must be “tightly” fixed to the floor and in the ceiling opening.
- It is very important to install all stringers perfectly evenly in relation to each other, otherwise the steps may have an undesirable slope to the sides.
Installation of risers and steps (treads)
First of all, risers are mounted on securely installed stringers. They are made in such a length that should be equal to the width of the stairs.
Self-tapping installation of risers and treads
After the risers are secured, installation of pre-milled treads (steps) begins. The length of the boards for them should be greater than the width of the distance between the two outer stringers by 10 ÷ 20 mm, and the width should exceed the protrusion of the comb by 20 ÷ 30 mm.
The treads are secured to the stringers and risers with self-tapping screws, so that the heads of the fastening elements are completely recessed into the thickness of the wood.
Installation of support posts and balusters
Installing balusters and posts is not as easy a task as it might initially seem. Its solution requires very precise marking and adjustment.
- Along the edge of the steps, the places where the prepared balusters and support posts will be installed are marked.
- The hole in the step for installing the dowel is placed at a distance from the edge equal to half the width of the base of the baluster, so that its edge coincides with the side cut of the step.
The next step is to drill holes on the marked steps. Dowels prepared to size are glued into the holes provided. The dowel should protrude from the surface of the step by 10 ÷ 15 mm.
Dowel for installing balusters
- Then, very carefully, exactly according to the diameter of the dowel (it is usually 8 or 10 mm), holes are drilled at the base of the balusters and posts.
- The pillars on a single-flight staircase are installed at the beginning and end of the flight. Only the upper pillars are installed first, the lower ones will be installed last.
- Next, you need to install one or two balusters on the dowels and measure the angle of the upper surface by attaching a handrail to them. Having determined the desired line, you need to mark and cut off the excess part from all prepared elements.
- Next, the base of the balusters and the hole for the dowels are coated with glue, and then placed on the protruding dowel.
The balusters are set vertically in level and pressed well against the steps, fixed, and then left until the glue dries completely.
Balusters and support posts must be accurately aligned vertically
- Then the railings are prepared. Their edges are cut at the desired angle - this is easy to check on site. Holes are also drilled on their sections, with the help of which the railings will be connected to the support posts.
- When the glue under the balusters has completely dried, the railings are mounted on top of them. A hole drilled on the upper cut of the railing is placed on a dowel glued into the upper post.
Then, the railings are laid on balusters coated with glue on top. Thanks to the groove milled from the bottom of the railing, the balusters will be firmly fixed in the desired position. But, nevertheless, the next step is to screw the balusters to the railing from below using thin self-tapping screws.
In addition to being glued, the railings are additionally attached to the balusters with self-tapping screws
- The last to be installed is the lower support post, which is connected to the lower cut of the railing, also by gluing in a dowel.
Upon completion of the installation work, and after the wood glue has dried, the stairs are coated with a special antiseptic primer. After it is completely absorbed and dries, the wood is coated with a transparent varnish, preferably water-based, or paint of the selected shade.
Video: Installation of a set of wooden two-flight stairs
Making and installing even the simplest staircase is quite difficult, especially if you do not have the proper experience in this work. If you have the slightest lack of confidence in your own abilities, it is recommended to seek help from specialists - at least in order to carry out independent work, but under their constant guidance. Mistakes here are absolutely unacceptable - an incorrectly calculated or carelessly installed structure can lead to serious injuries.
What function does the porch serve?
A porch is an indispensable element in every wooden house. A cozy porch not only pleases the eyes of guests and owners of a house made of timber, but also performs a number of useful practical functions, for example, it serves as additional protection from cold, wind and dirt. The structure serves as an entrance and exit, and in some cases, also as a summer veranda.
What to consider when building stairs to the porch
When constructing a porch, the following factors must be taken into account:
When choosing the material, shape of steps and flight of stairs, consider:
The entrance staircase and porch steps are made of wood, concrete, and metal. It is also possible to combine materials in compliance with construction technology and without violating aesthetic perception. Do not put off designing a flight of stairs or a porch until the house is already built. This will help avoid imbalance in design and unnecessary costs of re-arrangement of the foundation.
If the building has been erected, but you are not satisfied with the existing option of wooden steps, carefully consider all the details before starting work. It's easy to destroy what you have. It's more difficult to create. Pay attention to the fastenings and the presence of a foundation. You may find it necessary to open up the yard cover and remove built-in supports.
- are able to add additional comfort and charm to your home; the natural beauty of wooden structures can rarely leave anyone indifferent;
- they do not require long and painstaking manufacturing processes;
- the simplicity of their installation sometimes does not require more than one day;
- do not require additional reinforcement of the foundation, the structure is quite light;
Structural calculation algorithm
Currently, there are a large number of online calculators for calculating the parameters of stairs, but not everyone knows how to use them. In this article we will look at the basics of independently calculating all dimensions of a structure. What elements does the staircase consist of and what are the requirements for them?
Table. Components of a standard staircase.
| Item name | Purpose and brief description of requirements |
| Bowstrings | The boards supporting the steps at the ends are most often fixed to the walls and have special recesses for fixation. |
| Stringers | Strong beams that support the steps. The lower plane of the steps rests on the cut-out horizontal platforms in these beams. |
| Vertical stand | A support post used in screw structures. All steps are attached to the rack on one side, so it carries maximum loads. Made from thick wooden beams or rolled metal. |
| Step | The main structural element can be made of boards or metal. The minimum width must allow two people to pass in opposite directions. A length of at least 80 cm is recommended. The depth of the step is within 25 cm. |
| Riser | Supports the step in a vertical position, hides the joints, and performs a decorative function. Riser height ≈ 17 cm. |
| Railings and handrails | They increase the safety of movement and are designed for maximum lateral forces (at least 150 kg). Recommended height 100 cm. |
| landing | Placed only on rotary staircases, it allows you to rest and change the direction of movement. |
| Columns | The ends of the railings are fixed to them and are made of stronger materials than railings. |
Elements of a flight of stairs
When calculating the dimensions of the stairs, you must use the recommended initial data.
- tilt angle 30–50°;
- riser height 15–20 cm;
- railing height 90–120 cm;
- The width of the boards for steps is 22–30 cm.
Basic parameters of stairs
There are specific features when calculating stairs installed in attic spans. It is necessary to take into account the requirements for the distance between the head of the climber and the ceiling. If this parameter is not observed, then two negative consequences are possible: a head injury on the edge of the flight or constant bending for fear of getting such damage.
Calculation of steps for stairs