The great demand for gypsum board sheets is explained by the many advantages inherent in this material. Installation of products can be carried out in various ways, among which the installation of drywall on a wooden frame stands out. Although this method is not one of the most popular, in some situations it is the most technically advantageous. For a high-quality result, you will need to perform a number of sequential processes.
What is needed for finishing
The basic list of materials and tools is the same as when working with drywall in conventional buildings. Of the tools you will need.
- Drill and screwdriver with a set of drills and bits.
- Grinder and metal scissors (for cutting profiles). If a wooden frame is being built, then a hacksaw is quite sufficient.
- A knife for drywall or a regular stationery knife, but with a supply of blades.
- Plastering accessories: spatulas (300 mm and 50 mm wide), nozzle, mixer;
A set of necessary tools and materials
The materials you will need:
- Putty - starting and finishing.
- Serpyanka for joints.
- Primer.
- Drywall.
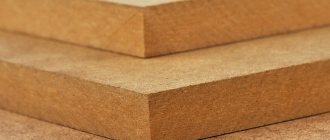
Types of GK sheets
Drywall is purchased taking into account the room in which it will be installed. The use of moisture-resistant sheets is highly recommended in bathrooms, bathrooms and kitchens. Stove and ventilation pipes are finished with fire-resistant analogues of the material. In other rooms, as cladding, a standard wall sheet is quite suitable.
The main mistakes made when covering walls with plasterboard
To get a good result and an even coating prepared for finishing work, the main thing is not to make mistakes during the installation process. A list of common mistakes when you decide to cover walls with plasterboard yourself:
- Incorrect installation of profiles. The profile should have its smooth side facing down. It is worth cutting it carefully and only with metal scissors in order to preserve the opposite shelf, where the drywall will be attached next, without damage. The use of hangers cannot be neglected;
- choosing the wrong types of profiles;
- unbending of parts of the profile, which leads to a decrease in the strength of the entire surface;
- installation of gypsum boards on the wrong side. Especially if a waterproof profile is used, for example in a bathroom, then installing it with the reverse side facing the room, all waterproof properties are simply lost;
- improper fastening of the sheets, they should be fastened at intervals, only then the structure will be reliable.
The profile should have its smooth side facing down.
You can cover the walls with plasterboard yourself. But you need to strictly follow the work technology, not missing out on details that may seem insignificant, but in the end will play a big role on the quality of the resulting surface. Doing the work yourself will reduce the cost of repairs.
Tip 2 How to attach drywall to a wall
Quite often people decorate walls with plasterboard. This matter requires special attention. Walls finished with plasterboard look very unusual. Currently, there are several ways to install plasterboard sheets.
Instruction 1 First you need to consider the frame installation of plasterboard sheets. Fastening is done using plasterboard slats. In order to level out large depressions in the wall, you need to attach slats cut from gypsum plasterboard to the wall with glue at a distance of 60 centimeters from each other. If the wall is not load-bearing, then you additionally need to secure the slats with dowels. The slats must be aligned vertically and in one line. Next, you can begin gluing the gypsum board. Seam putty is suitable for this purpose. The layer should be thin. 2 In those places where it is impossible to cover the walls with glue, 12.5 mm thick plasterboard is attached to a frame made of wooden slats. First you need to attach 50x30 mm wooden slats to the base using dowels and screws. They must be aligned vertically and in one line by placing wooden blocks of the required thickness in the right places. To maximize thermal and sound insulation, you need to lay a layer of mineral or glass wool between the slats. After this, you can begin covering the wooden frame with insulation. It needs to be sheathed with gypsum boards. For this purpose, wood screws are most often used, which have a length of 35 millimeters. The screw pitch is 25 millimeters. 3 Sometimes people use the free-standing cladding method. This type of cladding is a standard partition, which is covered with sheets of plasterboard on one side. This design is most often used for leveling foundations, cladding crumbling walls and laying the necessary communications in the wall cavity. The frame is made from UW (guides) and CW (posts) profiles with a width of 50, 75 and 100 mm. The racks have a pitch of 600 millimeters. Wooden beams 60x60 millimeters are also well suited for this purpose. You need to place soundproofing tape under the guides. Plasterboard sheets are secured using metal self-tapping screws, which are 25 millimeters long. You can also use wood screws. To improve thermal insulation and sound insulation, you need to fill the entire cavity with mineral or glass wool. Video on the topic
https://youtube.com/watch?v=7ezJnJp76-s
Is the advice useful? Print How to cover a wooden wall with plasterboard Search Login to the site or Forgot your password? Not registered yet?
Tips and tricks
For installation, it is better to immediately take care of the availability of the necessary materials and tools. You will need screws for wood and metal - the quantity depends on the area of the walls and the type of frame. For cutting and marking you need a tape measure, a level, a marker, a long ruler and a painting knife. Wooden guides will require a hacksaw, and metal profiles will require metal scissors or a grinder. For fastening to walls and profiles you need a drill and a screwdriver.
If the fastening method is frameless, then you need to have a container for mixing glue, a mixer, and a spatula. In any case, a deep penetration primer will be required. For joints you need reinforcing tape with a width of at least 50 mm. You should immediately take care of the required amount of putty for further finishing of the walls.
Often, when attaching sheets of drywall to a frame, beginners are faced with the fact that the place under which the profile is located is not visible; the screws are screwed into the void. Therefore, it is necessary to mark in advance on the surface of the gypsum board the places for tightening the screws.
There is no need to tighten the screw too deeply into the sheet; if it breaks through the paper layer, the fastening will be ineffective; over time, such a base may collapse. It is necessary that the head of the screw is pressed exactly against the paper, not higher and not deeper than the surface. Therefore, you should work with a screwdriver as carefully as possible.
For an overview of finishing a wooden house with plasterboard, see the following video.
See below for finishing the house with plasterboard.
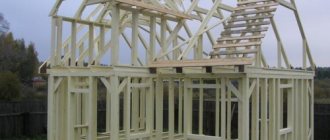
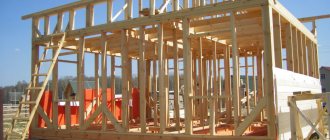
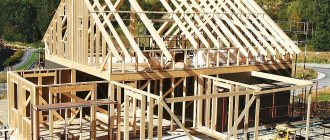
Advantages and disadvantages of wooden frames
What advantages does a wooden frame have over its now classic metal profile analogues:
- The first and main advantage is the price of the material. Metal guide and rack profiles will cost more (one element costs about 70 rubles). Wooden beams that are suitable for assembly are sold at a cost of approximately 30-40 rubles, if you look directly at sawmills it is even cheaper.
- The wood is easy to process. Defective bars and slats can be “corrected” with a plane or used as jumpers. It is easy to install; drywall screws can be screwed in even with a screwdriver.
- Environmentally friendly. Although metal profiles are safe for human health, wooden slats are a pure material.
- Shelves and furniture can be attached to the timber frame with racks of appropriate cross-section. The foundation can easily withstand the load without additional mortgages.
But there is no ideal material; timber also has its drawbacks. This is a shorter service life in comparison with metal analogues, flammability, and the possibility of damage by insects and rodents. Mounted wooden frame under sheets of plasterboard However, the main disadvantages of wooden battens include low resistance to moisture and the inability to assemble a non-standard curved frame. However, gypsum plasterboards can be mounted on timber, but following the technology and carefully selecting the material.
Advantages
When the lathing is made from wood with your own hands, the home craftsman gains many advantages. Firstly, such a frame does not form cold bridges, which cannot be said about a metal profile. The internal cavities will only need to be filled with insulating material, which will also soundproof the walls. Secondly, installation work using wooden blocks is somewhat easier to carry out, because it can be difficult to deal with load-bearing, rack and guide profiles. Thirdly, all the disadvantages of wood such as fire hazard and susceptibility to insects can be eliminated by treating the material before installation with fire retardants and compounds that ensure biological inertness.
Advantages of designs
The positive side of a plasterboard partition is that, unlike brickwork, it does not need to be plastered. The wall surface is smooth, ready for finishing. Additional advantages of the designs:
- quick installation;
- light weight reduces the load on the foundation;
- stability and reliability of the structure thanks to a durable metal frame;
- The wiring of electrical points is simplified as much as possible, without additional gating of walls;
- high noise insulation;
- gypsum, which is 92% in the slab, is an environmentally friendly material.
When installing structures there is much less dust and debris. The ease of assembly allows you to build them yourself. You just need to adhere to a certain sequence and follow the recommendations of specialists.
Options for partition construction and design
GKL against plaster
First, let's decide whether it's worth messing with drywall at all or whether it's better to use plaster the old fashioned way.
Here are the arguments in favor of gypsum boards:
- High finishing speed due to the large sheet area (3 square meters with a size of 2500x1200 mm);
- Possibility to eliminate significant unevenness of the base at minimal cost. Let's say, if the height difference between adjacent elements of a slab floor is 8-10 centimeters (yes, yes, this also happens), leveling the ceiling with plaster is very expensive and unsafe: the fall of peeling plaster of such thickness can cause a lot of trouble.
But for gypsum boards on the sheathing, the condition of the surface underneath does not matter at all - as long as there is something to attach the frame to;
It is easier and cheaper to level an uneven and littered wall with plasterboard.
- The surface of kraft paper (gypsum core shell) has excellent adhesive properties. You can glue wallpaper of any density to it using any wallpaper glue; tiles also adhere perfectly to cement tile adhesive or homemade cement-based mortar.
Ceramic tiles adhere perfectly to drywall using any tile adhesive.
And not only them. How does drywall compare to plaster?
- Mechanical strength. Let me clarify: in this parameter, gypsum sheet material is second only to cement plaster. Using gypsum board to decorate walls in a gym or workshop is a dubious idea;
- Resistant to water with constant contact with it. Alas, even moisture-resistant drywall only tolerates high air humidity. If you immerse a gypsum core in water, it will get wet just like any other gypsum product. Accordingly, it would be a bad idea to use gypsum board without protection with a waterproof finishing finish for the construction of shower walls;
- Occupied usable area of the room. It is better to level walls with minor unevenness in a small room with a thin layer of plaster: even when glued directly to the wall, without lathing, a sheet of plasterboard, taking into account the thickness of the glue, will shift the surface of each wall by at least 20 mm. When mounted on a frame, each wall will move towards the center of the room by 60 - 80 mm.
The space under the sheathing is wasted.
Sliding frame made of wooden blocks
It is better to make a wooden frame for drywall from dense wood, such as pine or oak. Regardless of the type of tree, the frame elements must be treated with antiseptic solutions to prevent the formation of mold and rot and fire retardants to prevent the wood from burning.
The algorithm for performing the work is as follows:
- The outline of the future frame is drawn on the floor and a projection is made onto the ceiling;
- Next, mark the places where you plan to install sliding guides for drywall. It should be remembered that from the corner to the near post it is necessary to maintain a distance of about 0.6 meters. The edges of the drywall must rest on the bars;
- For additional strength, intermediate slats are installed between the main bars in increments of 0.2 meters;
- Metal corners are used as fastenings for vertical frame elements, on one side of which there is a vertical oval groove. Direct fixation is performed with a screw and washer. The corners are attached at a distance of 0.2-0.3 meters from each other;
- The outer bars are placed first, between which a fishing line or cord is pulled to install intermediate elements;
- The fixation of the bars should not be strong so that the bolts can move along the mounting angle when the house shrinks;
- After installing all the vertical supports, proceed to the installation of horizontal struts; their location can be arbitrary. However, experts recommend installing the jumper so that the corner of the plasterboard sheet rests simultaneously on the vertical and horizontal frame element.
Frame structure
The number of frame elements is calculated taking into account the fact that the distance between its vertical and horizontal parts must exceed 400 mm, and also that the perimeters of door, window and other openings must be framed by frame elements. Let’s calculate how many linear meters of elements are required to assemble the frame.
If, nevertheless, a decision is made to make a wooden frame from slats, it should be taken into account that along the perimeter plasterboard sheets are attached to slats with a cross-section of 80 x 25 mm (two adjacent sheets are fixed on one such slat), and intermediate ones are used with a cross-section of 40 x 25 mm .
Choosing timber for sheathing
If you decide to assemble a frame for drywall made of wood, then you need to approach the choice of material very carefully. The list is as follows:
The wood must be very well dried. In most cases, you can only buy raw timber at the sawmill, which you will have to dry yourself
The ideal option is considered to be a maximum moisture content of the construction timber of 14%. Each lath and beam must be inspected for defects: uneven and knotty material will create problems during assembly or sheathing. It is important that the lumber is of the same cross-section. For guides and frame posts, you can use the same type of timber 50×50, 40×40, 50×40 mm and others
It is advisable not to use smaller widths, because sheets of plasterboard will be joined and secured with self-tapping screws on the racks.
After purchasing the material, all slats need to be inspected again and treated with protective impregnations or at least painted
This will protect the forest from moisture penetration. It is important to remember that the timber and slats must be stored in a horizontal position, otherwise, over time, vertical storage will result in curved racks
Marking
Before you start making a wooden frame for drywall, you need to determine the plane in which it will be installed and mark the lines of its intersection with the floor, ceiling and walls. In this case, you need to remember about the thickness of the plasterboard and take it into account when applying markings.
The starting point is chosen at the line where the ceiling meets one of the walls. Applying a plumb line to it, find the corresponding mark near the floor. Both points are connected by a vertical line. Drywall sheets are manufactured with sufficient precision to be used to determine right angles. To do this, we apply the gypsum board at an angle to the mark on the floor with the narrow side close to the wall. Continuing the perpendicular to the opposite wall, we find the next mark. Using a plumb line or level we rise to the ceiling. We connect all four points with straight lines using coated thread or a pencil with a ruler.
Subtleties of making wooden sheathing
When assembling sheathing for drywall made of wood, you need to select lumber with the appropriate cross-section. If you do not plan to insulate the walls with plasterboard, then a batten with sides of 40x40 millimeters is suitable. When laying insulation, the width of the frame should allow this to be done, that is, use timber 50-100 mm wide and 40-50 mm thick. Plastic dowels and screws with a suitable length are used for fastening
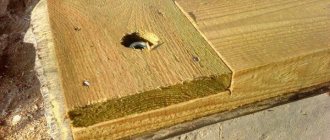
Fasteners are purchased based on the thickness of the lumber, so that at least 30-40 mm of dowels fit into the wall. Diagram with the dimensions of wooden beams for sheathing It is important to take into account the material of the walls. Gas or foam concrete blocks are very fragile, and a standard plastic dowel will not provide reliable fixation; it will simply fall out or have significant play
The same applies to anchors. For fragile walls, a metal dowel with teeth, the so-called “crocodile”, is used. The technology for assembling the sheathing can be in the form of two designs: with fastening the slats directly to the wall (if it is flat without significant differences) and with installation on guide bars laid on the floor and ceiling. Example of installing lathing on a wall. In the second option, the diagram is similar to assembling a frame from a profile on a wall. The guides are mounted, the frame posts are attached to them using mounting angles, and then the cross rails are added. This embodiment is applicable when the walls in the house have very large unevenness and need to be leveled with plasterboard.
It is important that the holes for the dowels are drilled in advance, otherwise it will not be possible to drive in the dowel; the same applies when screwing in self-tapping screws “directly”, they can simply split the board. Sheathing installation diagram Example of attaching wooden sheathing under plasterboard If the walls are smooth, the sheathing is assembled as follows:
Lathing installation diagram
An example of attaching a wooden sheathing under plasterboard. If the walls are smooth, the sheathing is assembled as follows:
- mark the surface for the vertical posts of the frame;
- The slats are installed along the lines and holes are drilled directly through them in the wall to the diameter of the dowel. The pitch of the attachment points is maintained within 500-600 millimeters;
- drive in dowels and screw in self-tapping screws.
At this stage, the sheathing is complete; it is worth protecting it from the negative effects of moisture and temperature changes.
Option for attaching wooden sheathing to the ceiling Plasterboard sheathing must be done with gaps. Between the sheets they should strike within 2-3 mm, from the floor 5-10 mm and 10-30 mm from the ceiling. These gaps will be closed in the future with decorative and finishing elements and will compensate for possible movements of the frame.
https://youtube.com/watch?v=RRqxtLjLxpc
The master's work is afraid
Do-it-yourself installation of either a wooden or a metal frame is carried out according to a similar scheme. Today, metal profiles remain more preferable. Note! When using wood for lathing, it must be treated in advance with special solutions that will protect the beams and slats from the adverse effects of temperature and air, as well as the appearance of insects in them. The process of assembling a lathing from a metal profile is as follows:
- assembly of support profiles. You need to start from the floor so that all other profiles are oriented along it;
- Next, we install them strictly along the line of the previously applied markings, after which the installed profiles must be checked according to the building level. This will determine how smooth the wall sheathing will be;
- We fasten everything with dowels. In this situation, it is necessary to fasten the profile every 25 cm;
- Next, we install profiles along the entire wall. They must also be aligned using a level and be in the same plane;
Intermediate frame
- After this, we proceed to the installation of transverse jumpers made from rack profiles. The step of their installation is determined by the degree of loading of the wall structure. The more weight it will have to withstand, the more often it will be necessary to install crossbars.
Note! To make the structure more durable and rigid, it is necessary to use mounting hangers.
Once the frame is ready, you can begin covering it with plasterboard sheets.
Disadvantages of wooden sheathing
Wood is one of the oldest materials used in construction. But, nevertheless, it has many shortcomings that previously builders simply had to put up with.
Diagram of the installation of wooden lathing on the wall under plasterboard
It was the development of the production of finishing products that led to the replacement of wood with metal parts. This happened for a number of reasons:
- Wood reacts very sensitively to changes in the surrounding air. When there is a high level of moisture, the slats or beams begin to absorb it and swell, which leads to an increase in volume. The temperature difference from lower to higher leads to drying out. As a result, the wooden product changes its shape, it “twists”, bends or warps. And such fluctuations are one of the features of our far from ideal climate. One can only imagine what will happen to the finish without proper care and treatment of such elements. An example of attaching wood lathing to a wall
- The second negative point is the reaction of wood to stagnant air without ventilation. The timber under the plasterboard sheathing will simply begin to quickly deteriorate, that is, rot. And if you also add a layer of insulation, which contributes to the lack of ventilation, the frame will become unusable very quickly. Diagram of the installation of timber sheathing for plasterboard
- And also the tree will react significantly to turning the heating on and off in the house. For example, in winter the room is heated, the air is drier, and as a result, moisture evaporates from wooden parts. When the heating is turned off, the humidity rises and the products will begin to replenish the lack of moisture. Simply put, the tree will begin to “pull” dampness from the sheathing, insulation and walls of the house.
- Another disadvantage of wooden material for assembling sheathing for drywall will be its poor quality of drying. Most sawmills sell lumber not fully dried, or even raw. Over time, in the absence of conditions for drying, the slats become deformed. Leveling the wall in this way will become very difficult, if not impossible.
But, all these problems are completely solvable, especially considering the fairly low cost of the material.
The process of laying insulation under plasterboard sheathing
Modern technologies, especially various impregnations and waterproofing, in combination with modern equipment, make it possible to use lumber to assemble sheathing for drywall.
How to make a wooden base for gypsum plasterboard sheathing?
Reasons for shrinkage of wooden structures
During the first 1.5-2 years, a wooden structure can experience significant shrinkage, this happens for the following reasons:
- Wood is characterized by natural shrinkage, as a result of which the original dimensions of the material change
- The timber tends to bend during the drying process, which makes the walls uneven
- Unprotected wood during operation can absorb moisture and dry out, which leads to constant changes in size
The presence of such factors causes deformation of the internal cladding of the house and the façade cladding. A sliding frame, which does not depend on the supporting base and does not move with it, helps solve the problem.
Partition on a wooden frame
Plasterboard dividing walls in a wooden house are often made of timber. This is justified from the point of view that the materials must match each other in structure and thermal conductivity. It is worth taking into account the fact that poorly dried timber can ruin the entire structure, it can “lead”
The second point that is worth paying attention to is that insect pests can grow in the tree.
Construction of a wooden frame partition made of plasterboard
Before installing the partition frame in a wooden house made of timber, the wood must be impregnated with antiseptic compounds. The calculation of materials is carried out similarly in the same sequence. The length of the timber strips ranges from 2 to 4 m. The principle of the structure is the same as that made from a metal profile.
Scheme of a wooden frame
Additionally you will need:
- metal perforated corners that will attach the racks to each other;
- wood screws 35 mm;
- timber for guide supports 40 x 60 mm or 50 x 80 mm;
- for racks 30 x 50 mm.
Sequencing:
- The markings are carried out in the same sequence as for the frame for the profile. Check it using a level or plumb line.
- Guide beam 40 mm x 60 mm (50 mm x 80 mm), attached first to the floor, then to the ceiling, walls. Guide strips to the floor and ceiling. Use dowels 40 mm-45 mm long. First, you need to drill a hole in dry wood with a drill, the diameter is slightly smaller than the fastener.
- Install wooden posts; timber 30 mm x 50 mm is suitable. They are attached to the guide posts using metal corners and 30 mm-40 mm wood screws. The step between them is the same as for metal profiles (60 cm). It is only necessary to take into account that the last racks must be installed from the wall at a distance of at least 10 cm. A small gap in height of 8 mm-10 mm (from the ceiling) is left between the guide beam and the racks. Then, using metal corners and wood screws, attach transverse hangers between the posts.
- The wooden frame is ready, then plasterboard sheets are attached to the timber, the joints are sealed with sickle tape, and putty is applied. The process follows the same scheme as for partitions based on profiles.
A selection of photos of the design of plasterboard partitions in the house
Stages of wood preparation before use
To build a partition with your own hands, use coniferous timber beams with different section sizes, the choice of which depends on the cladding method and the height of the partition being built.
Basic requirements, subject to which the structure will last longer:
- The indoor humidity level is less than or equal to 18%;
- For partitions whose height does not exceed 3 meters, the riser is a section of 6x5 cm, the sheathing is 6x4 cm;
- For partitions over 3 m - sheathing and riser with the same cross-section, which is 6x5 cm.
- The choice of gypsum board depends on the height of the partition. The ratio of the height and thickness of the sheet is directly proportional; the higher the structure, the thicker the gypsum board;
- Regardless of the selected height, section and thickness, the step is 60 cm;
- Treatment that reduces the ignition index of the material is carried out in accordance with the requirements of the first fire safety group;
- Fastenings are made using nails, screws, and tenons. Using the latter type of fastener, the connection becomes stronger and will last longer;
- For sound insulation, mineral wool with a thickness of at least 5 cm and no more than 6 cm is used;
- The thickness of the new partition with the highest value is 132 mm and the smallest is 85 mm;
- The insulation index is calculated based on the selected partition thickness. It varies between 41 – 51.
DIY drywall finishing
Before installation begins, the wood lies for a couple of days in the conditions in which the frame will be erected. During this time she will undergo acclimatization.
Chemical treatment is no less important than fire treatment. It is aimed at productively combating various factors of biological origin. Let's consider in detail:
- Mold and mildew render the used lumber unusable, which is fraught with further destruction;
- Natural decay - necrobiosis, decay. Antiseptic treatment prevents these natural processes;
- Insects. Many species of these representatives of the fauna render the material unusable;
- Rodents are no less dangerous. A special composition is able to repel them.
Antiseptic
Antiseptics are a variety of chemical compounds. Due to its effectiveness, preference is given to sodium fluoride. It is a light gray powder that dissolves in hot water. The structure of the bars allows sodium to pass deep. An indisputable priority is the poor washability of the solution; it does not decompose, has no unpleasant odor, is not toxic and does not have a corrosive effect on metal.
Sodium fluoride is also used, to which soda ash is added. This combination turns the first substance into a pure sodium fluoride compound.
Antiseptics with an oily structure are prohibited for use in residential premises. This:
- Anthracene oils;
- Shale;
- Carboniferous;
- Creosote.
They are toxic and can cause considerable harm to people.
Wood damaged by insects
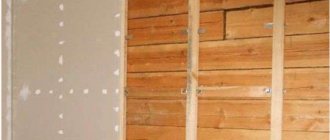
Fastening drywall to timber
The sheathing is carried out as when using a metal frame. But there are some nuances that should compensate for some of the disadvantages of such a material as wood. Scheme for attaching various materials to a wooden sheathing First, sheets of plasterboard are attached to a wooden frame with gaps from load-bearing walls within 5 mm. This distance from the floors should be up to 30 mm, and the ceiling should also be 5 mm. Scheme for installing drywall on a wooden frame Secondly, installing drywall at the joints is not done end-to-end, but with a gap of 3–5 mm
These precautions are taken in case of possible movements of the wooden base. Self-tapping screws are screwed in in increments of 250–300 mm, joining adjacent sheets on the frame posts. The caps are slightly recessed, but without damaging the cardboard layer
After covering, finishing is carried out using conventional technology with putty and reinforcement of joints.
Installation features
To lath walls with metal profiles correctly, you need to follow some tips. We present to your attention a small selection of the most important recommendations, the implementation of which will help you avoid the most common mistakes of beginners:
Wood processing
- avoid contact of self-tapping screws and screws with wiring elements that are usually routed along the walls;
- in humid climates, to create a frame it is necessary to use only metal elements, as well as a moisture-resistant type of plasterboard sheets. If you intend to use wood for sheathing, be sure to treat it with several layers of a special protective solution, which will protect against the negative effects of moisture and repel wood insects;
- start installing profiles from the floor and along the entire perimeter of the walls;
- when living in a climate characterized by temperature changes, snowy winters and hot summers, it is advisable to install insulating materials in the frame;
- the use of untreated wooden slats is highly undesirable. They must first be sanded and the surface made smooth. This is also why many people prefer to use metal elements to create wall sheathing.
Guided by these recommendations, you can frame any room without the slightest problem and get perfectly smooth walls. In addition, you can create complex wall devices that will include niches or shelves made of plasterboard. When creating a frame, remember that all the strength and beauty of the final repair depends on it.
How to choose the right materials
When selecting materials for finishing a house made of timber with plasterboard, several fair questions arise:
- Is it possible to attach drywall directly to wooden walls inside the house?
- If you use a frame, can it be assembled from wood or should you prefer a metal profile?
- What type of drywall should I use: wall, moisture-resistant or fire-resistant to improve fire safety?
The answers to these questions will determine the further choice of material, as well as the techniques for finishing a house with plasterboard.
Frame or frameless methods
The frameless method of mounting plasterboard sheets to the wall surface is simpler and faster, but requires compliance with many factors.
GKL can be mounted directly on walls if the planes do not have significant differences. Perfectly straight walls in a wooden house are very rare, even in a new building. After all, wood dries out and shrinks along with movement.
And in this case, laying communications becomes much more difficult. For example, you will have to directly drill the supporting structures for the wiring.
Scheme for frameless installation of drywall
The frame, on the contrary, makes it possible to level out any differences and unevenness of the walls to the ideal value, and laying utility lines under the plasterboard sheets will not be difficult at all. In addition, if suspended ceilings are planned, structures on a solid foundation can withstand the load much better.
Metal or wood
In timber houses, both wooden slats and metal profiles can be used as frame material. Moreover, in the first option, it is permissible to build a simpler structure by attaching the beams under the gypsum board directly to the walls (again, taking into account differences). But the quality of lumber must be at a high level. Only wood that is well dried and treated with protective compounds is used. The cross-section of the racks of such a frame must be exactly 50×25, the same criterion for the crossbars, but the guide bars are no less than 75×25!
Mounted wooden frame under plasterboard in a timber house
The process of attaching wooden frame posts
Metal profile types are also suitable for use in wood construction. With their help, you can build a solid foundation that is resistant to influences such as humidity and temperature changes.
An example of fastening a metal frame in a house made of timberMetal frame on the ceiling
To do this, you need ready-made guide elements UD profiles and rack CDs. In terms of cost, metal “parts” of the frame will be cheaper in comparison with high-quality wooden slats. The video shows how to install a metal frame on timber walls.
Which drywall to choose
The type of drywall for finishing a wooden house is selected depending on the purpose of the room. In the bathroom, toilet and kitchen there must be a moisture-resistant sheet; in living rooms, a wall option is quite suitable, and a fire-resistant one is used for finishing structures that may be exposed to temperature influences. In addition to the above-mentioned features of material selection, in a house made of timber, it is necessary to use a vapor barrier.
Installation of an interior partition made of plasterboard
Don't forget to use sealing tape wherever the profiles come into contact with any surface. Thanks to this, the soundproofing characteristics of the partition are improved. You can assemble two frames for partitions at a distance of 10-20 cm from each other.
They are then covered with plasterboard, and a thick partition is obtained. This step is taken when they are going to place a lot of things inside such a structure. There is enough space inside the structure to stretch a power cable to connect an outlet or wall lamp. Such cables must be corrugated for fire safety purposes. If the vertical posts were installed in 40 cm increments, then you can do without jumpers.
If the pitch is 60 cm, then you need to install several horizontal jumpers for greater structural stability. Simply cut a profile from guides that are mounted horizontally between the vertical posts. The fastening step is 50-60 cm.
The jumpers are also fastened with “bugs” or using a cutter. Such partitions can be used to divide a nursery where children of different sexes live. Or the living room can be turned into two bedrooms.
Regardless of the situation, the process of erecting plasterboard partitions in a room will be the same.
Additional information on the topic:
- How to cut moisture-resistant drywall at home
- How to install a socket block in drywall video instructions
- What is drywall and what width does it come in?
- What is better: plaster or plasterboard for aerated concrete walls?
- What is needed to cover the walls and ceiling with plasterboard
How to treat the surface → Room decoration → How to choose the right paint → Surface treatment technologies → Leveling and finishing the walls → Selecting and applying a primer → Removal from the surface → Stretch ceilings and technologies → Reviews and testimonials
How to sheathe a wooden house with finishing material
Before you begin covering the interior walls with plasterboard, you need to prepare the necessary tools and additional building materials. For this process you will need:
- The basis for assembling the frame with your own hands. You can choose a wooden base or a metal profile as it. Whatever base is chosen, the assembled frame must be strong and reliable.
- Construction drill.
- Special cutting tools for trimming finishing material.
- Screwdriver for fasteners.
- Paint brush for painting.
Initially, it is recommended to treat all wooden walls that will later be covered with plasterboard. This stage is quite simple, and anyone can do it with their own hands. It is best to choose a special impregnation for wood, and repeat the manipulation after the first layer has dried. Impregnation will prevent mold or mildew from appearing. You can apply the special composition to the surface using a construction brush or roller.
Next, a base of metal or wood is assembled. Most often, a metal profile is used as it, which is most convenient to assemble and is much more practical to use. The base of the frame must be attached to the surface of the wall, so these parts must be level and consistent in size. To check, you must use a construction or laser level.
The self-assembled frame must be firmly and stably attached using special screws to three planes:
- to the floor;
- to Wall;
- to the ceiling.
In this case, care should be taken to ensure that the finished and secured frame can easily support the weight of the finishing material, as well as additional decorative elements that can be applied to the drywall.
The next process involves cutting the material and joining it to the frame. After the base is covered with plasterboard, you need to use putty intended for interior work. You need to carefully putty the walls with your own hands, alternating the process of priming the entire surface. It is on high-quality putty and primer that the evenness of the walls will depend, on which any type of decorative finishing can be applied in the future.
To cover the walls of a wooden house with plasterboard with your own hands, you do not need to have specific construction skills, and you won’t have to spend a lot of effort for this event. The most important thing is to adhere to the process technology, and if necessary, you can familiarize yourself with the photo and see the recommendations of specialists in the video.
https://youtube.com/watch?v=-yZN1quNY0A
Construction of a brick partition
How to make partitions in a brick bath? This material is quite common and is often used for the construction of buildings in the bathhouse.
The construction is made using half-brick spoon masonry.
To make work easier, some specialists use hollow material.
Preparatory procedures
Before starting work, you need to carefully prepare the surface. The plank covering is removed from the floor to the very base, after which it is cleaned with a wet broom. The place where the construction will be carried out is equipped with good lighting. All foreign objects are removed from the premises and the outlines of the building are outlined.
To work you will need to prepare the following tools:
- level;
- sander;
- trowel;
- plumb line and rule;
- cement-sand mortar. For more information about the construction of a partition, watch this video:
Creating a partition
The process of erecting a brick partition consists of the following stages:
- A string is stretched and used as a guide. The solution is laid and leveled using a trowel. The level checks horizontality. You will need to wait until the solution begins to dry.
- Another layer is applied on top of the dried mixture. After which the first row of brick screed is laid.
- The mortar is applied to the end of the first brick, after which it is laid by pressing down. It is tapped and leveled according to the string; the remaining mixture will need to be removed immediately before it has time to dry.
- If an opening for a door is planned in the partition, it will need to be positioned first. The door frame is installed using spacers. The evenness of its location is checked and, if necessary, this parameter is adjusted.
- The brick is laid close to the box. To tie the partition together, special metal strips are used; they are folded and attached to the side surfaces between the bricks. Instead of strips, you can also use reinforcing rods.
- After laying the first row is completed, the brick is divided into 2 parts with a pick. One half is used to start the second row. The string that served as a guide is moved higher so that you can easily navigate. Laying the third row is carried out in the same way as the first. For more information about the process, watch this video:
Building any kind of partition between the steam room and the sink is a rather labor-intensive procedure.
Not every beginner will be able to do this kind of work on their own.
But, as a result, this will ensure a high level of comfort in the bathhouse, which is why the construction of such elements has recently become popular.
Also useful for repairs:
- How to knit a hat and snood with braids
- Diamond cutting wheels for metal
- DIY flowers in a dhow
Tip 1 How to cover a wooden wall with plasterboard
Author KakSimply! The use of plasterboard when decorating a room allows you to level the walls, making it easier to carry out further repairs, improve sound insulation, mask communications and save heat. An additional advantage of this material is that anyone, including those far from construction professions, can attach it to walls; you just need to acquire the appropriate tools and know the basic principles of working with drywall.
You will need
- - drywall;
- - wooden slats;
- - dowels and screws;
- - drill;
- - hacksaw;
- - screwdriver;
- - putty;
- - putty knife.
how to cover walls with plasterboard
Partition insulation: nuances
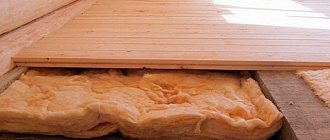
Insulation diagram of internal partitions.
Sometimes a building cannot do without additional insulation, especially if the partition is not decorative. Installation of insulating materials is carried out when one side of the wooden frame is covered with plasterboard. The optimal insulation material is mineral wool and foam materials.
Insulation is quite easy, since the dimensions of the distance between the posts and the materials are the same. All that remains is to lay the material and secure it. If a rigid material is chosen as insulation, then its fastening must be done on the inside of the already lined partition. If cavities form during installation, they can be filled with mineral wool. The combination of materials will give a high soundproofing effect.
Often, during the process of facing the second side with slabs, a problem arises in the racks in the form of cracks. This happens due to the large number of screws. It is easy to avoid such a mistake if the joints of the slabs on the walls are made from opposite sides (for example, the 1st side is sheathed on the left, the 2nd on the right).
It is important to remember that you need to leave a small gap of 1-2 cm between the ceiling and the top of the plasterboard. The need is that the gypsum in the slab may begin to crumble. The gap will not be noticeable; it can be easily closed with a simple baseboard.
Advantages of lining a wooden house from the inside with plasterboard
The timber structure is distinguished by relief walls. At the same time, owners often want to give their home a more modern look. Using drywall in a wooden house to level surfaces is preferable to other materials for a number of objective reasons:
- natural composition of dry gypsum plaster;
- high vapor permeability of the material;
- light weight and ease of cutting facing slabs;
- low cost and simple installation on a frame base;
- additional thermal insulation;
- communication wiring hidden behind the casing;
- ideally flat surface for finishing materials.
View of a room covered with plasterboard. It is noteworthy that these works were carried out without the involvement of hired professional builders
Various types of drywall: standard, fire-resistant and moisture-resistant
The advantages of this choice include covering the wooden ceiling with the same plasterboard slabs.
The universal material allows for bold design solutions - multi-level surfaces of any configuration, zoned built-in lighting, overhead air distribution from the air conditioning system.
In a word - almost everything your heart desires.
Plasterboard finishing in Voronezh
Finishing with plasterboard when renovating apartments in a new building is preferable both from a financial and technological point of view, since the outer layer of cardboard is an excellent basis for any finishing material: paint, wallpaper, decorative plaster, ceramic tiles and finishing stone.
The big advantage of plasterboard sheathing is the ability to install heat and sound insulating materials behind the plasterboard sheets in the frame and the ease of installation of communications compared to brick, concrete and wooden walls.
Independent frame made of metal profile
A sliding frame for drywall in a wooden house can be made with your own hands:
- A level is struck on the floor and ceiling, a guide profile is installed on the floor;
- Using a level and a tape measure, mark the places where the vertical posts will be located; the distance between them is chosen independently (60 or 40 cm);
- The height of the wall is measured, depending on which the height of the vertical posts is determined. To ensure that these elements do not rest against the ceiling, their length should be 10 cm less than the distance from the floor to the ceiling. In this case, the racks will not be damaged when the house shrinks;
- Next, the stand, cut to size, is applied to the mark on the wall and several attachment points are drawn. In this case, you need to ensure that the fasteners do not get into the joint of the logs or into an existing crack. They also mark the wall and profile with one number. In the future, this will allow you to install the vertical elements in their place, since the grooves may be at different levels;
- Now, using a grinder, cuts are made along the axis of the profile in those places where the attachment points are marked. The length of the finished groove should be about 10 cm, and its width should be slightly greater than the thickness of the screw. The edges of the slot are cleaned until completely smooth. The groove should be located strictly along the axis of the profile, and its main part should be located under the intended attachment point;
- All other vertical racks are prepared according to a similar scheme, while marking the wall and the profile located in this place is mandatory;
- To give strength to the frame elements, special stops made of bars or long self-tapping screws are nailed a little above the mounting points on the wall. The outer plane of the stop should be at the level of the future frame;
- Now you can screw the racks to the wall; for this you can use self-tapping screws with fairly wide washers. This will allow the fastener to rest tightly against the profile. The stand is placed with its back against the wall and the fasteners are screwed into the upper part of the slot, stepping back slightly from the edge. In this case, there is no need to tighten the fasteners too much; the washer should turn with little effort. The distance left below will allow the screw to move with the wall during the shrinkage process, and a small indentation at the top will allow the wood to expand due to moisture;
- To attach plasterboard sheets to the frame, take a U-shaped profile and combine it with an installed vertical stand, with the back facing outward. The profiles are connected to each other with a cutter through the side edges;
- At the end, cross members made of metal profiles are installed to make the structure more rigid.
Installation of various types of lathing
GKL sheets can be mounted directly on the wall, but this is not always possible - it will not be possible to straighten out serious curvatures. The best solution would be to install sheathing. It comes in two types: wooden or metal.
Wooden structure
It is arranged in houses that have long stopped shrinking. That is, it can continue, but the indicators are completely insignificant.
Installation of wooden sheathing
- The required lumber is selected and treated with antiseptics and fire resistance compounds.
- The beam for the racks must be at least 75*30. The rest is from 50*25 mm.
- The necessary markings are made.
- A horizontal beam is attached to the floor and ceiling. On opposite walls - it is mounted vertically. Thus, a closed square or rectangle is obtained.
- Vertical posts are installed into the resulting profile. This is done every 60 cm.
- Attach horizontal ties.
- Insulation is placed in the resulting squares and a vapor barrier is made.
- We must not forget about communications.
Everything needs to be leveled well; a level is suitable for this. The reference point is the largest protrusion of the wall. Self-tapping screws with washers are used for fastening. This completes the installation of wooden sheathing inside the house; next will be the installation of gypsum plasterboard sheets.
Metal structure
The metal frame is mounted quite simply. It's easy to do it yourself. For this purpose, a special metal profile and additional fittings are used. The profile is cut to the required size.
Installation of lathing from metal profiles
- Careful markings are made from the inside of the house.
- Before installation, all necessary values are measured.
- 10 cm retreat from opposite walls.
- Using plumb lines, determine the mounting location of the upper and lower guides.
- Racks are installed, 60 cm apart. They are secured using hangers.
- Cross members are attached.
Advice! For new houses, a movable type of sheathing is used. It differs in that the fastening takes place on a wooden sheathing, and the crossbars are attached through grooves in the supporting profile.
List of tools and materials
- Metal profile, galvanized. Sheet insulation. Antiseptic compounds for protecting wood. Drywall sheets. Wallpaper. Glue. Paint and putty. Screws. Electric drill. Screwdriver and hand screwdriver. Paint brushes. Spatulas. Tape measure. Plumb and level. Pencil.
If the finishing of the surfaces of a room is carried out correctly and efficiently, then its appearance can change beyond recognition. When using high-quality materials, such finishing of the interior surfaces of the house will last for many years.
When the construction stage is completed and the turn of finishing approaches, the question of choosing the material arises.
If the walls are not level, then plasterboard sheathing is ideal. In this case, you can do redevelopment, add various structures and additional partitions, or create arches, with the help of which you can conditionally divide the room into several zones. This finishing provides good protection from moisture to wooden walls and retains heat inside the house. This material is easy to work with, so anyone can handle it.
General information
First of all, I note that there are two ways to install drywall:
| Installation method | Peculiarities |
| Frame | In this case, a frame of metal profiles is assembled on the walls or ceiling. As a result, the usable space in the room is reduced, but the frame allows you to provide a flat surface for the walls. In addition, in the space between the base and the casing, you can hide communications or even lay insulation. |
| Frameless | Such installation allows you to save space in the room; in addition, it is carried out much faster, since there is no need to assemble the frame. The only thing is that in this case the base must be smooth and of high quality. |
Below we will consider the installation features of each of these methods.
Reinforcement and puttying
A wall or partition covered with plasterboard is not yet ready for finishing: the heads of the screws and the seams between the sheets must be hidden with putty. In addition, the seams and outer corners of the walls need reinforcement and reinforcement.
To reinforce the seams, serpyanka is traditionally used - a self-adhesive fiberglass mesh with a cell size of about 2 millimeters. It is glued along the seam, after which it is filled with putty directly through the mesh cells. You have to putty at least twice: gypsum putty gives a small but quite noticeable shrinkage when drying.
Reinforcement of the seam between sheets with sickle tape.
External corners are reinforced:
- Galvanized perforated corner profile;
- Plastic profile with mesh.
The corner is sunk into the putty applied to the corner, after which it is covered with another layer of it.
The corner profile will be completely closed when the wall is puttied.
The photo shows a corner of the partition protected by a decorative plastic corner.
What putty should I use to level the surface?
The most common gypsum putties in Russia produced by the German company Knauf are HP Finish and Fugen. However, I liked the cheaper and less common ABS Saten much more: the mixture lives noticeably longer (at least 45 minutes versus 25-30 for Knauf products), if necessary, can be diluted with water (which increases its life time to an hour or more) and does not lumps during mixing.
Finishing gypsum putty ABS Saten.
How to prepare putty correctly?
- Water at the rate of 1 liter per 1.6 kg of dry gypsum mixture is poured into a wide bowl (I use a plastic paint bucket);
- The mixture is poured into water, distributed as evenly as possible over its surface;
- After 3-5 minutes, the swollen putty is mixed - manually (with a spatula) or with a mixer attachment for a drill.
How and with what to properly putty seams, corners and screw heads?
- The caps are covered with two movements of a spatula 10-12 cm wide, crosswise. The first sliding movement fills the recess with putty, the second (“scraping”) removes its excess;
- The seams are also filled with cross-shaped movements of the same spatula. In this case, the seam is filled with putty as tightly as possible. Cavities in it increase the likelihood of cracks. In the second pass, the seam, together with the serpyanka reinforcing it, is covered with longitudinal movements of a spatula 30 - 35 cm wide;
Puttying with a second pass should completely hide the texture of the reinforcing material.
- To align external and internal corners, it is better to use special corner spatulas.
After filling the seams and masking the heads of the gypsum board fasteners, they are often puttied over the entire area. A layer of putty about a millimeter thick completely masks the seams and does not allow the base to show through the paint.
The next stage is sanding. GKL is sanded with grids No. 80 in the first pass and No. 120 - 160 in the second pass. It is better to sand in bright, oblique lighting, which will highlight the slightest irregularities due to the shadows they cast. I use an inexpensive oscillating sander for sanding.
Vibrating sander with attached sanding mesh.
The smooth surface of the gypsum board is dust-free (I clean it of dust with a regular broom) and primed with penetrating acrylic primer. The primer will stick the remaining dust and improve the adhesion between the surface of the drywall and the final coating - paint or wallpaper.
Deep penetration acrylic primer from Ceresit.
Wallpaper can be glued immediately after the soil has dried, but painting will have to wait at least two weeks after puttying. If you hurry, the seams will show through any number of layers of paint due to the moisture that has not completely evaporated.
Preparatory stage
It consists of preparing the original surface. Before installing the profiles, protruding or collapsing elements are removed from the walls, cracks and holes are covered. Inspect the walls for knots - their presence will complicate the installation of guides.
Determine in advance how the wiring will go. Usually it is laid inside the frame, but in this case it is better to put it above the sheets of drywall.
It is important to take into account the requirements of SNiPs, namely:
- lay electrical cables or wiring in metal sleeves;
- Do not install plastic pipes and corrugated elements under drywall.
The requirements are determined by the fact that if it is necessary, for example, to tighten a self-tapping screw or drive a nail into a wall, the fastening element may touch the structure under the plaster. In the case of pipes, this threatens flooding and wetness of the gypsum boards (and they will fail), and with electricity, a short circuit that can cause a fire.
Frame method
This type of installation is excellent in situations where there are large differences in the surface. It is also used if you need to insulate wooden walls or hide communications. In this case, you can attach drywall to the wall on a wooden frame or use a metal profile.
Schematic representation of a simple wood frame indicating the connecting nodes and materials used for this
Creating a wireframe
- First of all, it is necessary to perform surface treatment. The fact is that after all the work is completed, the wood will be completely covered, and this must be done to prevent the appearance of fungus or mold. Taking this into account, the installation instructions recommend the use of special impregnations containing antibacterial substances.
Option for installing a structure made of a metal profile, indicating the most correct dimensions and distances when manufacturing only vertical guides
- After this, they select and begin to install the frame. It can be made from wood, but experts recommend choosing metal profiles. The fact is that it is much easier to work with them, and products made from this material have a longer service life.
- First, the lower and upper guides are usually attached, which are set using a plumb line to correctly maintain the vertical. At the same time, the manual, which explains how to sheathe walls with plasterboard in a wooden house, recommends focusing on the unevenness of the wall. They try to position the first guide so that it is closer to the most protruding part of the wall in order to save space as much as possible.
Another option for making lathing, indicating the type of material used
- Next, install the vertical strips. In this case, the distance between them is made such that the sheet of drywall installed on the frame, on both sides, lies on their area to the middle. Some craftsmen prefer to mount additional verticals, which will be located in the center of the material, but the price of the structure will increase.
For installation on the ceiling it is more convenient to use clamps
- Horizontal slats are also attached, although some experts refuse them. However, the technology for producing such finishing work strongly recommends not to neglect this point, as this will affect the quality of the structure.
If necessary, you can install insulation into the cavity of the frame, although in wooden houses it is considered more reasonable to insulate the outside of the building so that the dew point is formed correctly
Installation of sheets
At this stage, covering wooden walls with plasterboard involves placing the material on the frame and then fixing it using appropriate fasteners. In this case, the screws are slightly recessed into the sheet by 1 mm. Usually the amount of fasteners is selected individually, but the main thing is to firmly fix the drywall, eliminating play and backlash in the connection.
If the height of the sheets is not enough to completely cover the area, then you can use pieces of material, but you should not make very small patches, as they weaken the structure and may crack during installation
At the next stage, the manual, which describes how to level walls with plasterboard in a wooden house, involves grouting the joints. The joints between the sheets are covered with a layer of putty, while installing reinforcing tape, trying to make the surface level. You also need to seal the places where the screws are installed.
A variety of planting gypsum from a well-known manufacturer