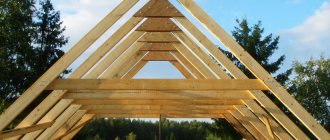
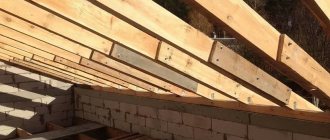
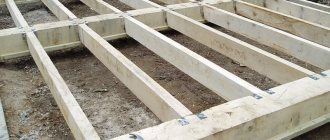
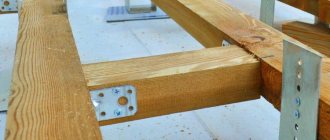
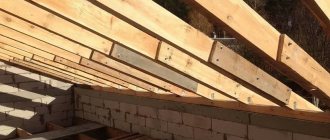
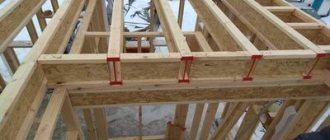
The rafter system is the frame of the roof of the house, which carries and evenly distributes the weight of the roofing pie, sometimes reaching up to 500 kg/m2. The reliability of this unique frame depends on three factors: the accuracy of the calculation, on the basis of which the number and cross-section of the supporting elements are selected, the material from which it is made, as well as the correctness of the fastening technology. Knowing how to properly fasten rafters, you can significantly increase the load-bearing capacity of the frame, making it stronger and more reliable. Installation errors, on the contrary, lead to significant losses in strength and deformation of the roof. In this article we will talk about the main types and methods of fastenings with which you can qualitatively install rafters with your own hands.
Installation of the rafter system
roof truss system
- Rafters, the size of which must fully comply with the design documentation. Usually this is a block of size 100-200x100-200x4000-6000 mm;
- All kinds of waterproofing material (you can use regular roofing felt);
- Axe;
- Simple pencil;
- Boards – 6 pcs. , the size of which should be 25x4000-6000mm. The width will not matter, but not less than 100 mm;
- Fastening material: metal staples, nails (from 75 to 200), self-tapping screws (6-12 mm x 70-150 mm);
- nail puller
- Hammer;
- Chainsaw (you can also use a hacksaw);
- Level (1000 mm);
- Roulette (at least 10 meters);
- Drills (diameter 4-10mm (it all depends on the size of your staples));
- Drill.
Direct installation.
- Before starting work, you should clearly determine what type of rafter system structure you will be working with. Only after this start working. Once the type of system is selected, you can begin installation. We will show the installation process using the example of an attic rafter system, since metal rafter trusses are rarely used in the construction of a residential building.
- A farm template is made from boards.
To perform this operation, we take two boards and connect their edges with a nail. That is, we will get a design in the form of scissors.
- The next step is to install the free edges on the supports that will support our rafters in the future.
After the roof slope is selected, we fix the angle formed between the boards using a crossbar.
- The template is then lowered onto the beams, where the cutting angle of the rafters is marked with a pencil.
Installation process
The template is made from boards. This simplifies the process of choosing an angle when installing the rafter system.
To avoid loads when fixing the crossbar, which can easily disrupt the desired angle, the crossbar should be secured with self-tapping screws.
- The next step will be cutting the rafters according to the template and directly assembling them (see diagram below).
The rafters should be assembled using nails, screws and a crossbar. When crossing rafters, the best option would be to hammer in three nails, this will immobilize them.
Next, we lift the entire frame and install it on the base. To climb to heights, use a ladder (
Observe safety precautions!!!).
Make marks with a pencil on the base and on the rafters so that you can then make cuts with a chainsaw (wood saw). Using the same system, assemble another roof truss. (Note: the base is a beam measuring 15*15 cm).
- Then we install wooden trusses at the edges of our building and stretch a cord between them, which will be a kind of level. Trusses should be installed exactly perpendicular to the base; this parameter is controlled by the level.
Compliance with point 6
Trusses that are installed along the edges are secured on both sides with sub-supports installed at an angle to the rafters.
- After you have installed two rafters, proceed to assembling the rest at intervals of 60-80 cm.
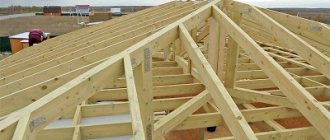
At the end, the rafter system should look like this:
Final look
It will be convenient to nail several boards between the rafters to prevent them from moving relative to each other.
- In the final stage, you can install transverse strips and supports; perform all work related to fastening using self-tapping screws, as they are more convenient and serve for better fixation of the rafters - the reinforcement of which we need.
Upon completion of the installation of the rafters, calmly proceed with the installation of the sheathing.
In order to make the attic cozy and warm not only in summer, but also in winter, the walls should be covered with wood panels, and insulation should be laid between the rafters.
Calculation of rafter installation
When calculating the rafter system, emphasis is placed on the reliability and strength characteristics of the structure. It is necessary to choose the correct spacing between the beams. The parameter is calculated based on the distance between the reference points and the cross-section of the bars, as well as the design of the roof.
Calculation table
| Distance between rafters (cm) | Rafter length (cm) | ||||||
| 300 | 350 | 400 | 450 | 500 | 550 | 600 | |
| 60 | 4×15 | 4×17,5 | 5×15 | 5×15 | 5×17,5 | 5×20 | 5×20 |
| 90 | 5×15 | 5×17,5 | 5×20 | 7,5×17,5 | 7,5×17,5 | 7,5×20 | 7,5×20 |
| 110 | 7,5×12,5 | 7,5×15 | 7,5×17,5 | 7,5×17,5 | 7,5×20 | 7,5×20 | 10×20 |
| 140 | 7,5×15 | 7,5×17,5 | 7,5×20 | 7,5×20 | 7,5×20 | 10×20 | 10×20 |
| 175 | 10×15 | 7,5×20 | 7,5×20 | 10×20 | 10×20 | 10×25 | 10×25 |
| 215 | 10×15 | 10×17,5 | 10×20 | 10×20 | 10×25 | 10×25 | |
Rafter fasteners
To ensure reliable connection of the parts of the rafter system, special fasteners are used. Rafter fasteners are wooden and metal products that are used when installing components of the rafter system. These include wooden elements
:
- bars;
- scarves (triangular overlays);
- dowel;
- thorns.
Metal elements
:
- nails;
- screws;
- bolts complete with washers and nuts;
- staples;
- clamps;
- overlays;
- loops;
- sliders/sleds;
- anchors;
- serrated plates;
- nail plates;
- corners;
- perforated tapes, etc.
The choice of rafter fasteners depends on the requirements for the strength of structural units, design loads and roof configuration.
Wooden fittings
This means various anchors, rivets, and metric fasteners. These are specially manufactured products for fastening certain parts of wooden structures.
They also use various mounting profiles made of thick galvanized steel sheet. They already have holes made for nails, screws or bolts - sometimes of different diameters. They greatly facilitate the connection of wooden elements in different configurations and at different angles.
The simplest such element is an ordinary perforated steel plate. Although there are more highly specialized parts that have very complex multifaceted shapes.
When choosing wooden fittings, it is recommended to check its permissible load. If, when designing a wooden structure, the architect foresaw the use of such fasteners and determined what loads arise from given connections, then choosing the most suitable fittings for your home will not be difficult. Otherwise, it is better to consult with experienced specialists and sellers of construction fasteners.
Did you find this article helpful? Please share it on social networks: Don't forget to bookmark the Nedvio website. We talk about construction, renovation, and country real estate in an interesting, useful and understandable way.
Attaching the rafters to the mauerlat
Fastening the rafters to the wall is most often done using a mauerlat - a special support structure that allows you to evenly distribute the load from the roof onto the walls and foundation of the structure. Rafters can be mounted to the Mauerlat in two ways - using a rigid or sliding fastening.
With a rigid fastening method, the possibility of any interactions (shifts, bends, turns) between the connected structural elements is completely eliminated. This is achieved if
:
- corners are used for fastening rafters with a hemmed support beam;
- a cut (saddle) is made on the rafter leg with further fastening of the connection with staples, nails and wire.
In the first case, the support of the rafter legs is carried out using a support beam. The rafter leg is firmly abutted along the pressure line, and then fixed with metal fasteners with a metal corner installed on the sides to prevent lateral displacement.
The second mounting option is used more often. In this case, the rafter fastening unit involves the use of nails, which are driven from the sides at an angle towards each other (crossing occurs inside the Mauerlat), and then the third nail is driven vertically into the lower part of the rafter.
Sliding (hinged) coupling of elements allows the rafters to be able to move somewhat relative to the Mauerlat within specified limits. Several fastening methods are used. This can be a rafter leg fastened to a bracket, a vertically driven nail, or two side nails driven in at an angle. Special sliding fastenings for rafters – “sleds” – are also used.
The sliding joint is mainly used in the construction of wooden houses from logs or timber
. In this case, deformation of the rafter system during gradual shrinkage of the house is eliminated. Sliding joints in the attachment points of the rafters to the walls ensure gradual adjustment of the roof structure to changes in the geometry of the structure. The remaining roof elements are installed using standard technology.
Skate attachment
Attaching the rafters to the ridge has its own characteristics. The three most common installation methods are:
:
- end-to-end connection of rafter legs;
- fastening to the purlin (ridge beam);
- lap joint.
Connecting the upper parts of the rafter legs end to end is a simple and reliable installation method. The top edge of each rafter should be cut at an angle in accordance with the selected slope angle. Then the opposite rafters must be connected at the cut points and fastened with two nails from 150 mm. The nails must be driven in at an angle so that the parts that go into the opposite rafter are of sufficient length to ensure a tight fastener.
How to strengthen rafters connected end-to-end? For this, it is recommended to use metal or wooden pads. The wooden overlay is fastened on both sides of the rafter pair in the area of the connection with nails, the metal overlay - with bolts.
The connection of rafters on a purlin (ridge beam) is similar in execution to the first method. The rafter legs in the upper part are cut in the same way, but are mounted one at a time to a horizontal beam.
An overlapping rafter connection involves connecting the rafter legs not with cut ends, but with overlapping side planes. The connection is made using studs with washers or bolts. An overlap connection is the easiest way to install rafter legs.
Installation of sheathing
The reliability of the roof largely depends on correctly executed sheathing. It can be continuous or sparse. The choice of type and pitch of sheathing depends on the roofing material used.
The sheathing is mounted from a bar or board, usually unedged. The timber is usually attached to the rafters (counter-lattice) with one nail at each attachment point. If the sheathing is made of boards, then the board is attached to each rafter with two nails driven in along the edges.
The length of the lathing material is usually less than the length of the roof slope. Proper fastening of the sheathing to the rafters implies reliable splicing of boards or timber along the length. The joint should be on the rafter, and both ends of the spliced elements are fastened with nails.
Before proceeding with the installation of the rafter system, it is recommended to choose the best option for how to secure the rafters.
How to stitch
If the house is small in width, then there will be no special problems with finding material for construction.
But if the structure is large, then an operation such as fastening rafters from several parts or building up may be necessary. How can you cope with such a task? Here builders advise fastening the parts together in one of the following ways:
Fastening can be done end-to-end. In this case, the ends of both parts of the rafters are sawed strictly at ninety degrees. Next, they are joined and secured with strips, board overlays or toothed plates.
In this case, nails or self-tapping screws must be placed in a checkerboard pattern. Both parts of the rafters can be secured with an overlap. This is the method that is used most often. In this case, the two parts are combined so that there is an overlap of at least one meter.
Next, fastening is done using nails hammered in a checkerboard pattern. Instead, you can use studs with nuts. To achieve maximum strength in the connection of rafters made of timber, it is better to use the method of splicing with an oblique frame. In this case, the ends are cut at an angle of 45 degrees.
Such notches on both parts of the rafters must match perfectly. If this does not work out and a gap remains, then you should refine the surfaces with a plane and sandpaper. After this, the ends of the beams are joined and fastened with bolts or studs.
Diagonal or main rafters cannot always be made from a solid board or timber. In this situation, you cannot do without merging the two parts.
But when doing this work, you need to remember the basic rule. Such a connection must be strong, because it will be subject to strong loads. Therefore, fastening must be done efficiently and slowly.
Types of metal fasteners and their characteristics
For the production of fasteners, metal with a thickness of 1.5-3 mm is usually used, which gives the products sufficient strength and sets it apart from other materials. You can find consumables in a variety of sizes for any purpose.
Among the varieties of rafter holder are the following devices:
- perforated mounting tape;
- support for beams;
- plates and overlays;
- beam supports;
- corner for rafter connections;
- LK mounts;
- corners KP;
- WB brackets;
- self-tapping screws;
- rafter bracket;
- bolts with nuts;
- knitting wire.
Fixing fasteners can also be done with nails. But they are used only in industrial production conditions, when it is possible to bend the cone-shaped part of the fastener. For such work, equipment is used that performs this procedure under pressure.
KP corner elements are produced in a large number of modifications. They make it possible to minimize the possibility of thread breakage on bolts and deformation of connections during natural shrinkage of the frame. Such parts can be fixed on nails or screws with your own hands; no special machines are required.
You can fix the load-bearing beam during the assembly of the floors of a wooden house from timber or rounded logs using WB brackets. In this case, there will be no need to make a tie-in on the rafter leg, and its load-bearing capacity is not reduced. Anchors, screws and nails are used to fix the fastening element.
In order to connect beams with rafters in the sub-rafter system, the LK fastening is intended. In terms of characteristics, it is practically no different from WB brackets, however, it can only be fixed with nails or self-tapping screws. They are widely used during the construction of log cabins.
To summarize, we note that fasteners are an integral part of the construction of any frame structure, including the roof of a log house. The stability of the entire structure and the service life of the roofing covering and pie depend on the quality of such consumables. In this regard, we recommend that you pay very close attention to the process of selecting fasteners for rafters in order to avoid many problems in the future.
What is a sliding mount?
The movable connection is made by installing sliding fasteners called “slides” or “sliders”. Such a unit provides a certain freedom for the rafter legs, which helps prevent deformation of the roofing system after the natural shrinkage of wooden buildings:
Here are the types of sliding supports:
Should I make a gash on the rafters if the house is made of timber: an alternative expert opinion
I still suggest cutting down, but not the rafters, but the top crown. Firstly, in this case, the risk of rafter bending is reduced, secondly, the “cold bridge” is reduced, thirdly, the tangential pressure on the mauerlat (top beam of the log house) is reduced, and fourthly, the insulation of the roof in the future is simplified. The disadvantage of this method is that when cutting down the upper crown of the beam, the height of the ridge decreases, therefore, if in the future it is planned to raise the height of the ceiling, one more crown should be provided. But! Such schemes are only suitable for houses made of wood, since in brick and concrete buildings the mauerlat must be intact in order to maintain its load-bearing qualities.
What methods of fastening rafters are used
When constructing roofs, two types of rafter structures are used - hanging and inclined rafters. Let's try to briefly consider both types of such structures and their attachment to the Mauerlat.
To evenly distribute the loads of an inclined roof structure, spacer and non-spacer methods are chosen for attaching the rafters to the Mauerlat. When a non-thrust design of rafter legs is used, then there is no thrust pressure between the walls and supports of the building.
To arrange a spacer structure, only rigid fastening of the rafters along the gable is used without the use of sliders. The force from the roof through the rafter legs is absorbed by load-bearing walls and supports. Attaching the rafters to the Mauerlat is done in this way:
- The support for the rafter leg is the mauerlat. The rafters are fastened using the sliding leg principle, and the upper part is fixed to the ridge run.
- The lower part of the rafter leg is secured to the Mauerlat using a slider. At the top, the rafters are connected by bolted joints or other means.
- The rafter structures and ridge purlins are connected into a durable structure, also called a ridge assembly, using a wooden block. They are fastened with nails, which must be driven in on both sides parallel to the ridge.
Fastening rafter structures to the Mauerlat using a non-thrust method is somewhat different from what was described earlier:
- It would be the right decision to make fastenings using sliders. In this case, there will be no auxiliary support at the bottom of the rafter leg. In the upper part, the structural elements rest against one another and they are connected to each other by various overlays.
- Fastening is carried out by rigidly pinching the lower ends of the rafters with the Mauerlat. To do this, use the lower support bar or gash, and the upper end rests on the ridge run into the horizontal notch. You can use a fastening with a slider, then there will be a slight possibility for vertical rotations at the joints.
In cases where the roof structure provides for the installation of hanging rafters, and this happens if there are no internal supports in the building or pillars, the lower end of the rafter leg has an overhang and extends beyond the supporting wall. The entire load coming from the roof is distributed over the external walls.
The system has the form of a symmetrical triangle, the side of which can have a length from 7 to 12 meters. Its design includes horizontal braces made of timber, as well as rafter legs, which are installed at an angle with a certain angle. The upper ends of the rafters on the ridge are installed in the completed cut. The structure is strengthened using a crossbar.
General information
To better navigate this topic, you need to know what rafters are, what they are, what they are attached to, and in what cases one or another type of rafter system is chosen.
Rafters are the load-bearing structures of pitched roofs, which take on the entire load from the roof and the snow cover on it, transferring it to the walls of the building. In private housing construction, they are most often made of timber or large-section boards placed on edge. Much less often, metal structures are used in the form of prefabricated elements or ready-made trusses. What and how to make the rafters from is decided based on the calculated load on them and the customer’s preferences.
Metal rafter system Source dawaihati.com
Structurally, rafters are divided into hanging and layered:
- Hanging rafters are installed on small houses, garages and other outbuildings, in which the span between the walls is no more than 5-6 meters. Their upper ends are connected to each other without additional support, and the lower ends, resting on the walls, are tightened with horizontal elements - ties. Tightenings reduce the bursting loads from the rafters on the walls, taking them upon themselves.
Additional tightening increases the span to 8 meters, and struts resting on the tightening - up to 10 meters Source obustroeno.com
- Layered rafters are installed on buildings with large spans over 10-12 meters with an average load-bearing wall or supporting columns. Their upper ends rest on the ridge girder, which in turn is supported by racks resting on the bench - a horizontal beam lying on columns or an internal wall. If the problem of how to install rafters on a pitched roof is being solved, then a layered structure is also chosen, since in it the role of a ridge girder is played by a higher wall.
In this case, tightening is not necessary due to the absence of tensile loads Source remoskop.ru
Types of support units by level of rigidity
It is those places where the rafters are attached to the roof elements that are called the support unit:
The support unit is not always static - sometimes it has to be made movable if some structural element is subject to unstable loads. It's like a car wheel that compresses, spins, squeezes and turns.
Something similar is realized in support nodes, only the degree of freedom in them can be different - from zero, when the node itself is already motionless, to triple, i.e. maximum:
- Support node with zero degree of freedom. Both ends in this case are rigidly fastened with corners on both sides. A rafter on a beam or mauerlat with such a knot cannot move at all.
- Hinge joint with one degree of freedom. In this case, the beam has the ability to rotate in a circle.
- Hinge joint with two degrees of freedom. Now, in addition to circular rotation, there is also the possibility of displacement. This provides special fastening of the rafters to the mauerlat or beams, and you only need to install the sliders or slides.
- A hinge joint with three degrees of freedom allows the beam to move both horizontally and vertically. True, circular rotation may or may not happen here.
Video description
Video about the construction of a rafter system for a pitched roof:
Modern steel rafter fasteners greatly facilitate the work of creating a roof frame. When using them, you should use the following tips and recommendations:
- all fastened wooden elements must have a thickness of at least 50 mm;
- The shaped fasteners should be fixed with galvanized screws or nails. Moreover, the nails should not be ordinary, but rough - with notches on the trunk, at least 40 mm long;
- symmetrically located fasteners can be additionally tightened with studs, tightening the nuts on both sides of the rafters.
Fastening with M12 studs Source mercabadom.ru
Connection between beam and rafter leg
The roof of the house, under the influence of loads on it, tends to move apart and down. To prevent this, various design solutions are used to prevent the roof frame elements from moving.
This is how cutting out recesses in the rafter legs was invented, which can be done using connections such as:
- tooth with one stop;
- tooth with a spike and stop;
- supporting the rafters on the floor beams.
Attaching the rafters to the mauerlat, watch the video:
A notch with one tooth is used when the roof has a large slope angle. This means that the rafters are attached to the floor beams at an angle greater than 35 degrees. A tooth with a spike is cut out in the leg, and a nest is created in the beam for the spike to enter. In this case, the depth of the notch cannot be more than 1/3 or 1/4 of the beam thickness, otherwise the element will weaken. The cutting is carried out at a distance of 25 - 40 centimeters from the edge of the beam, then the possibility of chipping will be avoided. To prevent the connection from moving sideways, a single tooth must be created together with a tenon.
A notch with a double tooth is performed for flat roofs, when the angle between the connection elements does not exceed 35 degrees, it is performed in one of the following ways:
- two spikes;
- stop without tenon;
- emphasis complemented by a spike;
- connection like a lock with two spikes and other options.
The mortise depth is usually the same for both teeth. But in some cases, the first tooth supplemented with a tenon is cut into 1/3 of the thickness of the beam, and the second - 1/2.
When creating roofs, this method of arranging rafters is encountered when the rafter legs and wooden ceiling beams are connected, but it is rarely used. In this case, a stop tooth is cut in the leg so that one of its planes rests on the flat edge of the beam, and the other plane rests on a cut made with a depth of 1/3 of the thickness of the beam. For reliability, in addition to cutting, an additional connection is made using clamps, bolts, wire loops or strips of metal.
Ridge knot
The roof ridge experiences a lot of pressure from the entire rafter system; roofers create a ridge assembly in five ways:
1. Butt 2. On a beam 3. Overlapped 4. In a groove 5. In half a tree
Butt-butt
To create a ridge unit by connecting opposite rafters end-to-end, do the following: 1. A right-angled triangle is sawn off from the upper end of each rafter leg. The cuts must be the same. Otherwise, the ends of the rafters will not be able to be brought close to each other. 2. Nails are driven into the connected ends of the rafter legs at an angle. If you do this horizontally, they won't be able to fit through both pieces of wood.
3. The created ridge assembly is reinforced on both sides with metal plates. Self-tapping screws are screwed into the rafters through the holes in these fasteners.
On the beam
When attaching rafters to a beam, or rather, to a special ridge purlin, they act in a special way: 1. The ends of opposite rafter legs are cut at the same angle. 2. The pointed ends of the rafters are placed against the ridge beam and secured to it with metal corners or nails. When the rafters are connected to the beam, the ridge is not pointed, but flat.
overlap
If you make a ridge knot by fastening the rafters together with an overlap, you will need to perform several simple tasks: 1. Connect the ends of the rafter legs so that they intersect each other. 2. Secure the overlap with a metal washer or bolt and nut.
3. Strengthen the fastening by squeezing out a little rubber seal around the bolt.
Into the groove
To connect the rafters into a groove, several carpentry actions are performed: 1. A cut is created in one rafter leg, and a tenon in the other. 2. The rafters are joined to each other by inserting the tooth into the notch. 3. The connection between the two frame elements is strengthened with a wooden dowel or nail.
Half a tree
Having chosen the method of connecting the rafters in half a tree, do the following: 1. At the ends of the opposite rafters, create two identical recesses, the depth of which is equal to half the thickness of the board used.
2. The ends of the rafter legs are connected like elements of a construction set. 3. The tongue-and-groove fastening is reinforced with two nails or a wooden dowel.
Attaching the rafters to the mauerlat
Correct fastening of the rafters to the ridge beam and to the mauerlat is an indispensable condition for professionally performed roof installation.
To install the rafters to the Mauerlat, one of two types of coupling is used:
- sliding;
- hard.
The choice depends on the shape of the roof and its structural features, and accordingly on which rafters are chosen - layered or hanging.
The rigid method assumes that the connection of the rafters and the Mauerlat is carried out in such a way that the possibility of rotations, shifts, bends, and torsions between these two elements is excluded (read: “How and how to attach the rafters to the Mauerlat”).
To achieve this result, you can use one of the following methods:
- using corners for fastening rafters and supporting frame beams;
- by making a gash on the rafter leg and further securing the connection with nails, staples and wire.
As for the second method, it is used more often than the first. It provides that nails are nailed from the sides at an angle towards each other (as a result they intersect inside the Mauerlat). After this, the third nail is driven vertically. The resulting fastening points for the rafter structure provide high rigidity (read also: “Rafter fastening points - structural elements”).
Additionally, both connection methods are secured by fastening the rafters to a brick or concrete wall using rolled wire and anchors. Prepare the rafters for installation if they have the same angle of inclination throughout the roof by using a template.
Installation of the rafter system, details in the video:
A sliding connection, also called a hinged connection, is achieved by creating a special fastener that allows one of the mating elements to move freely within specified limits. In this particular case, such a part is the rafter leg, and it will move in relation to the mauerlat.
There are the following methods for installing rafters to the mauerlat, providing offset:
- with the help of sawing and subsequent laying of the rafters, the place was washed on the mauerlat;
- by driving two nails diagonally from the sides in the direction one to the other;
- connection using one nail, which is nailed in a vertical position from top to bottom through the rafter leg into the mauerlat. An alternative is to use rafter fastening plates that have holes for nails;
- fastening method using a bracket;
- by extending the rafter leg beyond the wall using single plate fastening;
- by using steel fasteners specially designed for rafters, which are called “sleds”.
All the described methods, on the one hand, make it possible for the rafter leg to rest against the Mauerlat, and on the other hand, if the structure moves, its elements can move relative to each other.
The sliding type is found quite often in the construction of houses; this connection of rafters and mauerlat is especially popular when arranging wooden houses that are built from logs or timber. Over time, the original geometry of the structure is distorted as the walls shrink and the use of rigid joints leads to the integrity of the walls being damaged. Attaching the rafters to the frame using a sliding connection allows the log walls, gables and other elements of the building to adjust to shrinkage.
It is also not possible to rigidly fasten the rafters in the ridge. The entire structure is assembled first on the ground. Before installing the rafters for the roof, measurements are taken, cut-outs are cut into the mauerlat and rafter legs, and then a careful adjustment is made.
How to design the location of the rafters?
To do this, it is necessary to correctly calculate all possible loads and determine the appropriate weight of the roof structure. Based on these calculations, it will be possible to design the material and determine the thickness of the main walls.
If errors are made in the process of assessing loads, the entire roof structure may become deformed, resulting in the integrity of the coating being compromised. In some cases, the roof may collapse. During the design process, special attention should be paid to the following factors:
- whether the structure contains internal elements for support; placement of such elements; total weight of the roofing material; roof slope, its angle of inclination; rafter system and its design; dimensions of the room that is planned to be covered; cross-section of the bars that will be used.
What other fasteners are used for connection?
Each existing fastening method requires the use of appropriate fasteners. For example, you are already familiar with steel angles and thick wires. Additionally, a variety of reinforced corners, special tape, all kinds of bolts, nuts and screws, special-purpose fasteners, etc. are used.
Specialized fastening, plays a connecting role when connecting two elements intersecting at an oblique angle
If the installation will be carried out using brackets, no tie-ins are made in the rafter legs. That is, this method allows you to obtain the most reliable and efficient connection.
Main connecting nodes
The main components of the rafter system are: - rafter truss - the connection of the rafter pair, braces, as well as racks and braces; - ridge knot - combination of two opposite rafters; - a link made of a mauerlat and a rafter resting on it; — a module that includes a run, a stand and a bench; - connection of the rafters with the strut and the stand.
The most complex part of the roof frame is the truss, which is distinguished by the fact that it is assembled on the ground and then transported to the roof, since this is the only way to successfully fit one wooden part to another. A roof truss consists of at least three elements - in addition to the main elements - two opposite rafters and a brace, it includes additional fragments - posts and braces that reduce the pressure of the structure on the walls and is created using various types of notches with virtually no use of metal fasteners.
The ridge knot also has several features - it is formed as a result of connecting two opposite rafters due to special cuts or notches. There are many methods for creating a ridge knot and it is fixed using metal strips, bolts or nails.
The connection of the rafters and the mauerlat occurs due to cutting in each rafter leg, corresponding to the shape of the element that serves as its support. The rafters are secured to the Mauerlat so that they do not move to the side, and strengthening the connection between the rafters and the Mauerlat is achieved by attaching metal corners, construction brackets, nails or bolts.
A module of a purlin, a post and a girder is formed by driving construction brackets, steel dowels or linings from steel strips into the places of their connections. The assembly of a girder, a post and a girder allows you to divide the load between the external and internal walls of the building. Struts, racks and rafters are assembled into a single module, creating cuttings. To prevent their connection from being weak, construction staples are used.
Advantages of wooden floors
Installation of wooden building elements does not require the use of special construction equipment and hired labor. This compares favorably with laying heavy concrete slabs. Moreover, such an interfloor ceiling in a wooden house with a second floor or attic is the only correct solution.
An important quality parameter for the wooden elements of a building is the absence of cold bridges. If sheet materials (foam plastic, mineral wool boards) are used for insulation, the sheets are cut strictly to the size of the openings between the beams. If the construction of a wooden floor between floors involves the use of bulk or fibrous materials, it is necessary to ensure that all cracks are filled.
It is extremely important to ensure high-quality vapor permeability. Therefore, when laying polyethylene on the insulation, and not a special hydro-vapour-permeable membrane, gaps are left
The installation of the wooden floor is completed by laying the finished floor and finishing work.
Comparing fasteners
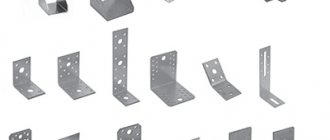
These metal corners are used for attaching rafters to the mauerlat, beams and walls:
Types of metal plates
Note that there are two types of such plates: nail and perforated.
Perforated ones have many holes for bolts and screws, and it is with their help that such plates are attached to wood. The advantage of perforated plates is that they are able to connect the necessary elements of the rafter system at almost any angle. Moreover, such plates can be easily cut to the required size. Install perforated plates on both sides of the connections.
Nail plates do not have nails themselves. This fastener is used only in factory conditions, or in the presence of a special press. The fact is that you cannot hammer such a plate into the rafters with a hammer - you need proper, uniform pressure.
Additional items
Sometimes, in addition to the same metal corners and nails, support bars are additionally used:
Some valuable tips
If you use flat or shaped steel fasteners in joint connections, then:
- The thickness of the wooden elements should not be less than 5 cm. All because of the screws.
- Secondly, simple nails cannot be used here - only screw or rough nails, which simply won’t come out. Especially if the wood for the rafters has a moisture content of more than 18%, i.e. not completely dried, and after this material dries, the nodal connections are always weakened.
- Thirdly, take nails with a diameter of at least 4 mm and a length of at least 40 mm.
- Always use two angle irons per assembly if possible. Just place them symmetrically.
Using a corner to connect structural elements
When choosing a method for attaching roof rafters to the Mauerlat, you need to focus on the characteristics of a particular roof. In the case of wooden buildings, a sliding joint is usually used; in all other situations, the joint is made rigid.
Scheme of strengthening rafters with additional struts
If preference is given to connections using special cutouts, work should begin directly with their preparation. Make the cutouts so that the rafter can be installed without any problems with its horizontal section on the mauerlat, and the angle of inclination of the beam corresponds to the inclination of the roof slope. To fix one beam, three nails will be enough, two of which should be driven in on both sides of the rafters at an angle. Drive the last nail in a vertical direction from the top. Use wire to strengthen the connection. As a result, you will get the most durable and rigid connection possible.
The most common method of connecting rafters to a mauerlat is a method that involves the use of hemming beams and corners. In this case, the work begins with the rafter being cut at the required angle. The angle is selected in accordance with the slope of the roof slope fixed in the project.
Next, you need to install a hemming beam about 100 cm long along the edge of the support beam. The rafter will rest rigidly against this beam along the pressure line. The design of the system under consideration is such that the connection will be as rigid as possible, without shifts or other disturbances. The lateral fastening of the rafter leg to the support system is performed using metal corners. Such fasteners help prevent lateral displacement of the rafters. Additionally, experts recommend strengthening the fastening points using special wire.
There are several types of corners that can be used to connect the rafters with the Mauerlat. The most common are the corners of the KR11 and KR21 brands. Such products have oval holes for anchors, thanks to which the likelihood of fasteners breaking under the influence of loads or during the settlement of the structure is significantly reduced. Using a corner of the KR5 brand, you can fasten structural elements with a large load-bearing capacity. The KR6 brand corner has a reinforced design and is used for fixing heavy elements.
Fastening
Additionally, corners of the KM brand are used, for the manufacture of which perforated steel is traditionally used. With their help, the main load-bearing and various additional elements of the rafter system are secured. Among the advantages of such fasteners, it should be noted the possibility of using traditional screws and self-tapping screws, as well as the absence of the need to involve special equipment in installation work.
Rafter fasteners
Reinforced corners of the KMRP brand are also available for sale. They are designed to fix structural elements at right angles. Such products provide high-quality fixation of rafters. Such corners can be adjusted, which makes work as convenient as possible.
How to properly attach rafters to beams?
In simple houses, mostly frame ones, the Mauerlat can be abolished. In this case, the rafters are attached to the floor beams. The most reliable option for assembling such a system is the preparation of roof trusses. Each truss consists of two rafter legs, a connecting crossbar and a bottom tie. For strength, the trusses are reinforced with central beams and struts:
The floor beams are laid in such a direction that the trusses intersect them perpendicularly in different planes. The tie performs the main load-bearing functions, is attached to the floor beams with anchors, through bolts, studs and reinforced with plates and metal corners.
It is possible to attach the rafter legs directly to the beam, which will additionally serve as a tightening. To create high-quality support units in such a system, two fastening methods are recommended:
- Connecting the rafters to the beam with a double tooth - cuts are made on the beam and the bevel of the rafter leg (two butt notches on each).
- Fastening with bolt and clamp. Through fastening may be provided, but if the boards have a large cross-section, notches are made and the parts are connected with long bolts.
Features when building a canopy
A shed roof is erected over an extension to a house or a canopy, adjacent to the wall or roof of the main building. The lower ends are attached to the Mauerlat in the usual way. The peculiarity is in the installation of the upper part of the rafter legs.
- As a preliminary step, the required angle of inclination is determined.
- Then, taking into account the angle of difference, a wooden structure made of timber is installed.
- The fastening of the rafter frame to the wall of the main building must be movable, since due to different shrinkage rates cracks may occur
- An elastic layer of polyurethane foam or other soft material with low thermal conductivity is laid between the beam and the wall.
- If the roof of the canopy is adjacent to the roof of the main building, then the adjacent slope is dismantled and rafter legs are installed from the ridge of the main roof to the mauerlat of the extension.
To seal the junction of the rafter legs to the roof or wall, install a roofing apron (a strip with flaps that seals joints and seams).
Let's sum it up
The article describes in detail how to properly attach rafters to a ridge, starting from an overview of the types of fasteners to a detailed description of each fastening method. You can attach the rafter legs to the ridge:
- With cutting - the traditional method, and without it - a simpler installation method, which became possible thanks to modern metal fasteners.
- Butt -joint is a more reliable, but also more complex method of fastening, which is suitable for houses made of aerated block, brick, concrete, or overlap is a simpler method that is good for log houses and houses made of timber.
- Nails and staples are an outdated method that is less reliable than other fastening methods.
- With the help of wooden overlays , which securely connect the rafters and the ridge beam into one knot.
- Using metal fasteners is the optimal fastening method for today, which provides a strong connection and is very easy to implement.
- Half-timbering is a very labor-intensive method, which is usually used when installing a rafter system using traditional technology.
- Joining a ridge beam is a fastening method originally from North America. Rarely used, since it does not have any special advantages over standard methods of installing rafters, and the complexity of the work is high.
- Hinged - not one, but several methods of connecting rafters, which have one thing in common: a movable fastening that can withstand changes in the slope of the roof during the shrinkage of a log house or house made of timber.
All of the above fastening methods are reliable and tested. Therefore, for an ordinary house that is being built in the south and central Russia, we recommend choosing the method of attaching the rafters to the ridge girder based on the criterion of ease of installation. In most cases, this is a connection of the rafters with a perforated plate, and the rafter legs and ridge with metal corners. Wooden houses require hinged joints, and for buildings in northern regions with heavy snow loads, reinforced methods of fastening rafter legs that can withstand hundreds of kilograms of snow load are needed.
Source
