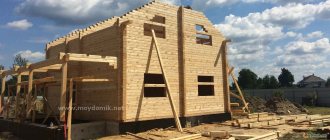
Frame construction is rapidly gaining popularity among individual developers. In Canada, this is a government program. In Russia, this is a solution to housing problems on your own, which will allow you to build a one-story or two-story frame house in the shortest possible time at the lowest possible cost.
It is possible to build a frame frame with your own hands, even in the absence of special construction education, skills, or experience. To do this, you will have to make an effort to understand the technology of frame construction, fortunately information today is available in articles and videos.
The next step is to acquire basic skills in performing construction work. As a result, you will be able to build a modern frame house with your own hands , and at an affordable price you will receive a reliable individual home tailored to your special requests, needs, and needs.
We will provide a detailed description of technological operations to avoid miscalculations during construction. Using technology, you can build a frame house with your own hands (step-by-step instructions, 6x6 m2 - the dimensions of the house that we took as a basis) with high quality.
- Strip foundation
- Concrete subfloor
- Ukosiny
Frame house: step-by-step instructions
Let's list the main steps that need to be completed sequentially in order to build a new frame house with your own hands; step-by-step instructions will give you the right idea about construction.
Frame wall diagram.
Design - planning, thinking through the structure of a house, layout of walls and rooms, doors and windows, plumbing fixtures, water supply, sewerage, electrical wiring, heating. During the design process, a diagram of a frame house is drawn , which indicates the location of utility networks and plumbing and heating devices. When working out diagrams of frame houses with your own hands , household utility rooms, it is important to take into account how the house will be heated - choose a heating system, a layout of its elements. Step-by-step construction will be carried out according to the finished scheme.
- Soil work is the preparation of soil for the foundation and the actual construction of the pile foundation.
- Assembling the wall frame from vertical posts and frames.
- Installation of interfloor ceilings.
- Roofing with sheathing, installation of the rafter system and laying of roofing material.
- Construction of walls that need to be sheathed with sheets of slab material.
- Installation of subfloor and ceiling.
- External doors, windows, partitions and partitions.
- Distribution of communications inside the walls of the house.
- Interior lining and finishing.
Now let’s move on directly to the question of how to make a frame house with your own hands, what to consider for high-quality construction and proper execution of the work.
Choosing a location on the site
In accordance with the urban planning standards of the Russian Federation, your residential building must be located at a distance of at least 3 m from the official border of the site. Also, in most cases, local regulations regulate a 5-meter setback from the red line of the street to the house.
It should be taken into account that all frames belong to the IV and V degrees of fire resistance, therefore, in accordance with fire safety standards, the distance from your building to the house on the neighboring site must be at least 10 meters.
The remaining requirements for placing the house are presented in this image:
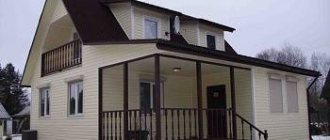
DIY frame house
Preparatory work is necessary for any construction, especially if you decide to build a frame house, you will simply need step-by-step instructions. If you thought through the house design yourself, then you took into account the peculiarities of the location of the building on the site. If you bought a ready-made project and decided to implement it on site, then you will need to “tie” the building to your terrain. How to build a frame house, instructions will be useful at the very early stages of construction.
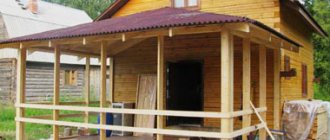
DIY frame house step by step photo.
Site preparation
What will need to be done on the site where I am building a frame house with my own hands:
- Clear it of old buildings, if there are any on the site, of construction debris and stumps and snags.
- Ensure the possibility of transporting construction materials, clear the road for the car and a place for turning around.
Shed for storing boards.
- Consider places for storing building materials; if the terrain is uneven, they should be located on elevated areas to protect them from getting wet.
- Perhaps the site needs to be leveled, for this you need to calculate the relief and call construction equipment.
- For some areas where frame construction is being carried out, instructions on how to build a fence will be additionally relevant to prevent theft of materials.
Site marking
By marking we mean the designation of the location of the future structure on the ground. The frame house diagram is transferred to the area using pegs and ropes. The pegs are driven into the ground and a rope is pulled between them, indicating the location of the future external walls along the perimeter.
Marking the site for construction.
Carefully measure all angles, observe the degrees (clearly marked 90°) and the length of the walls. Deviations of even a few degrees are not allowed. They lead to distortion of the structure and improper distribution of loads. Which, as a result, can reduce the strength of the entire structure and reduce its reliability.
We are drawing up a project
According to the Federal Law, the developer is obliged to be guided by the project created by professional design organizations. The documentation drawn up must also be agreed upon by authorized officials of various services, where changes and/or additions may be made.
In fact, local authorities only require a preliminary design, including a general plan diagram, plans, section, facades and basic technical and economic indicators. Such a project costs no more than 10,000 rubles, and it can be ordered after construction and before commissioning.
However, for your convenience and saving on rework, we recommend choosing a suitable standard project or creating an individual one, taking into account personal preferences and wishes. In both cases, it is necessary to mark out all communications and include engineering systems in the plan.
Example of a typical preliminary design
Please note that standard projects are traditionally cheaper, while individual ones allow you to realize your own ideas. Individual drawings from the design documentation are drawn up taking into account the reference to the topography and other features of the site - only such scrupulousness can guarantee the long-term operation of the home without problems and major repairs.
Instructions for the foundation
The step-by-step construction of a frame house with your own hands begins with the foundation. This is the foundation of the house, a large, flat and strong “stand” on which the entire frame structure rests. It can be poured from concrete or assembled from ready-made concrete blocks.
Strip foundation for frame.
Frame construction is called “light”. Frame walls put much less pressure on the surface of the earth than permanent brick structures or concrete monoliths. The frame is also lighter than a timber house. Therefore, your building will need a small, shallow foundation, and the depth can be 100-300 mm.
On a note
When deciding how to build a frame house with your own hands, you invariably face the question of choosing structures and materials. For frame buildings, shallow strip foundations or slabs are constructed. In some cases, foundations for frame frames are made deep.
In some cases, frame frames require a greater foundation depth. This happens when the soil is unstable, mobile, loose, and the structure is planned on the shore of a reservoir. In this case, a pile-screw foundation is installed, which will rest on deep and stationary layers of soil.
Strip foundation
It is a stone ribbon, a path buried 100-400 mm into the ground. The foundation rises 100-300 mm above the ground surface. Thus, the total height of the strip foundation for a frame house is 200-700 mm.
Strip foundation formwork with reinforcement mesh
On a note
You can make the foundation deeper and higher - but this is at your discretion, if you want to use more building materials and get a more massive structure for the foundation of the house.
The foundation tape is poured into trenches prepared in advance. You can mix the concrete for pouring yourself. Before pouring, a layer of sand is poured into the trenches, thereby creating a so-called sand cushion (thickness up to 100 mm) and metal reinforcement is laid.
Slab foundation
A slab foundation is also called a floating foundation. The frame house will rise and fall with it, with seasonal expansion of the soil. Therefore, the slab must be strong enough to allow the construction of a building of two floors or higher.
The slab foundation is poured from concrete and reinforcement, and the reinforcement is tied with wire. The reinforcing mesh provides the frame house slab with the necessary strength, rigidly fixing the monolithic slab.
The foundation is calculated according to the principle of increased load; reinforcement of different diameters is used. Plus, you can change the distance between the rods, and this will help increase the strength of the foundation. The cost depends on the complexity of the work and the materials spent on creation.
The foundation is poured with a monolithic slab
The slab base can be minimally buried into the ground by 100-200 mm, or concrete can be poured onto a gravel bed without deepening. The total height of the slab should be 200-300 mm.
It is important for the foundation slab to ensure resistance to rising ground moisture. Therefore, when mixing concrete, a waterproof additive is added to it. This will ensure the concrete slab is waterproof and the floor inside the future room is dry. It will also extend the durability of the foundation and the entire structure.
Pile-screw foundation
To obtain a pile-screw foundation, you can use asbestos pipes or ready-made metal piles. For asbestos pipes, pits are prepared, into which the pipe is installed and concrete is poured into it. Pre-reinforced, i.e. place metal fittings inside the pipe. Metal piles are screwed into the ground without removing the soil, without digging a hole.
To make it easier and clearer how to install a pile-screw foundation and a frame house with your own hands, here is a step-by-step photo.
Set of piles for screw foundation
Screwing in foundation piles manually
Connecting foundation screw piles to each other
Pile-screw foundation
Expert advice
- When laying the foundation, it is better to use piles that have an extended “heel”. This design of piles increases the bearing capacity of the foundation several times. In addition, this design will effectively prevent soil swelling.
- To secure the strapping beam, you should prepare in advance special pins that will connect the base of the house to the foundation. The more often these studs are installed, the stronger the structure of the frame house will be.
- For strapping, you can use timber measuring 150 mm by 100 mm, but its cost is quite high. It is better to use several boards of smaller thickness connected together, which will significantly increase the strength of the strapping.
- If the logs are very long, then a transverse beam is used, onto which jumpers are nailed to increase the strength of the structure.
- To reduce the cost of building a frame house and at the same time significantly increase its strength, you can use the technology of prefabricated racks, when each rack is mounted from two boards fastened with nails.
Timber tying
Horizontal beams are laid on top of the finished piles. This design is called a grillage. When you decide to build a frame house with your own hands, the step-by-step sequence begins with the installation of a grillage, which is also the bottom frame of the frame with vertical fastening of the racks on them.
For the bottom trim, choose a wooden beam with a cross-section of 150x150 mm. This is a load-bearing element of the structure, which must have sufficient strength and support the walls, roof, decoration and internal household appliances.
To connect the corners of the strapping, choose one of the methods suggested in the picture - half-tree or half-paw.
Half-tree connection options
Half-tree and half-leg connection
They differ in the thickness of the wood cut for corner joints. Half a tree - exactly half the thickness of the beam is cut, half a tree - the beam is cut at an angle to each other. The connection is reinforced from above with a metal bracket or plate. Then the corner of the trim is secured to the foundation with a metal anchor. After installation is completed, the timber is treated with an antiseptic.
Walls
Frame construction process
After installing the floor, you can begin building the walls. It is best to make them in sections. They are assembled on a dry surface from timber, equal in length to the height of the future room. You choose the width of the beam installation step yourself, usually it is 300, 400, 600 mm.
Note!
All wooden parts of a frame house must be from the same type of wood.
Instructions for the subfloor
To build a frame house, the instructions will describe in detail the entire construction process. First of all, the floor of a frame house with your own hands consists of a rough layer and a finishing coating. The subfloor is made of concrete or wood. Finish coating made of wood, laminate, linoleum and other finishing materials.
Concrete subfloor
The concrete floor is poured on top of the ground. It represents a multilayer structure, which contains a layer of waterproofing, thermal insulation, and reinforcing mesh.
Concrete subfloor - concrete screed
The bottom layer is 10 mm sand. On top - thermal insulation made of expanded clay, sawdust with clay - the so-called adobe, penoplex. Next is concrete with a waterproofing additive.
Wooden subfloor
If wood is used to construct a subfloor, then empty space will form underneath it.
Subfloor between joists
Wooden logs are laid on top of the bottom frame and are used as a base, to which subfloor boards are nailed from below. Insulation is laid on the subfloor boards. Then the flooring is spread on the logs: laminate, linoleum, OSB, parquet.
Roofing material
The step-by-step instructions end at the stage of installing the roof cladding. You can choose soft tiles, corrugated sheets or metal tiles. All of these materials are easy to work with, affordable, and look decent. After the facing work, all that remains is to install drainpipes and a drainage system, which will be responsible for draining precipitation outside the site.
Now you can imagine the whole process of building a frame house with your own hands, so that the structure is durable and warm. If you do not ignore the rules of construction and assembly technology, you will become the happy owner of your own home, which you can only dream of.
Installation of a frame house
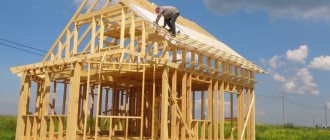
How to build a frame house with your own hands? The step-by-step construction scheme begins with the construction of the frame - one of the most critical construction operations. It is important to choose the right beams and boards (size and cross-section) and connect them correctly. What features arise when the installation of a frame house begins: racks, beams, jibs and crossbars? You can easily start building a frame house with your own hands; the video will show you step by step all the main points of assembling the house.
- The locations of the posts and joints of wooden elements are measured with a tape measure and marked with a pencil.
- Carefully check the verticality of the posts, the horizon of the top trim and the angle of connection. The angles between the posts and beams should be 90°.
- For connecting frame elements, the most reliable options are used - metal staples and nails.
- The installation of a frame house is carried out from elements assembled in advance on the ground - wall templates, trusses. They are lifted, installed, temporarily supported by oblique beams and then secured with connecting elements.
Installation of walls in a frame house
Step-by-step construction of a frame house, the technology for assembling the wall frame is as follows:
- Lay the bottom trim.
- The frame of each wall (lower, upper and vertical elements) is assembled separately - the so-called wall template. Afterwards, the assembled template is lifted in its entirety and installed on the lower frame.
- A second top frame is laid on top of the wall templates, on which the rafters for the roof are then placed.
On a note
Three people will be needed to lift the 6 m long wall template. It’s quite possible for the three of us to raise such a template. Longer walls are assembled from several templates and their joints are connected with special threaded connections.
Assembling a frame house, photos and videos demonstrate the progress of construction operations - assembling the template and installing it in the location of the future wall.
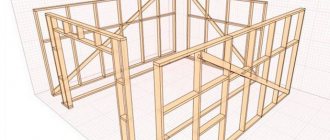
Ukosiny
In some frame house installation schemes, not only vertical and horizontal frame elements are used, but also inclined ones - the so-called jibs. They enhance the strength of the frame structure. They are made from boards 150-50 mm or 100-50 mm.
Correct location of the jib
Rigel
A crossbar is a horizontal board that is attached next to the top trim board. The crossbar is attached to the template during assembly on the ground. For crossbars, wooden boards with a thickness of 50 mm or more are used.
Crossbar across the entire wall of a frame house
The horizontal support between the inclined roof trusses is also called a crossbar. In general, a crossbar is any beam that works in compression.
Angles
The corners of the frame carry the maximum load. Therefore, they are assembled from two or three support boards.
Options for fastening frame wall corners
Internal walls
The frame of the internal walls is assembled from wall templates in the same way as the external walls. The internal walls do not carry a large load, and therefore can be made of boards of a smaller cross-section.
The main requirement for internal walls is sound insulation. Therefore, their thickness should ensure the installation of soundproofing material during the subsequent arrangement of walls and their insulation.
Windows and doors
After assembling the frame, windows and doors are installed in the openings provided for in the diagram. It is easier to order this work from the manufacturer - a ready-made PVC window along with installation in the window opening. As for doorways, their frame can be successfully assembled independently from wooden boards 25-30 mm thick.
Constructing a ceiling
The ceiling is attached to the floor beams, which in turn are fixed with nails or steel brackets on the top frame beam. Where interior partitions are installed, you need to install support beams, in the place of which a wooden ceiling panel is nailed.
Attic floor insulation scheme
A vapor barrier film should be laid on top of the shield, and mineral wool or foam plastic should be laid flush with it. The insulation is covered with a windproof membrane on top, and boards are laid on top of it. Read more about insulating attic floors.
Instructions for proper insulation
The frame house is being built step by step, and now it is necessary to start insulating the house. High-quality insulation ensures the ability to maintain a comfortable temperature in winter from the cold, and also determines your future costs for paying for winter heating. Therefore, based on this, it is better to overdo it and insulate a frame house well with your own hands than to save money and insufficiently insulate the walls of the building.
Mineral wool in the form of pressed mats is the best option for insulating frame structures. It allows air to pass through, provides air exchange, limits heat loss due to the fact that it does not conduct heat from the house to the street, does not cake and does not lose its properties and characteristics over time. During installation, it shrinks a little and then expands, which ensures the absence of installation seams and cracks through which heat loss also usually occurs.
Wall insulation with mineral wool
Foam plastic – rigid slabs of polyurethane foam. They have one advantage over mineral wool mats - they are cheaper in price. In all other respects they are inferior to cotton insulation. They do not shrink during installation and leave small gaps that need to be filled with foam. They do not allow air to pass through and do not provide air exchange. They require the construction of exhaust ventilation when permanently residing in a residential building, due to the content of harmful substances, and attention must be paid to this.
Since thermal insulation with mineral wool mats has obvious advantages, we will turn to this technology.
Mineral wool is a moisture-absorbing material. Therefore, when installed inside the wall, it is covered from the outside with a special film. This film must be made of a membrane that will not stop air exchange. That is, the membrane structure should allow wet steam to pass through only on one side, i.e. do not allow moisture to pass through from the atmospheric air and release from the inside.
On a note
Using polyethylene instead of a membrane negates the efforts to build a “breathable” wall at home. With the same success, you can, for example, insulate the wall with airtight foam.
External finishing material can also block the removal of moisture. Therefore, an air gap is provided between the membrane and the outer slabs - a void or air layer 50 mm thick. The moist air that has accumulated in the frame wall will come out through it. To construct such a gap, a wooden sheathing is used - wooden planks 50x50 mm wide. They are attached along the supports on top of the insulation. Afterwards, the outer wall panels are attached to the sheathing.
Popular questions and answers
How to reduce the cost of building a frame house?
First of all, you should clearly determine the optimal area of the building, its number of storeys, the presence of an underground garage, attic, etc. You can also purchase building materials in winter, when they are cheaper. According to Timofey Tesin, director of construction development, the main thing that can help against cost overruns during the construction process is a competent project, calculation of materials that should be used for construction, and clear control over the implementation of this project.
At the stage of entering the construction site, you should not skimp on the quality of materials, as well as on the technology of constructing a frame house. An architect or technologist can advise you at the project stage on how to competently construct a building or how to objectively avoid inflating the estimate. Alexander Korshunov, development manager for the DIY segment at ROCKWOOL Russia, notes that wooden frame structures are initially the most economical in terms of material consumption and labor intensity - they require 1.5-2 times less wood than logs and paving stones. Unlike log walls, frame walls are not subject to shrinkage and can be finished immediately after installation. In addition, proper insulation will not only ensure comfort in the house, protect it from mold and mildew, but also save money during operation. How much the homeowner will pay for heating depends on how well the structures are thermally insulated.
What is better to entrust to specialists?
Even when a frame house is erected with your own hands, you cannot do without the help of specialists.
Construction requires diverse knowledge and skills. Some may find it difficult to lay a foundation, install plumbing, or install electricity on their own. But there are other jobs that are best left to specialists. It is often recommended to involve professionals at the stage of design and calculation of a house, since only a specialist can tell whether you have saved on something vital for the property. Particular attention is paid to the thermal insulation of frame structures. It is important to understand all the nuances of choosing materials, since wooden houses have a reduced weight and an increased fire hazard. Therefore, it is necessary to use a lightweight, fire-resistant material with optimal thermal and mechanical characteristics.
Are there standards for the construction of a frame house?
Alexander Korshunov provides the following standards for the construction of frame houses based on SP 31-105-2002 “Design and construction of energy-efficient single-apartment residential buildings with a wooden frame” and SP 64.13330.2011 “Wooden structures”.
The existing standards aim, first of all, to protect the residents themselves. To do this, the following requirements must be observed: - The frame of the house should be made of edged boards and timber of coniferous species, subjected to high-quality drying and treated with antiseptics; — When covering frame houses, it is recommended to use OSB boards or plywood; — It is better not to use materials containing asbestos, which has carcinogenic properties; — The roof must be covered with light roofing materials (metal tiles, corrugated sheets, bitumen, ondulin); — For thermal insulation, fire-resistant materials should be used: mineral wool, fiberglass.
Roof
Finally, the construction of the house ends with the construction of the roof. Metal tiles are ideal for wooden houses; they are easy to install and have a beautiful appearance. Soft bitumen tiles are also suitable, which are also not too difficult to use and have an original and unusual appearance. Roof construction should begin with design. Here everything will depend on what shapes and sizes the structure has. Most often, gable roofs are chosen for self-production, which are relatively easy to implement on your own and are suitable for any type of building. For gable roofs, the attic space can always be converted into an attic.
The roof of a house made of boards has the following elements:
- Mauerlat.
- Rafter system.
- Roofing covering.
- Lathing and counter-lattice, thermal insulation and thermal insulation layer.
- Cross beams.
- In the interior, laying a vapor barrier layer and OSB.
First, the rafter system is installed, and then work begins on attaching the crossbars and laying the thermal insulation and waterproofing layer. The roofing material is laid last, and the installation technology will largely depend on what type of coating you choose for the job.
Building a house from planks is not the most difficult process if you strictly follow the technology. This building is a frame-type structure, and first of all, walls and partitions are built, then the floor is arranged, the internal walls are sheathed and the roof is made. As a foundation, you should use a lightweight strip, which is perfect for any type of frame house.
- Previous: How to dig a pit for the basement: Instructions + Video
- Next: Rose from foamiran: Step-by-step master classes and diagrams
Frame assembly
While the slab was standing, I took care of the fence, and at the same time poured crushed stone over geotextile on the entrance area in the entrance (entrance) area from the gate and gate to the house. The fence had to be abandoned at the stage of assembling the formwork in order to complete the warm contour before winter; the first two walls were assembled and raised in almost one day, another day was spent on assembling and lifting the third.
Assembly was complicated by the disgusting quality of the lumber - due to the curvature of the boards, the corners had to be tightened with bolts, the nails could not cope. The quick-release and screw clamps purchased ahead of time were very useful.
Not everything went as in Larry Hohn's films; if it was level at the bottom, a lot of effort had to be made to level the top, but things worked out, the box grew. I finally leveled the walls with the help of a winch and a tow rope, cut corner jibs into the corners, the region is windy, it’s not superfluous to insure OSB for your own peace of mind. At the same time, I made an insulated blind area.
There were no difficulties with the overlap - joists with a pitch of 488 mm, bridges (lintels) every 1220 mm, for laying OSB 1220x2440 mm, plus I added a lintel on the walls between the joists. Even without slab cladding, there is no trampoline effect with a span of 3.7 m.
But how to tighten the OSB to the top in one, I had to rack my brains, but even then everything worked out.
adenartFORUMHOUSE Member
I threw 4 50x150 mm 6-meter boards from the ceiling to the ground, near the stack of OSB, fastened them with an inch at the bottom in two places and made a support so that they would not sag. I nailed another board on top, about a meter from the ground, to support the sheet. He pulled the sheet from the stack onto the boards, pushed it a little and rested it on this board, then hooked two clamps on top of the sheet and a cable to them, and pulled it up from the ceiling by the cable. The most difficult thing was to drag the first sheet, or rather, it was more scary, because I had to drag it and step back along the joists, then it was calmer on the OSB.
I couldn’t find any rough nails on sale, so I fastened the sheathing with self-tapping screws (5 and 56 mm), with sizing using “liquid nails” from the middle price category. I twisted the screws “like in a book”, along the edge of the sheet along the edges of the walls after 10 cm, along the edges of the sheet inside the house after 15 cm, inside the sheets after 30 cm.
I covered the first floor with OSB sheets, horizontally, with staggered seams, assembled and raised the outer walls of the attic, gables and internal supporting walls. Raising a ridge made of double boards 50x20 mm, 8.4 m long with a gable height of 4.3 m alone is another puzzle. The decision is risky, but the winners are not judged.
adenartFORUMHOUSE Member
And I lifted the skate, although I didn’t make the scaffolding - I lifted it with a winch as I originally wanted, in one piece. To be honest, it was scary when a 100 kg fool was hanging on a rope above you. And then I had to climb onto a wall 100 mm wide and, standing on it, having no other supports, lift the ridge with my hands and push it into the opening on the pediment. Somehow I was able to lift one side and put it in place, and lifted the other side with a winch, but then I couldn’t do much with my hands, but then the neighbor with whom we raised all the walls looked in, and together we finally defeated him !
The quality of the lumber had an effect here too, even the boards that seemed even were bent, and the ridge tilted a little to the side, but further loading should correct it. I installed supports, the spans along the edges are 2 m, the central one is 3.5 m, there is no deflection.
Before assembling the rafter system, I worked out all the controversial areas (strengthening the ridge, fastening the rafters, friezes, etc.) in a graphic editor, and after the approval of the collective mind, I assembled all the elements.
I laid the membrane, filled the sheathing, laid the metal tiles in the color “moss green”.
I covered the attic with OSB, installed energy-saving windows, as usual, having first carefully studied the theory and consulted with forum members. During installation, I was guided not only by other people’s experience and advice, but also by the current GOST for the installation seam.
I installed a metal front door, I wanted a Finnish one, but the budget didn’t stretch it, so I had to make do with a more affordable option in the first place.
Interior decoration
The insulation was laid flat, without trimming, although in a compressed state the thermal conductivity increases, but I didn’t waste time on trimming, the difference in the coefficients “per circle” is not so critical. The attic floor was insulated with 200 mm stone wool slabs, plus another 50 mm of glass wool underneath from the ceiling of the first floor, for sound insulation. I considered the vapor barrier purchased for the whole house to be a bit sticky and laid it in two layers in the attic, and on the first floor I used 200 micron film.
Next, I installed the electrical panel, carried out ventilation and closed the box with a membrane.
I taped the windows and made counter-insulation on the first floor.
The rough cladding of the walls is standard for frame frames - gypsum plasterboard, first I did the first floor.
I decided to make the staircase “solid”, a wooden frame with a niche, covered with plasterboard, and in the niche there was a couch and a house for a cat. The wooden base platform, stringers 60x300 mm, even in the rough version, the design really helped when I had to haul 90 sheets of gypsum board up.
At the same time, I connected a treatment station so that water could be used.
Before laying the tiles, I coated the base around the wet areas (bathroom, sink) with waterproofing mastic, and treated the remaining surfaces with a regular primer.
At this stage, construction costs amounted to about 1.25 million, which included all expenses:
- USHP – 260 thousand rubles.
- VOC – 70 thousand rubles.
- Well – 100 thousand rubles.
- Tools – 70 thousand rubles.
Condition of the house: closed circuit, ready for finishing of the first floor with floors (tiles, linoleum), interior doors, plumbing, simple kitchen and boiler room (electric boiler, boiler, etc.). The second floor is only covered with plasterboard. Both finances and time ran out, and the family decided to move. What remains to be purchased and completed:
- Putty, fiberglass and paint - on both floors.
- Floor coverings are on the second floor.
- Doors to the second floor.
- Facade.
- Fence.
Construction started in the early summer of 2015, almost single-handedly adenart built a one-and-a-half-story house, hired an engineer, practically finished the first floor, and moved in with his family in early March 2016.
Overlap
The beams are secured to the top frame in three ways:
- On steel support brackets;
- On steel corners;
- With insert.
The installation step of the beam structure and the size of the elements directly depend on what is planned to be done on top. If you plan to equip an attic floor, then in order to prevent the floor from sagging, the maximum cross-section of the beams is taken, and the step between them is reduced to 40 cm. If there is just an attic and roof on top, then the step can be increased to 60 cm, and the beams are arranged with a section 100x100.
If you plan to build a second floor, then take 150x150 beams and install a subfloor on them - this will make it easier to work with the walls of the second floor. The assembly of the structure itself is carried out similarly to that used during the construction of the first floor, but with the difference that the wall frame structure will have to be dragged to the second floor.
Indoor partitions
Installing partitions is almost identical to installing an external wall. However, it is subject to gentle requirements for thickness and insulation material:
- Indoor partitions are made thinner than external walls.
- The insulation in the middle of the partition acts as a sound-absorbing material, not thermal insulation.
- It is possible to fill room partitions with insulation without the use of vapor barrier and waterproofing materials.
Above are the main differences between the outer wall and the one inside the room. In other cases it is installed the same way.
Facade, finishing touches, fence
Work continued with cladding the façade with imitation timber, which the craftsman still preferred to “all kinds of siding.” As fasteners I used galvanized nails 2.5×5 mm, in a tenon at an angle of 45˚. Before installation, the boards were treated with colorless fire-bioprotectant, and on the façade they will already be coated with a tinted antiseptic – red-brown “Teak”.
At the same time, interior finishing was carried out.
adenartFORUMHOUSE Member
On the advice of a friend, I do this:
- I putty the joints/screws with starting putty;
- I go through a primer with the addition of glue;
- I glue fiberglass;
- I putty the entire surface with finishing putty;
- Cleaning up;
- I paint it with white interior paint in 2-3 layers.
Living room on the first floor.
Entrance hall and corridor.
As the heating season has shown, it is still impossible to do without radiators on the second floor, since the temperature difference is noticeable. But the stove, as intended, turned out to be an excellent heat accumulator and maintains heat after the heating system is turned off, although the boiler is set to 40˚C and is turned on only at night.
A staircase with automatic illumination of the steps; I made the controller myself, since a ready-made one is twice as expensive. The backlight is dynamic - the room darkens, the first and last steps light up at a third of the brightness. When someone goes up or down, the remaining steps gradually light up along the way and go out behind them.
Children's rooms are on the second floor.
Using leftover drywall, adenart made an imitation of old brickwork in the office; everyone liked it, especially considering the “zero cost.”
The office table is also homemade - edged board 50x150 mm, but in fact, 45x140-45, which after processing became even narrower and thinner. The frame was planed and sanded, the lid was only sanded, everything was varnished.
We also got around to the fence - a wooden picket fence on a metal frame. Initially, a chess game was planned, but the live appearance was not impressive.
As a result
Any construction is unthinkable without the creation of design documentation, which includes building drawings, plans, a list of parts, and an estimate. It is important to understand that you will always have to collect the mentioned documentation, with the exception of cases when construction is carried out on the territory of a garden or a summer cottage. Otherwise, a building permit will not be issued, and the house will be considered an illegal building. As a result, the authorities may demolish it.
Also, pay attention to the amazing chalet-style house designs.
It is best to entrust the development of drawings either to specialized engineering firms or to private traders, if they have the necessary qualifications. The first option is preferable, since the company provides guarantees for the work, and in most cases offers additional services for project approval.
If the construction takes place at the dacha, then you can draw up the drawings yourself. To do this, it is better to use special PC programs that simplify the work and do not require the skills of a professional engineer. The main thing is accuracy and attentiveness.
Start of work: calculations, preparation of drawings
Drawings of frame houses
Before designing a structure, you need to step by step decide on the following points:
Step 1. Purpose of the house - for example, for a non-residential building, insulation may not be required, the walls will be thinner.
Sectional example of wall insulation
Step 2. Heating - its type (separate boiler room or powered from existing communications), heat consumption per living area (the more rooms, the more expensive it will be to warm them up), chimney installation.
House heating layout
Step 3. Number of residents - the number of floors and bedrooms depends on this.
Layout of a two-story house
Step 4. What materials will be used - wood products are often used, since they are available in all regions, but it is important to understand that long elements (over 6 meters) cannot be purchased. For example, beams for tying the foundation will have to be joined. This will require relevant experience.
An example of the use of wood materials
Step 5. Location of communications in the building - external or internal. In the first case, maintenance of pipelines and electrical wiring is easier, but the appearance of the premises is spoiled. In the second, if repairs are necessary, you will have to disassemble the casing.
Laying communications under the house
Step 6. Finding bathrooms, kitchens and other utility rooms - they try to group them close to each other - to facilitate pipe routing.
Consider also the air circulation in the room
Step 7. Planning is the most difficult stage for future owners. Comfort depends on the proper arrangement of the premises, and making changes after construction will be difficult. It is recommended to use 3D computer modeling - this will make it possible to clearly verify the correctness of decisions.
A clear example of 3D modeling
Step 8. Balconies and loggias - done if the building is (at least) two-story. Elements should also be provided for and calculated in advance.
Second floor balcony
After this, you should decide on the sizes. They depend on the size of the site and its quality. If the landscape has strong differences in height, this will have to be corrected in advance.
Example: 6x6 house with an attic. Standard designs and drawings
Second floor layout 6x6
A one-story 6x6 house is one of the best solutions for an average family of 2-3 people. Such projects are often chosen for construction in private gardens; houses are suitable for relaxing and sleeping on summer days. Almost any site owner can create drawings for one-story 6x6 houses.
First floor layout option 6x6
Main advantages:
- saving building materials;
- compactness;
- simplicity and high speed of construction.
One of the options (general plan):
First floor layout 6x6
- First floor – kitchen, bathroom and toilet.
- Second floor – bedrooms.
- The foundation is made of lightweight screw piles.
Floor layouts can be chosen depending on the purpose of the house. experienced builders create such houses even alone.
Video - DIY 6x6 frame house
Houses 6x4
6x4 projects are also compact, but are not suitable for a large family. Often used to build summer cottages, hunting lodges or for household needs.
The main feature is the fastest possible erection if a one-story house is chosen. The buildings also weigh little; on stable and stable soils they will require the simplest foundation.
Video - Drawings of a 6x4 frame bath
Projects 6x8
Frame house plan
In such buildings, 3-4 residents will be comfortable. There are projects of two-story and one-story houses. In the upper part there is an attic or attic; this is not considered the third floor.
Layout of a frame house
The choice of layouts is varied. On the ground floor you can provide a living room, a bathroom, a kitchen and a small utility room. On the second floor there are bedrooms and guest rooms. In the attic there is a workshop, a gym, or additional rooms.